Board index

My Home Page

PilotOdyssey.com By hoser...


PilotOdyssey.com Chat Room

PilotOdyssey.com Photo Album

* Login   * Register * FAQ
http://www.pilotodyssey.com/PO/adm/images/imagemenu/smiley_cool.png PilotOdyssey.com Chat    http://www.pilotodyssey.com/PO/adm/images/imagemenu/find.png PilotOdyssey.com Google Search    http://www.pilotodyssey.com/PO/adm/images/imagemenu/emoticon_tongue.png FL400 Parts    http://www.pilotodyssey.com/PO/adm/images/imagemenu/emoticon_grin.png FL350 Parts    http://www.pilotodyssey.com/PO/adm/images/imagemenu/emoticon_evilgrin.png FL250 Parts    http://www.pilotodyssey.com/PO/adm/images/imagemenu/emoticon_unhappy.png Admin Email   
It is currently Sat Apr 27, 2024 7:09 am

All times are UTC - 5 hours [ DST ]


Post new topic Reply to topic  [ 12 posts ] 
Author Message
PostPosted: Wed Oct 14, 2020 6:33 pm 
Offline

Joined: Fri Jan 12, 2007 2:17 pm
Posts: 3620
Location: Wichita ks
Due to the sporadic rpm readings (13,650) I thought I had better take a look. It takes me about 20 min to completely remove and take apart. I was expecting the 8000 rpm setting maybe a spike however not 13,650. So maybe the tires lifted and free spun, tach error,old drive not set up right or opps in driven assembly.

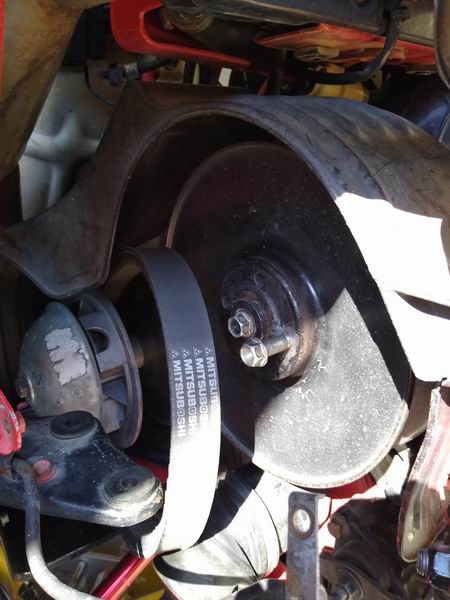
First item of business is to look at the belt. If bad look at drive and driven faces for signs of issue. If that looks good than look at the assembly of drive and driven and parts checking for broke spring, hung puck etc.

The belt was bad. showed signs of slippage, lose of grip, over heat and was coming apart.
The drive and driven both showed signs of slippage. The area of slippage was at engagement and run out. The shifting area (zone) was OK. Both springs were fine Drive assembly looked good. The driven not so good. the issue may be one I created when assembled or The old Seals and o-rings would not hold the grease as it moved in and out (shaft wiper) The driven shows signs of grease being flung outward on the outside of the movable face and on the inside of the sheave faces. and of course I may have packed to much in. I lube them than run them up and down and then wipe off excess before installing the collar seal. Then wipe down after installing the collar seal and running it up and down then clean again. I also clean between the sheaves after running it up and down before installing the spring.
With the amount of fling on the outside and the sand packing in the middle of the sheave is which also ad some fling on it. I would say the seals did poor or I just did not clean good. I reworked it again and double checked my cleaning as I went this time be sure to rule it out. I also ordered new o-rings and found some seals which are on order to get ere next week. Since I will be reworking it again next week I went light on the grease so I can run this weekend. I did order enough to do three drivens. This one, spare one, future one (wife's). Now I can test the set up again.

I arrowed up some of the pics to show the slippage zones


Attachments:
Unhook battery.jpg
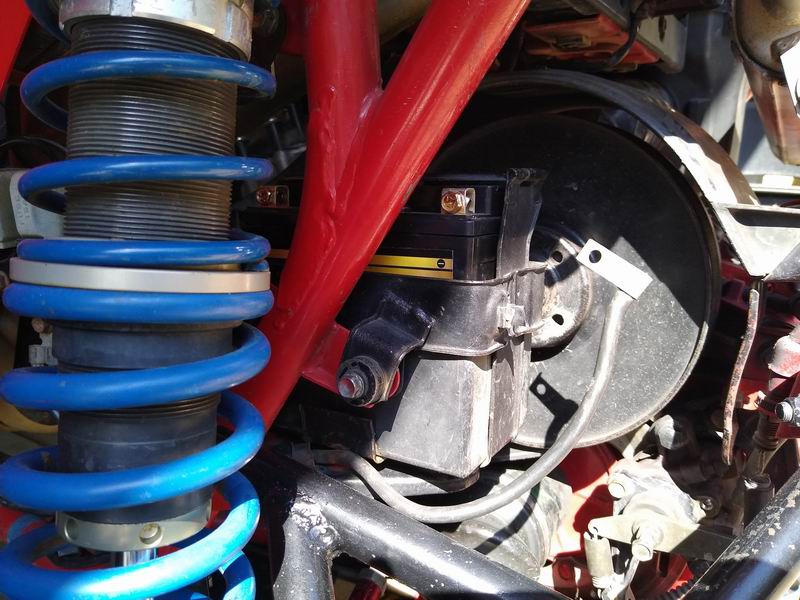
Unhook battery.jpg [ 98.24 KiB | Viewed 1372 times ]
Remove battey.jpg
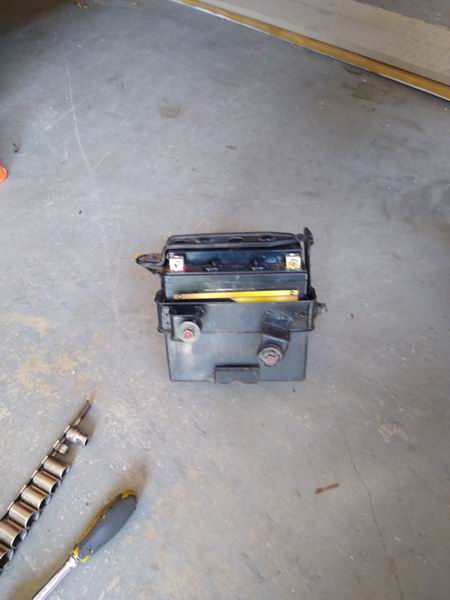
Remove battey.jpg [ 36.61 KiB | Viewed 1372 times ]
Belt romoval bolt.jpg
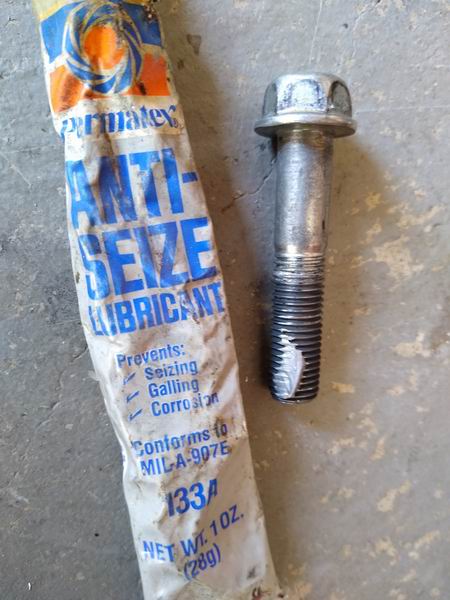
Belt romoval bolt.jpg [ 55.14 KiB | Viewed 1372 times ]
belt bolt in driven.jpg
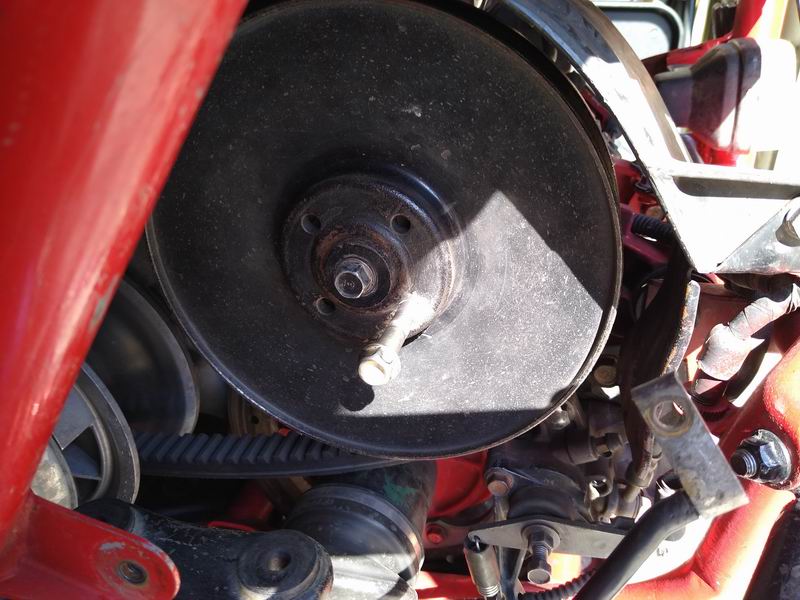
belt bolt in driven.jpg [ 88.8 KiB | Viewed 1372 times ]
Remove belt.jpg
Remove belt.jpg [ 52.45 KiB | Viewed 1372 times ]
Top
 Profile  
 
PostPosted: Wed Oct 14, 2020 6:36 pm 
Offline

Joined: Fri Jan 12, 2007 2:17 pm
Posts: 3620
Location: Wichita ks
more pics


Attachments:
Remove Driven.jpg
Remove Driven.jpg [ 86.64 KiB | Viewed 1371 times ]
Removed Driven and Belt.jpg
Removed Driven and Belt.jpg [ 68.71 KiB | Viewed 1371 times ]
Damage to belt.jpg
Damage to belt.jpg [ 71.58 KiB | Viewed 1371 times ]
Damaged Belt.jpg
Damaged Belt.jpg [ 72.21 KiB | Viewed 1371 times ]
Remove bolt for Drive Acess.jpg
Remove bolt for Drive Acess.jpg [ 71.73 KiB | Viewed 1371 times ]
Top
 Profile  
 
PostPosted: Wed Oct 14, 2020 6:40 pm 
Offline

Joined: Fri Jan 12, 2007 2:17 pm
Posts: 3620
Location: Wichita ks
As you look at the first set of pics you see bad belt. The driven fling on driven face does not really show up in the pics at first glance.


Attachments:
Tool set up for Drive Removal.jpg
Tool set up for Drive Removal.jpg [ 87.54 KiB | Viewed 1371 times ]
Drive bolt loose.jpg
Drive bolt loose.jpg [ 46.22 KiB | Viewed 1371 times ]
Drive Removal bolt.jpg
Drive Removal bolt.jpg [ 53.33 KiB | Viewed 1371 times ]
Impact on bolt.jpg
Impact on bolt.jpg [ 55.06 KiB | Viewed 1371 times ]
Drive removed from crank 1.jpg
Drive removed from crank 1.jpg [ 45.56 KiB | Viewed 1371 times ]
Top
 Profile  
 
PostPosted: Wed Oct 14, 2020 6:42 pm 
Offline

Joined: Fri Jan 12, 2007 2:17 pm
Posts: 3620
Location: Wichita ks
more pics


Attachments:
Drive removed from Crank 2.jpg
Drive removed from Crank 2.jpg [ 50.15 KiB | Viewed 1371 times ]
Drive removed from Crank 3.jpg
Drive removed from Crank 3.jpg [ 53.03 KiB | Viewed 1371 times ]
Remove Drive through frame.jpg
Remove Drive through frame.jpg [ 51.54 KiB | Viewed 1371 times ]
Items removed.jpg
Items removed.jpg [ 82.98 KiB | Viewed 1371 times ]
Top
 Profile  
 
PostPosted: Wed Oct 14, 2020 6:43 pm 
Offline

Joined: Fri Jan 12, 2007 2:17 pm
Posts: 3620
Location: Wichita ks
Now we can start looking at damage and cause


Attachments:
bad signs on drive.jpg
bad signs on drive.jpg [ 49.11 KiB | Viewed 1371 times ]
Bad signs on Driven.jpg
Bad signs on Driven.jpg [ 36.72 KiB | Viewed 1371 times ]
Take Driven Apart 1.jpg
Take Driven Apart 1.jpg [ 42.59 KiB | Viewed 1371 times ]
Take Driven Apart 2.jpg
Take Driven Apart 2.jpg [ 40.79 KiB | Viewed 1371 times ]
Take Driven Apart 3.jpg
Take Driven Apart 3.jpg [ 32.71 KiB | Viewed 1371 times ]
Top
 Profile  
 
PostPosted: Wed Oct 14, 2020 6:46 pm 
Offline

Joined: Fri Jan 12, 2007 2:17 pm
Posts: 3620
Location: Wichita ks
You can see the brown strips where the belt was slipping and see grease fling where the snap ring is on the cap.
If go look at the pics of driven clean up you will clean this clean before install.

In pic 1 you see the fling on the driven outer surface. You can also see the seal has wiped the shaft clean.
In pic 2 you ts arrowed up
In pic 3 you can see the slippage on the driven faces and some fig and the sand build up in the center.

So I say the inner seal is bad and the o-rings are bad. The inner seal allowed grease to squeeze out and fling on the faces causing the bet slippage and pack sand in the center. The o-rings allowed grease to fly out past the collar seal and fling on outer face.

When I get my new parts I think I will do an enhanced post on assembly


Attachments:
Take Driven Apart 4.jpg
Take Driven Apart 4.jpg [ 47.89 KiB | Viewed 1371 times ]
Take Driven Apart 5.jpg
Take Driven Apart 5.jpg [ 55.42 KiB | Viewed 1371 times ]
Take Driven Apart 6.jpg
Take Driven Apart 6.jpg [ 41.08 KiB | Viewed 1371 times ]
Top
 Profile  
 
PostPosted: Sat Oct 17, 2020 5:41 pm 
Offline

Joined: Fri Jan 12, 2007 2:17 pm
Posts: 3620
Location: Wichita ks
Went out today for some more fun. I did confirm the seal is bad on the driven. I have good consistence rpm data now for the HRD drive. The belt did well and only showed minor signs of slippage at top end. This can be fixed pretty easy with a new seal and a shim here and there. I cleaned it up and install a shim on the drive to start with. This sound get me were I want to be on RPM. Then I can shim the driven a little and be good to go. With a HRD you can not only add pre load you can take it a away. You can not do this with an ALT once you all shims are removed from spring plate with out some work. My red over rev light came on more than I like so I will take some pre load away from the drive. This should take care of that. This will load the driven more. As I am driving under hard acceleration if I can see go from blink to a quick solid its to much.

Got in another tank ride of 51 minutes. What a gas hog.


Attachments:
Start of day.jpg
Start of day.jpg [ 53.87 KiB | Viewed 1351 times ]
Run 1.jpg
Run 1.jpg [ 66.9 KiB | Viewed 1351 times ]
Run 2.jpg
Run 2.jpg [ 59.05 KiB | Viewed 1351 times ]
Run 3.jpg
Run 3.jpg [ 58.83 KiB | Viewed 1351 times ]
Run 4.jpg
Run 4.jpg [ 64.69 KiB | Viewed 1351 times ]
Top
 Profile  
 
PostPosted: Sat Oct 17, 2020 5:45 pm 
Offline

Joined: Fri Jan 12, 2007 2:17 pm
Posts: 3620
Location: Wichita ks
In case you were wondering I rest it before every run. I resets max temp, max speed and max rpm, it does retaine ART or accumulated run time (Engine hours).


Attachments:
END of Day.jpg
END of Day.jpg [ 49.82 KiB | Viewed 1351 times ]
Driven Insp.jpg
Driven Insp.jpg [ 60.64 KiB | Viewed 1351 times ]
Bad seal.jpg
Bad seal.jpg [ 70.07 KiB | Viewed 1351 times ]
cleaning pad.jpg
cleaning pad.jpg [ 34.97 KiB | Viewed 1351 times ]
Cleand up.jpg
Cleand up.jpg [ 25.93 KiB | Viewed 1351 times ]
Top
 Profile  
 
PostPosted: Sat Oct 17, 2020 5:47 pm 
Offline

Joined: Fri Jan 12, 2007 2:17 pm
Posts: 3620
Location: Wichita ks
Hopefully the seal will come this week before I run again.


Attachments:
Residue from faces before install.jpg
Residue from faces before install.jpg [ 34.38 KiB | Viewed 1351 times ]
Top
 Profile  
 
PostPosted: Wed Oct 21, 2020 12:24 pm 
Offline

Joined: Fri Jan 12, 2007 2:17 pm
Posts: 3620
Location: Wichita ks
Got the seals today. Still waiting on the rest of the parts to put this driven toghter and replace seals and o-rings on the other.


Attachments:
IMG_20201021_111607169.jpg
IMG_20201021_111607169.jpg [ 28.36 KiB | Viewed 1326 times ]
IMG_20201021_111637393.jpg
IMG_20201021_111637393.jpg [ 25.76 KiB | Viewed 1326 times ]
IMG_20201021_111737056.jpg
IMG_20201021_111737056.jpg [ 24.46 KiB | Viewed 1326 times ]
IMG_20201021_111750583.jpg
IMG_20201021_111750583.jpg [ 22.72 KiB | Viewed 1326 times ]
Top
 Profile  
 
PostPosted: Wed Oct 21, 2020 12:44 pm 
Offline

Joined: Fri Jul 04, 2014 7:33 am
Posts: 1070
If you still have the driven apart you can try shimming the spring 1/8" to give better hold and back-shift. That way you'll be able to run more weight in your primary clutch pucks which will put more pressure on the belt to not slip and wear like your photo while keeping a similar RPM.

BTW why the heck are you spinning 8400 RPM anyway? The power drop-off after 7500 does not yield well I'm afraid. Are you massively ported for top end? Have you dyno'ed to see if that's a good peak target?


Top
 Profile E-mail  
 
PostPosted: Thu Oct 22, 2020 6:26 pm 
Offline

Joined: Fri Jan 12, 2007 2:17 pm
Posts: 3620
Location: Wichita ks
Zero it is rev ported. Did it my self so who knows on power. The driven is at 6-1/4 inch's right now. The HRD has 14 washers in it.
I'll post up a port angle area,rpm for it. Posted in other post.
I did some ridding today since I will not be home Saturday.

The rpm numbers are what the ports can flow at a given angle area.


Attachments:
Porting.jpg
Porting.jpg [ 31.81 KiB | Viewed 1307 times ]
IMG_20201022_103118697.jpg
IMG_20201022_103118697.jpg [ 60.19 KiB | Viewed 1307 times ]
IMG_20201022_103512182.jpg
IMG_20201022_103512182.jpg [ 60.09 KiB | Viewed 1307 times ]
IMG_20201022_113247511.jpg
IMG_20201022_113247511.jpg [ 56.29 KiB | Viewed 1307 times ]
IMG_20201022_131656194.jpg
IMG_20201022_131656194.jpg [ 51.1 KiB | Viewed 1307 times ]
Top
 Profile  
 
Display posts from previous:  Sort by  
Post new topic Reply to topic  [ 12 posts ] 

All times are UTC - 5 hours [ DST ]


Who is online

Registered users: Bing [Bot], Google [Bot]


You cannot post new topics in this forum
You cannot reply to topics in this forum
You cannot edit your posts in this forum
You cannot delete your posts in this forum
You cannot post attachments in this forum

Jump to:  
cron
Powered by phpBB® Forum Software © phpBB Group