| PilotOdyssey.com http://www.pilotodyssey.com/PO/ |
|
| BL1TZ's Odyssey http://www.pilotodyssey.com/PO/viewtopic.php?f=5&t=15709 |
Page 3 of 5 |
| Author: | afastcar [ Tue Jun 23, 2015 11:26 pm ] |
| Post subject: | Re: BL1TZ's Odyssey |
I bought expanding test plugs for plumbing at a hardware store. |
|
| Author: | bl1tzkr13g [ Wed Jun 24, 2015 1:15 am ] |
| Post subject: | Re: BL1TZ's Odyssey |
the plumbing ones i found only come in 1.5 inch 2inch and 3inch the 2 inch only goes from 1 7/8 to 2" as per rands measurements "The intake opening measures in at 1.48". The plug I used is a 1 3/8" expandable freeze plug. The exhaust opening (DG pipe) measures in at 1.78". I used a 1 3/4" expandable freeze plug. " I think the freeze plugs are more to the size of the intake and exhaust i'll have to check the stock exhaust size Dorman AutoGrade Rubber Expansion Plug Part Number: 02605 Nominal Size: 1-3/4" Size Range: 1-3/4" - 1-7/8" Metric Range: 44mm - 47mm Dorman AutoGrade - Rubber Expansion Plug Part Number: 02602 Nominal Size: 1-3/8" Metric Size: 34mm Size Range: 1-3/8" - 1-1/2" Metric Range: 34mm - 38mm |
|
| Author: | bl1tzkr13g [ Wed Jun 24, 2015 10:34 pm ] |
| Post subject: | Re: BL1TZ's Odyssey |
I measured stock intake and exhaust and got 1.5 inches for both so gonna get the 1.5 expanding plug also took pics of the piston and cylinder wall from the exhaust will post em shortly |
|
| Author: | bl1tzkr13g [ Wed Jun 24, 2015 10:44 pm ] |
| Post subject: | Re: BL1TZ's Odyssey |
|
|
|
| Author: | bl1tzkr13g [ Thu Jun 25, 2015 3:50 am ] |
| Post subject: | Re: BL1TZ's Odyssey |
During my leak down test I was getting leaks at the intake around the seal pulled it off and found pieces of the old seal under the new seal... Some people don't pay attention to detail I guess. After fixing it I have leaks around the recoil/starter case.  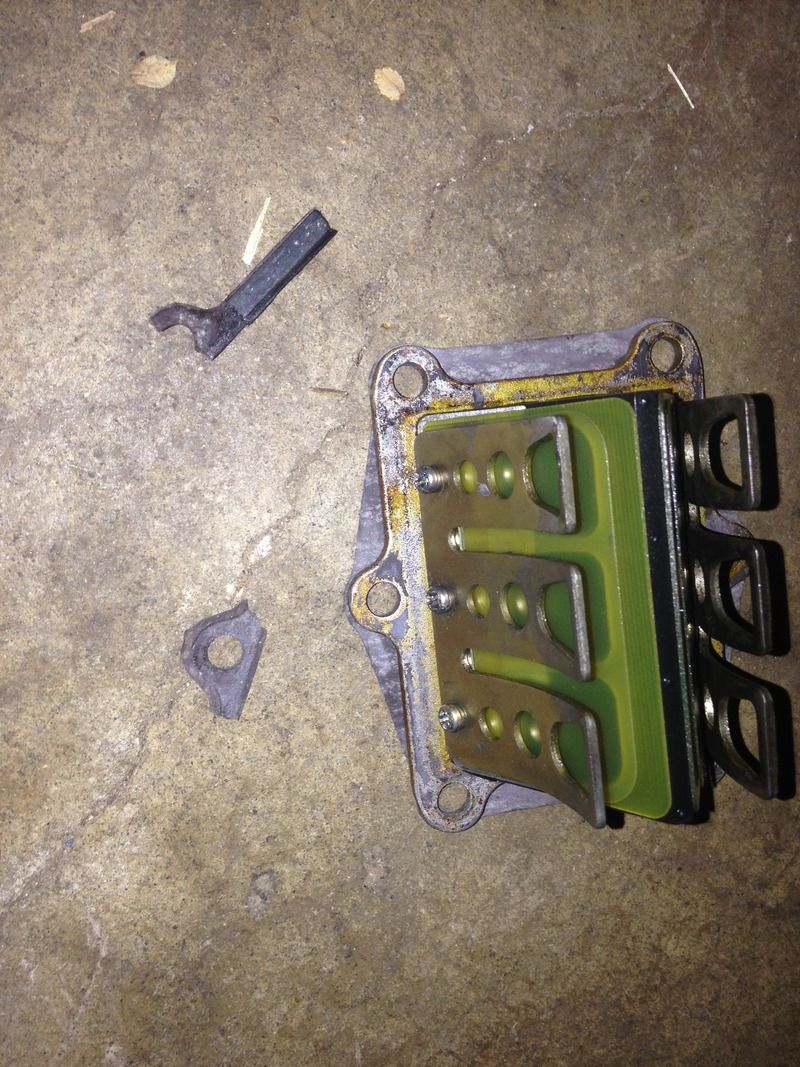
|
|
| Author: | hoser [ Thu Jun 25, 2015 5:29 pm ] |
| Post subject: | Re: BL1TZ's Odyssey |
If your seeing leaks around the recoil case it almost sounds like your mag side crank seal might be leaking but you will need to remove the recoil, flywheel, stator then pressure test to see, if you take it that far apart you might as well change that seal anyways unless you know the history of that seal and it turns out to not leak..... If you have not been here yet go check it out lots of details for your Engine viewforum.php?f=26 |
|
| Author: | bl1tzkr13g [ Thu Jun 25, 2015 7:00 pm ] |
| Post subject: | Re: BL1TZ's Odyssey |
Thanks hoser.l I pulled off the side and yes it is leaking from that seal as well as the clutch side seal. Took the oil dip stick out to see of air was coming out of there as well and it is. So I pulled the motor (( Internal Combustion Engine ? )) out.. Since I'm going to have to tear down both sides to get to the seals. Oddatv on ebay sells a set if seals for 35$ anyone use them with success? Says there "custom made" 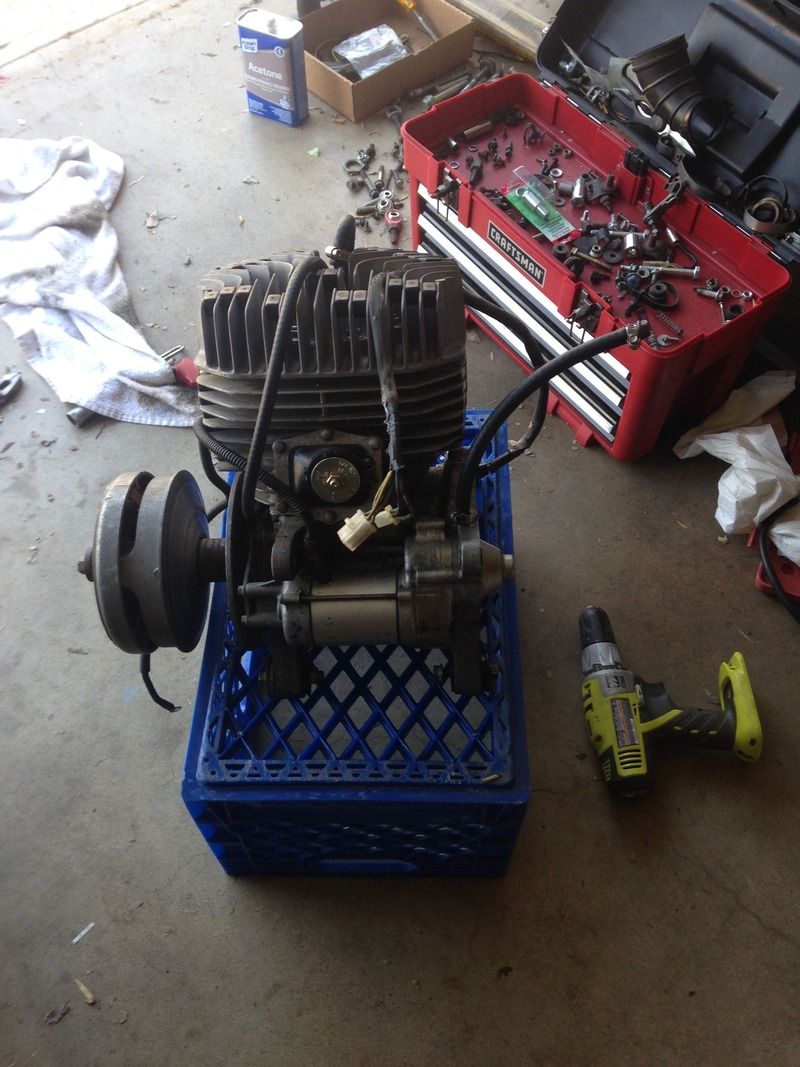
|
|
| Author: | DMoneyAllstar [ Thu Jun 25, 2015 8:01 pm ] |
| Post subject: | Re: BL1TZ's Odyssey |
bl1tzkr13g wrote: Thanks hoser.l I pulled off the side and yes it is leaking from that seal as well as the clutch side seal. Took the oil dip stick out to see of air was coming out of there as well and it is. So I pulled the motor (( Internal Combustion Engine ? )) (( Internal Combustion Engine ? )) out.. Since I'm going to have to tear down both sides to get to the seals. Oddatv on ebay sells a set if seals for 35$ anyone use them with success? Yep! They're the real deal. |
|
| Author: | bl1tzkr13g [ Thu Jun 25, 2015 10:26 pm ] |
| Post subject: | Re: BL1TZ's Odyssey |
good to know. is there anything else i should be doing or look at since i have the Engine out and stripped down? things i'm concerned about are it has a new top end so idk if holes were put in the piston and if the exhaust bridge was relieved. I don't think the bottom end was redone so condition of the crank bearings. don't believe any vent mod has been done for the balancer oil issue should probably take car of that now since its out...... |
|
| Author: | wyeeoddy [ Thu Jun 25, 2015 10:37 pm ] |
| Post subject: | Re: BL1TZ's Odyssey |
""""Don't forget""""" To block the end if the Pulse Tube. It caught me out the first time I did a pressure test. MAX 5 to 6 PSI and bring the pressure up slow |
|
| Author: | bl1tzkr13g [ Thu Jun 25, 2015 11:51 pm ] |
| Post subject: | Re: BL1TZ's Odyssey |
lol me too at first. was also coming out the vent tube on the other side so i had to block that one off aswell? |
|
| Author: | DMoneyAllstar [ Fri Jun 26, 2015 8:03 am ] |
| Post subject: | Re: BL1TZ's Odyssey |
Here's my thread on the rebuild of the bottom end: http://www.pilotodyssey.com/PO/viewtopic.php?f=26&t=13605 You'll need a couple special tools (bearing push/pull press, bearing remover, flywheel tool), but its nothing out-of-this-world. Bearings are easy, but one of the most vital things in the 2-stroke Engine. Nice thing about the FL350R Engine is that [1] the center cases use an actual gasket -- not just the basic Honda-bond sealant, and [2] the guts are about as basic as it gets with no transmission, shift forks, ball detents and such to worry about. You can get a good look at the crank bearings once you get the oil seals off. Look for pitting, corrosion, missing pieces, etc. Sometimes you can even hear grime and grumbling made by worn-out bearings. Check the crank for run-out (aka: "crank wobble"). If the prev owner thrashed a crank bearing and/or had a run-away death-rpm and/or some nasty detonation, they may have induced some run-out. You generally check it with a dial indicator and set of v-blocks (or good lathe chuck), but you can also see "bad" run-out with your naked eye. You can even just tape an unwound paper-clip firmly and rotate the crank to check if the gap between end of wire and the shaft changes. Also look for signs of past "events" such as scrapes, scratches and sometimes even prev builder's initials. Check the top-end job including the lube holes, exhaust bridge relief, and measure the wall clearance (gap between piston OD and bore ID) to make sure its not out of spec. Check ring gap to spec. Get an all-around look at the crank pin needle bearing. Look for pitting , corrosion, missing needles, etc. Get a good look at the rod's wrist pin loop with the wrist-pin out & piston removed. Look for hairline cracks, shaved material, surface imperfections, etc. Get a good look at case damage, cracks, repair-jobs, etc. Assembled the empty cases together, light the inside with a flashlight, and look for dings/waves on the center sealing surfaces. Get a good look for any signs of water-intrusion. Look for one half of the crank lobes to be corroded. And when you pop the recoil cover off, that stator and flywheel should look CLEAN. The best thing you'll get out of a total rebuild is piece of mind. Once you know everything is good inside all you need to do is ensure its sealed up (no air leaks), setup the carb right, break it all in properly, use good fuel & oil, and have fun. Once you get the Engine running great, the next you'll want to look at is BRAKES. Going fast is fun...until you need to stop, lol. |
|
| Author: | bl1tzkr13g [ Sun Jun 28, 2015 2:14 am ] |
| Post subject: | Re: BL1TZ's Odyssey |
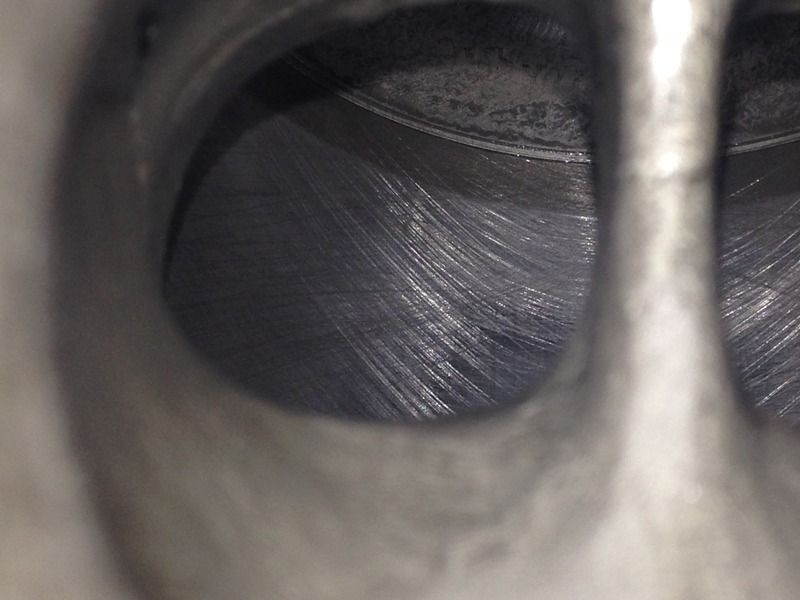
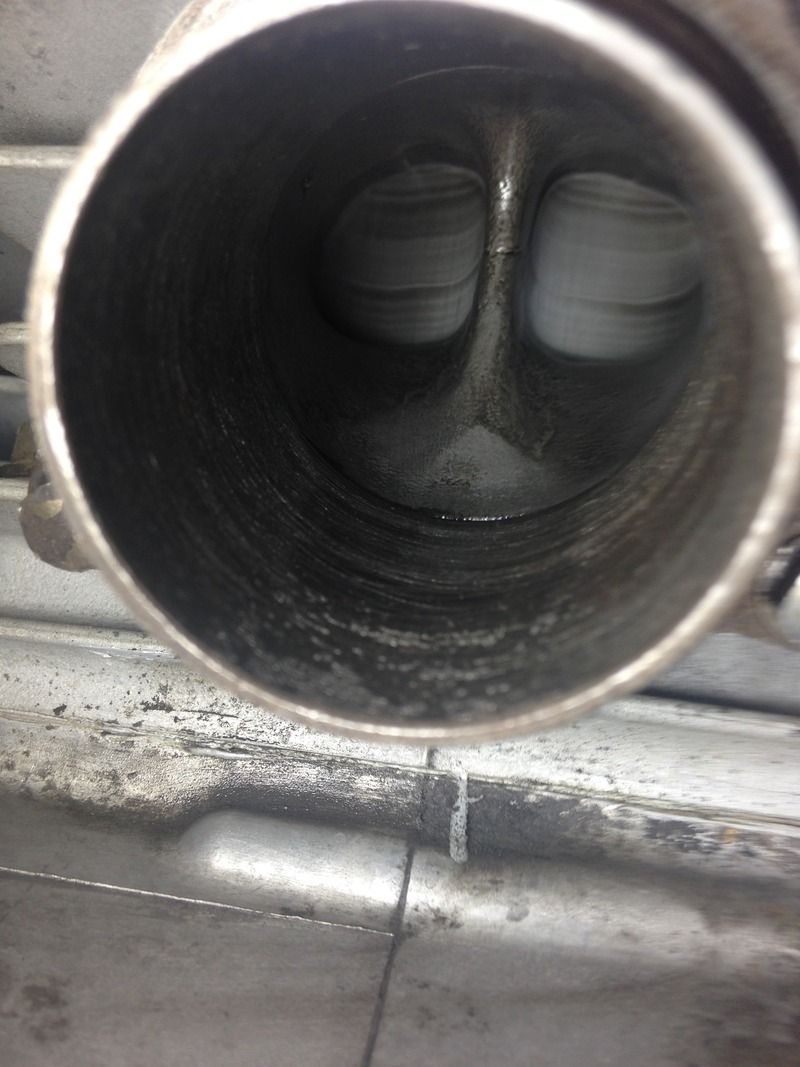
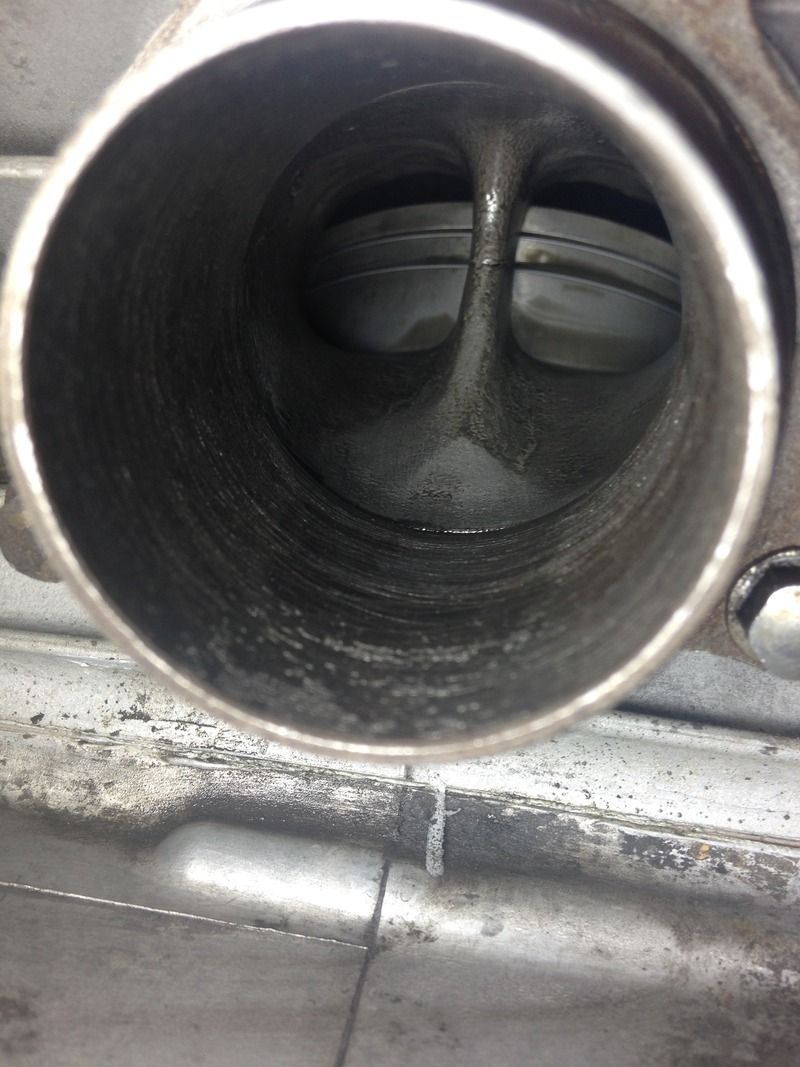
pulled the head off to check the piston and exhaust bridge 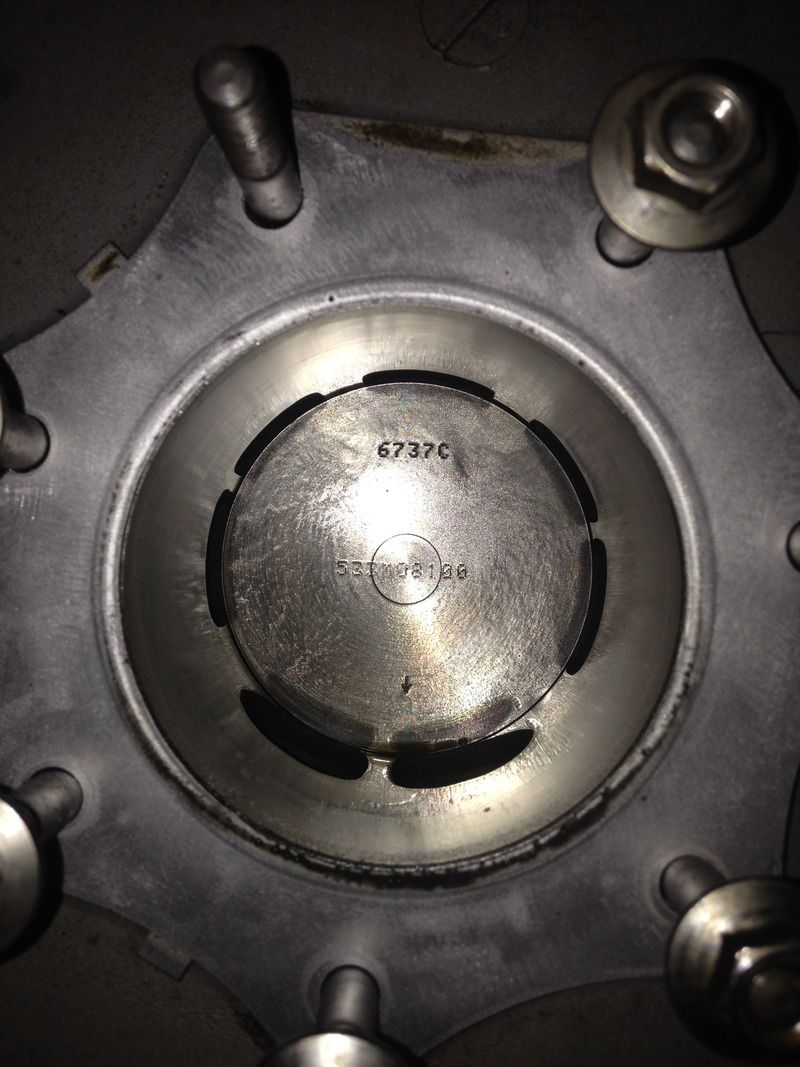 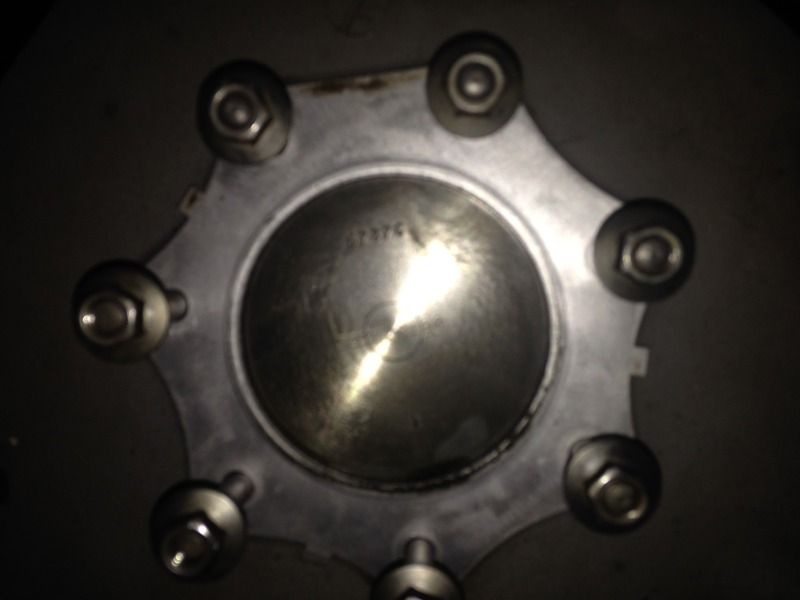 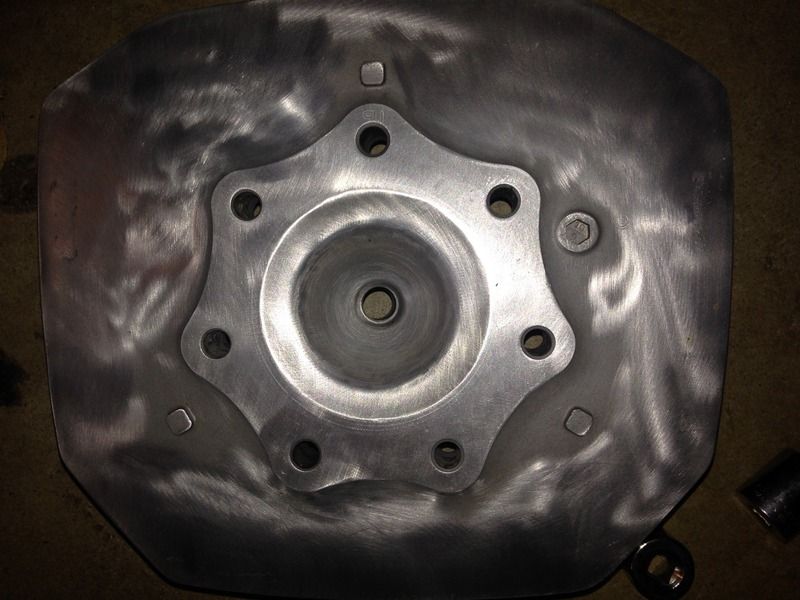
|
|
| Author: | Randman [ Sun Jun 28, 2015 1:03 pm ] |
| Post subject: | Re: BL1TZ's Odyssey |
Looks like your piston to cylinder wall might be excessive. What is your compression? Rand |
|
| Author: | bl1tzkr13g [ Sun Jun 28, 2015 7:47 pm ] |
| Post subject: | Re: BL1TZ's Odyssey |
120 psi throttle closed... i didn't open it when i did it. |
|
| Author: | Randman [ Sun Jun 28, 2015 7:53 pm ] |
| Post subject: | Re: BL1TZ's Odyssey |
If you crank it long enough, holding the throttle open doesn't make a difference. 120psi at sea level is the lowest recommended compression rate where you should consider rebuilding the top end. What is your elevation? Rand |
|
| Author: | bl1tzkr13g [ Sun Jun 28, 2015 9:07 pm ] |
| Post subject: | Re: BL1TZ's Odyssey |
860 feet above sea level |
|
| Author: | bl1tzkr13g [ Sun Jun 28, 2015 9:09 pm ] |
| Post subject: | Re: BL1TZ's Odyssey |
also the top end was rebuilt prior to purchase |
|
| Author: | Randman [ Sun Jun 28, 2015 11:47 pm ] |
| Post subject: | Re: BL1TZ's Odyssey |
There is the outside possibility that either the PO lied to you or whomever did the rebuild, did it improperly. Hell, when I bought my Ody the PO told me that it had only 10 hours on it. Unfortunately it was more like way over 100 hours! My compressions was about where yours is and it had a piston to cylinder clearance of .012" which is three times the wear limit. At 860 feet above sea level, you should only be shy about 3 to 5 psi from the standard compression of 136psi. Here's how you can tell if it's been recently rebuilt..... 1.) There should be heavy crosshatch marks from cylinder honing. Your cylinder wall looks like it is completely polished smooth with little evidence of crosshatch marks left. 2.) The piston to cylinder clearance on a fresh rebuild should be .004". If you look at your picture you posted, there appears to be a 10 to 15 thousandths (maybe more) clearance between the piston and cylinder wall. To truly check piston to cylinder clearance, you can use a micrometer and dial bore gauge to see the difference between the two. If you don't have the aforementioned equipment, you can use the simple method of using a feeler gauge the check the gap. If you can get a .010" feeler gauge in between the piston and cylinder wall, it's well past the wear limit and it's rebuild time. Note, this should be done at the bottom of the piston in the area of either the front or rear of the sylinder as this will be where the majority of your wear will occur. Rand |
|
| Author: | Randman [ Sun Jun 28, 2015 11:54 pm ] |
| Post subject: | Re: BL1TZ's Odyssey |
HMMMM!!! I just double clicked on your cylinder picture and found the photo bucket pictures you have of the cylinder wall through the exhaust port. Plenty of cross hatch visible in the bore which leaves me wondering if whomever did the rebuild, set the piston to cylinder clearance correctly. By the low amount of compression you have, this is my bet. You may want to do your compression test over again. Rand |
|
| Author: | bl1tzkr13g [ Mon Jul 20, 2015 2:36 am ] |
| Post subject: | Re: BL1TZ's Odyssey |
some pics haven't worked on the ody in a while due to a loss in the family. I got my new seals from oddatv and a universal flywheel holder... doesnt work as i thought it should. also used my stator puller i got from oddatv after fighting with the damn nut that was holding it on. what can i use to clean the stator off? 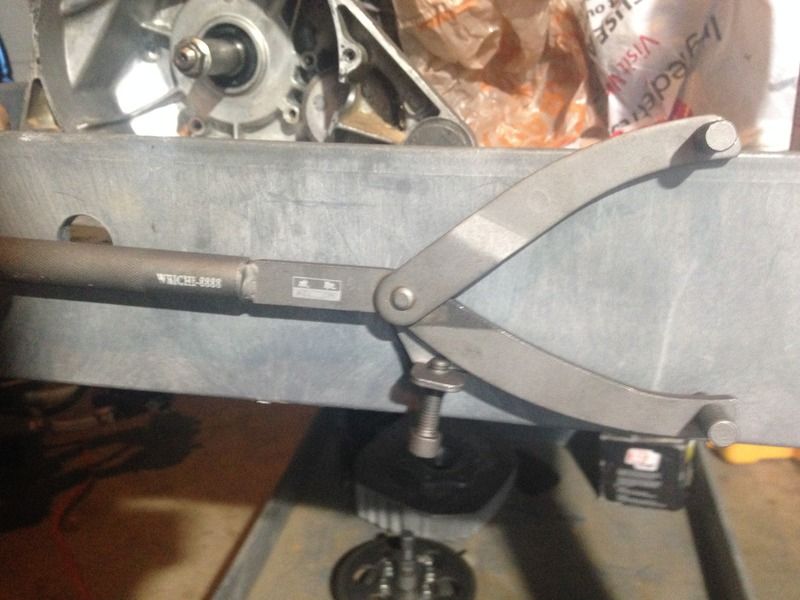 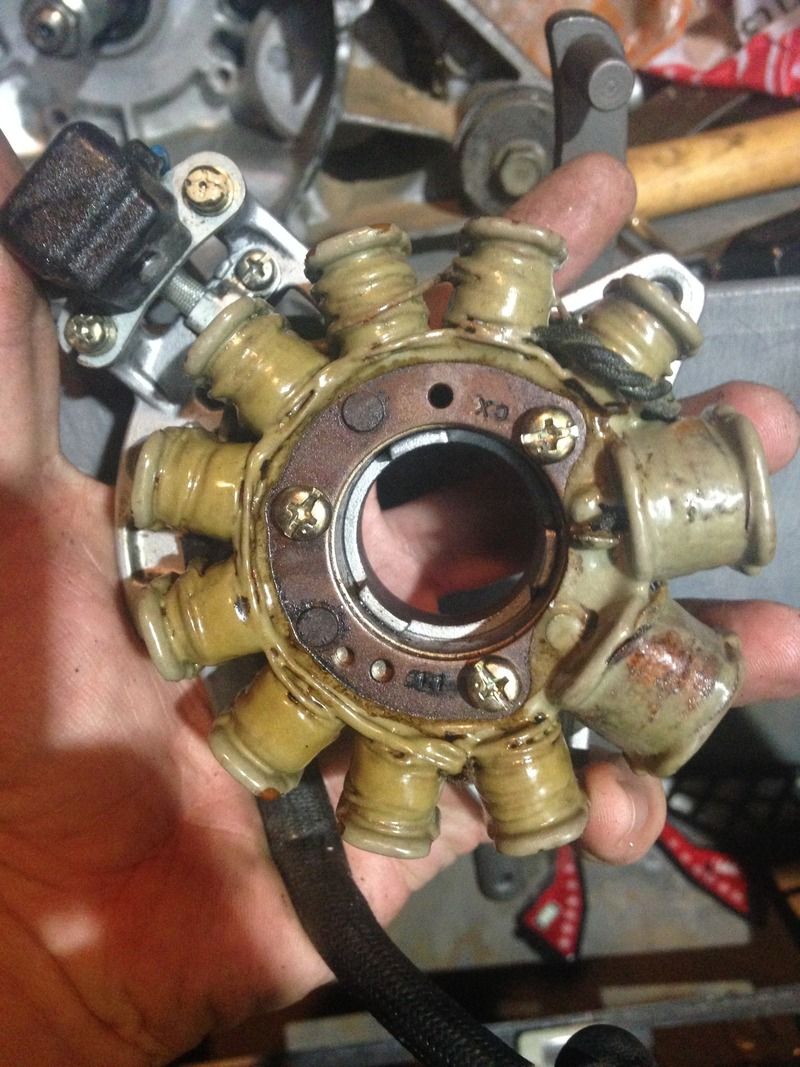 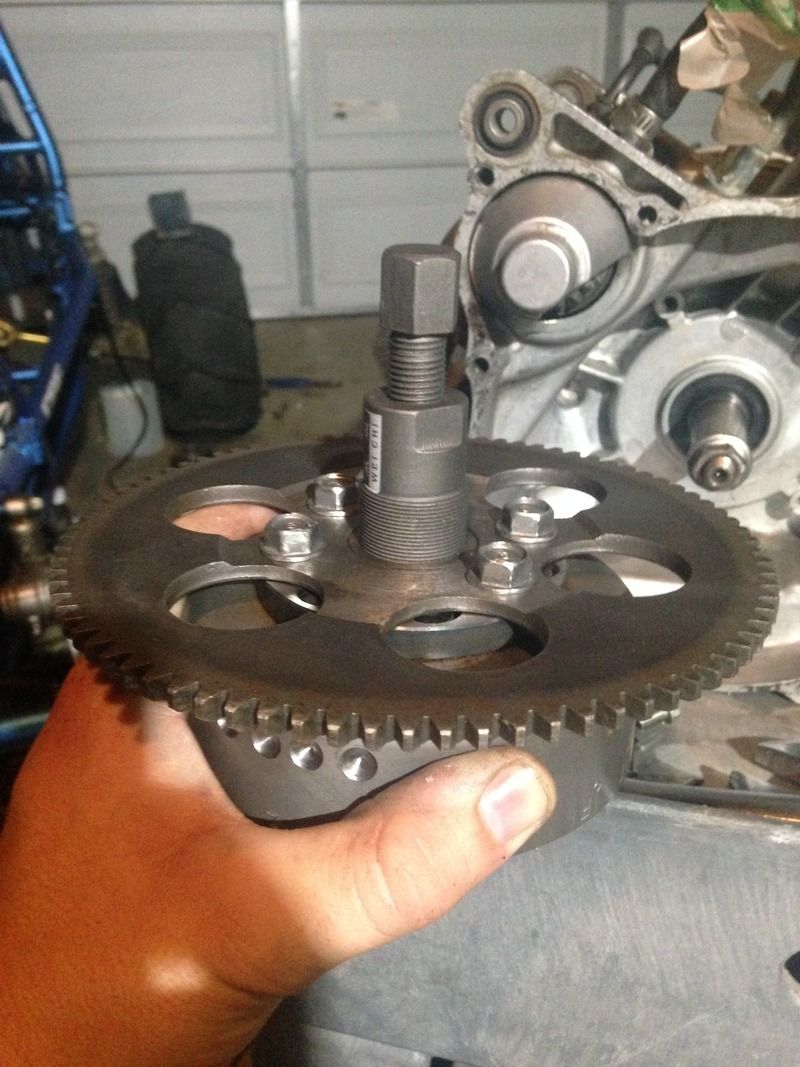 
|
|
| Author: | Randman [ Mon Jul 20, 2015 11:01 am ] |
| Post subject: | Re: BL1TZ's Odyssey |
Sorry to hear of you loss. You can clean the stator with an electrical contact cleaner. Do not use just a general solvent such as brake cleaner as it will eat the coating on the windings. Rand |
|
| Author: | bl1tzkr13g [ Mon Jul 20, 2015 7:04 pm ] |
| Post subject: | Re: BL1TZ's Odyssey |
Thanks Rand. The hollow bolt that's on the salsbury clutch what size socket do I need for that? 32mm? Don't have one and need to stop and pick up what ever socket it is. And a 27mm 
|
|
| Author: | Randman [ Mon Jul 20, 2015 7:29 pm ] |
| Post subject: | Re: BL1TZ's Odyssey |
I'll check to see what size it is when I get home tonight. Rand |
|
| Author: | bl1tzkr13g [ Thu Jul 23, 2015 1:54 am ] |
| Post subject: | Re: BL1TZ's Odyssey |
bought an impact socket set from HF its a 32mm |
|
| Page 3 of 5 | All times are UTC - 5 hours [ DST ] |
| Powered by phpBB® Forum Software © phpBB Group https://www.phpbb.com/ |
|