Board index

My Home Page

PilotOdyssey.com By hoser...


PilotOdyssey.com Chat Room

PilotOdyssey.com Photo Album

* Login   * Register * FAQ
http://www.pilotodyssey.com/PO/adm/images/imagemenu/smiley_cool.png PilotOdyssey.com Chat    http://www.pilotodyssey.com/PO/adm/images/imagemenu/find.png PilotOdyssey.com Google Search    http://www.pilotodyssey.com/PO/adm/images/imagemenu/emoticon_tongue.png FL400 Parts    http://www.pilotodyssey.com/PO/adm/images/imagemenu/emoticon_grin.png FL350 Parts    http://www.pilotodyssey.com/PO/adm/images/imagemenu/emoticon_evilgrin.png FL250 Parts    http://www.pilotodyssey.com/PO/adm/images/imagemenu/emoticon_unhappy.png Admin Email   
It is currently Fri Apr 19, 2024 5:05 am

All times are UTC - 5 hours [ DST ]


Post new topic Reply to topic  [ 89 posts ]  Go to page 1, 2, 3, 4  Next
Author Message
PostPosted: Mon Nov 11, 2019 9:35 pm 
Offline

Joined: Mon Nov 11, 2019 9:05 pm
Posts: 134
Location: Dirty Bird, AZ
Hey everyone, new board member, not so new FL350 owner. I've been working on my girl since April of 2018, and it's been quite the journey. I'm closing in to 'done' (snert), so I thought I'd take the time to post my story, along with all the photo's I've captured along the way. So here goes!

Attachment:
File comment: Ryan and his Dad
RYAN.jpg
RYAN.jpg [ 82.99 KiB | Viewed 27268 times ]


That picture isn't me, but that's a photo of my Honda! If you look close, you can just see the top of my (vury good) friend Ryan's head, while sitting in his Dad's lap. His Mom just happened to snap this photo at exactly the right time. This would be around 89-91 or so, he was 6 at the time.

I'm now the 3rd owner of this lady, and she was in immaculate condition when I picked her up in Boise, ID. She came with custom canvas side panels, and a custom cover. Everything else was stock, even down to the (nasty) fuel line. She had sat for about 10 years or so, when I got her. My friend mentioned his Dad wanted to sell, and before she was ever listed anywhere I was offered it. So I bought it, and drug her back home to Phoenix AZ.

Here's a shot of her very first mod, switching from incandescent to LED lighting, while I was pulling the tank and carburator to clean them right after getting it home:

Attachment:
LED lights.jpg
LED lights.jpg [ 64.34 KiB | Viewed 27268 times ]


The only parts I had to buy to get it running again was some fuel line, new belt, and both a new throttle and choke cable. Here's some shots of the carb and tank when they were out. I was fortunate, the tank was lined/coated early, and it's in fantastic shape.

Attachment:
clear_line.jpg
clear_line.jpg [ 75.36 KiB | Viewed 27268 times ]


I also replaced the snorkel? tube, I still have the original however it broke close to the airbox. Hard to believe it was like a paperboard back in the day:

Attachment:
new_snorkel.jpg
new_snorkel.jpg [ 80.27 KiB | Viewed 27268 times ]


Attachment:
snorkel_2.jpg
snorkel_2.jpg [ 88.46 KiB | Viewed 27268 times ]


So that got me up and running! It seemed to run just fine, and according to my friend Ryan, he'd never seen it start as easy or idle as well after I had it all apart and cleaned up. So off we go!


Top
 Profile E-mail  
 
PostPosted: Mon Nov 11, 2019 10:03 pm 
Offline

Joined: Mon Nov 11, 2019 9:05 pm
Posts: 134
Location: Dirty Bird, AZ
Early May, 2018:

So I've had it for a couple weeks, and got it up and running. I've only used it a few times, and had some issues with the brakes. I had a really rough time bleeding them initially (no mityvac yet), and discovered that the old sight lenses had effectively disintegrated. Looking at them, they appeared to have fractured like a spider web, and touching them they were 'spongy', and weeping brake fluid.

Unfortunately I don't have any shots of the original master sight lenses, but here's the replaced results:

Attachment:
master_1.jpg
master_1.jpg [ 43.66 KiB | Viewed 27258 times ]


Attachment:
master_2.jpg
master_2.jpg [ 32.65 KiB | Viewed 27258 times ]


Attachment:
master_3.jpg
master_3.jpg [ 39.15 KiB | Viewed 27258 times ]


Attachment:
master_4.jpg
master_4.jpg [ 50.29 KiB | Viewed 27258 times ]


Top
 Profile E-mail  
 
PostPosted: Mon Nov 11, 2019 10:28 pm 
Offline

Joined: Mon Nov 11, 2019 9:05 pm
Posts: 134
Location: Dirty Bird, AZ
May 12th, 2018:

Since this is Phoenix AZ, May is starting to get hot. So at this point, most of my testing was done at night, after 9pm when my kids had gone to bed and the ambient air temp had dropped to something reasonable. I rapidly realized that the standard lighting is insufficient, even after switching to the most potent LED I could find. So I came up with my next mod, which was to add in a light bar at the top of the roll cage. This is the first iteration of this light bar, and I powered it by putting a splitter in both the positive and negative side of the tail light connector. So the light bar would only turn on when the headlights were on. I did it this way so the connector was still stock, and my change could be undone, by removing the splitters and plugging the tail light back in as it was.

Attachment:
Lightbar_testing1.jpg
Lightbar_testing1.jpg [ 89.69 KiB | Viewed 27255 times ]


Attachment:
lightbar_testing2.jpg
lightbar_testing2.jpg [ 87.35 KiB | Viewed 27255 times ]


I secured the lightbar by using rubber pads between the frame tube and the bracket, and then replaced the zipties with screw clamps that I covered with heat shrink tubing to make them both look better, and grip better (without messing up the paint)

Attachment:
lightbar_install1.jpg
lightbar_install1.jpg [ 86.99 KiB | Viewed 27255 times ]


Attachment:
lightbar_install2.jpg
lightbar_install2.jpg [ 97.76 KiB | Viewed 27255 times ]


Here's some shots of the switch I had made. You can see everything was done with the intention of it being reversible. In the first shot, you can see the splitters I made with bullet connectors. The 2nd has them covered in loom.

Attachment:
lightbar_switch1.jpg
lightbar_switch1.jpg [ 60.03 KiB | Viewed 27255 times ]


Attachment:
lightbar_switch2.jpg
lightbar_switch2.jpg [ 62.71 KiB | Viewed 27255 times ]


May 12th was a Saturday. This is significant, because it meant I was able to take my new lightbar out and test it. My friend Ryan (who grew up with this FL350), was free that evening, and able to come along with me to try it out. He always loved to take the Honda out for a romp while it was still at his Dads, so of course he jumped on this opportunity.

So Ryan and I took the Honda out to the 'Back way to Crown King' https://azoffroad.net/backway-to-crown-king since the launch site for it is public and not too far from my house. This was after 9pm, so nice and dark and cool.

We had a blast! The new lightbar performed flawlessly, it basically gave the Honda high beams if compared to car. We took turns riding it a handful of miles up the road towards Crown King and back.

There is a section a few miles up the road that has a blind switchback, that is banked incorrectly. When turning left, you want to be driving on a bank like this / not on a bank like this \ . This particular turn was grated so it sloped down, instead of up, if that makes sense. Opposite of how it should have been.

In any case, I warned Ryan about this, and he didn't have any issues navigating it. We both took our turns and then finally called it a night. As we were loading up to leave, Ryan asked for 'one more rip' up the road and back.

"OK sure" I say, and go about my business fiddling with the other ride we had brought that evening (that's a whole 'nother story). I wait, and wait, and wait, and finally I hear the Honda come back. By now, I'm very concerned.

This is my attempt at building suspense :)


Top
 Profile E-mail  
 
PostPosted: Mon Nov 11, 2019 11:21 pm 
Offline

Joined: Mon Nov 11, 2019 9:05 pm
Posts: 134
Location: Dirty Bird, AZ
May 17th, 2018:

It's a few days till I'm able to survey the damage. Thankfully, Ryan was unhurt however he did take a bump to his head. Remember that nasty left turn I mentioned? Ryan took it just a little too fast on that final rip and fishtailed, and ended up rolling on the right (passenger) side.

You can see the hoop and passenger down tube took the brunt of the impact:

Attachment:
downtube_1.jpg
downtube_1.jpg [ 64.29 KiB | Viewed 27252 times ]


In the following shot, you get an idea of how bent down that front passenger corner of the hoop is (top) and how crooked the down tube really is:

Attachment:
downtube_2.jpg
downtube_2.jpg [ 80.5 KiB | Viewed 27252 times ]


In this shot, you can see this particular hoop is done for:

Attachment:
crooked_hoop.jpg
crooked_hoop.jpg [ 86.14 KiB | Viewed 27252 times ]


Here you can see what appears to be a twist in the frame, using my ultra-accurate/ultra-sophisticated measuring ATV jack to give a rough idea where it 'should' be:

Attachment:
frame_twist.jpg
frame_twist.jpg [ 74.69 KiB | Viewed 27252 times ]


So now what the thunder do I do now? My new-to-me toy was just broken by the former owner :(

Thankfully Ryan is an officer and a gentleman, as well as a man of his word. He promised to make it right, and get it back to where it was. And that's exactly what he did. Ryan has quite the interesting assortment of business connections, and one of them includes a body shop that employs a man gifted with the frame rack machine :-)

So I dropped the Honda off at the body shop sometime around end of May 2018.


Top
 Profile E-mail  
 
PostPosted: Mon Nov 11, 2019 11:24 pm 
Offline

Joined: Mon Sep 04, 2006 2:20 pm
Posts: 781
Location: Joliet, Illinois
Welcome to the site new guy, great story and great looking oddy! Thanks for the pics too ::-:


Top
 Profile  
 
PostPosted: Mon Nov 11, 2019 11:26 pm 
Offline

Joined: Fri Jul 04, 2014 7:33 am
Posts: 1070
Very nice. Looks like a clean machine. Has the top-end of the Engine ever been serviced? I ask because all FL350r air-cooled rigs had some issue with clearance of the exhaust bridge. Also fuel pumps tend to 'go' on these machines, and the replacements are not having a good track record either.


Top
 Profile E-mail  
 
PostPosted: Tue Nov 12, 2019 12:02 am 
Offline

Joined: Mon Nov 11, 2019 9:05 pm
Posts: 134
Location: Dirty Bird, AZ
Early September 2018:

She's back baby! She's better than ever! It turns out, Ryan's Dad had also rolled this FL350R over in the same direction, so it was 'kinda' crooked in the hoop ever since I had gotten it. This particular round was just insult to (same) injury.

Attachment:
back_from_bodyshop.jpg
back_from_bodyshop.jpg [ 80.01 KiB | Viewed 27248 times ]


The body shop was able to get everything back in order, and moar straighter than I'd ever seen it to be honest. I believe Ryan said they had pulled 1.5" of twist out of the frame overall, and ended up having to replace the hoop (but not the down tubes), and the passenger side front trailing arms.

While I was at it, I decided to go ahead and renew the 20 something year old front rubber I was rolling around on. I also had the front rims repaired at a local shop here in PHX, they painted them for me while they were at it:

Attachment:
front_driver.jpg
front_driver.jpg [ 65.46 KiB | Viewed 27248 times ]


Attachment:
front_passenger_tire.jpg
front_passenger_tire.jpg [ 64.27 KiB | Viewed 27248 times ]


Attachment:
front_tires.jpg
front_tires.jpg [ 64.76 KiB | Viewed 27248 times ]


This is also when I fixed the plastics. When I had gotten it, only the front driver fender had a crack in it. After this accident, 3 out of 4 fenders had issues.

Here's an example of what I did to repair it. It will do, I just wish I had a better way.

Attachment:
fender_fix1.jpg
fender_fix1.jpg [ 36.62 KiB | Viewed 27248 times ]


Attachment:
fender_fix2.jpg
fender_fix2.jpg [ 39.8 KiB | Viewed 27248 times ]


Top
 Profile E-mail  
 
PostPosted: Tue Nov 12, 2019 12:14 am 
Offline

Joined: Sun Jul 29, 2018 2:03 pm
Posts: 549
Location: Jerseydale, CA
Cool story! And welcome!


Top
 Profile E-mail  
 
PostPosted: Tue Nov 12, 2019 12:17 am 
Offline

Joined: Mon Nov 11, 2019 9:05 pm
Posts: 134
Location: Dirty Bird, AZ
September-ish 2018:

Since the old girl had been sitting from May to September, I figured the fuel system needed looked at again. That and the carb bowl was always 'wet', and covered in oily dust. So I re-plumbed it again, and replaced the float, needle and bowl gasket, and gave it a general scrub down.

Attachment:
fuel_tee.jpg
fuel_tee.jpg [ 49.13 KiB | Viewed 27247 times ]


Attachment:
carb_redo.jpg
carb_redo.jpg [ 39.58 KiB | Viewed 27247 times ]


Attachment:
clear_kinda_sux.jpg
clear_kinda_sux.jpg [ 44.36 KiB | Viewed 27247 times ]


Attachment:
replumb_part_deux.jpg
replumb_part_deux.jpg [ 53.13 KiB | Viewed 27247 times ]


Once I had everything back together, I was back in action!


Top
 Profile E-mail  
 
PostPosted: Tue Nov 12, 2019 12:27 am 
Offline

Joined: Mon Jul 19, 2010 3:20 pm
Posts: 1718
Location: saskatoon, sk, canada
nice Oddy..lots of info here


Top
 Profile  
 
PostPosted: Tue Nov 12, 2019 12:34 am 
Offline

Joined: Mon Nov 11, 2019 9:05 pm
Posts: 134
Location: Dirty Bird, AZ
September-ish 2018 to December-ish 2018:

And that was that, other than take it out for a ride every chance I had :-) Up till now, I was pretty much only riding that 'Back road to Crown King' since it was so well maintained... to a point. I was still riding around on the original front trailing arm bushings, so the front wheels had lots of 'camber slop'. I tried not to ride anything too rough.

I never actually 'made it' to Crown King in the Honda, and that frustrated me. I kept running out of gas. So I came up with my next mod, a spare tank holder. It was mid December I built this:

Attachment:
tank_holder1.jpg
tank_holder1.jpg [ 72.32 KiB | Viewed 27244 times ]


Attachment:
tank_holder2.jpg
tank_holder2.jpg [ 69.62 KiB | Viewed 27244 times ]


Attachment:
tank_holder3.jpg
tank_holder3.jpg [ 89.07 KiB | Viewed 27244 times ]


Attachment:
tank_holder4.jpg
tank_holder4.jpg [ 88.82 KiB | Viewed 27244 times ]


Attachment:
tank_holder5.jpg
tank_holder5.jpg [ 95 KiB | Viewed 27244 times ]


Attachment:
tank_holder6.jpg
tank_holder6.jpg [ 90.57 KiB | Viewed 27244 times ]


Since these were taken, I've had the tank holder powder coated black. I've also come to realize it's a PERFECT platform for a 'shock saver' chain or cable. :-)

Anyway, the title of this hot mess is 'FL350 earned her rebuiled', surely this isn't it, right?

Oh heck no. This is just the warm up. It's about to get interesting.


Top
 Profile E-mail  
 
PostPosted: Tue Nov 12, 2019 1:31 am 
Offline

Joined: Mon Nov 11, 2019 9:05 pm
Posts: 134
Location: Dirty Bird, AZ
January 1, 2019:

My wife and 2 sons had gone for the holidays to her fathers house, and were still gone at this point. I was unable to come with because I had just started a new job, and didn't have the time off available yet. So I stayed home and got a ton of work stuff done, and also took the Honda out for a fateful ride on New Years Day.

This was to be my 2nd true 'throw the glove down' challenge of the 'Back road to Crown King', since I had built my spare tank holder. The first time went well, but I took a wrong turn and probably would have made it to CK had I not.

This trip started out gorgeous as always. Here's a couple action shots, as I climbed up elevation.

Attachment:
1-1-1.jpg
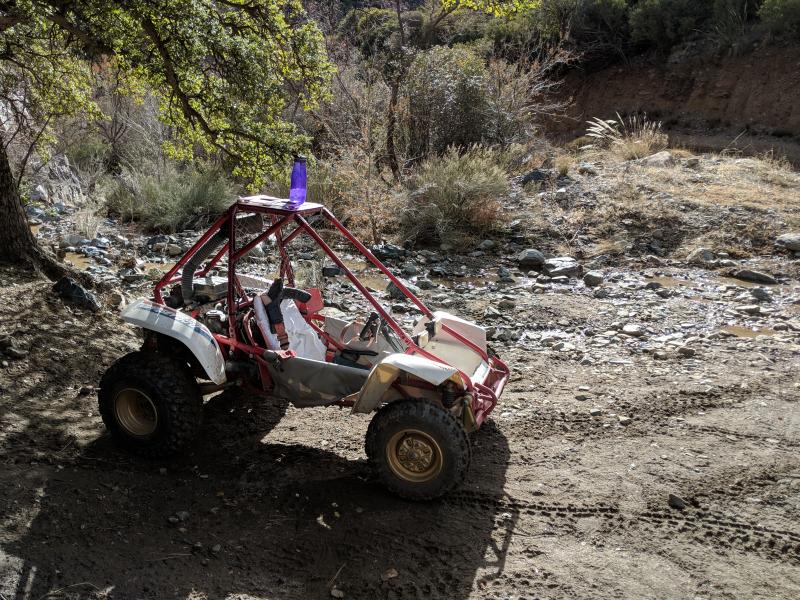
1-1-1.jpg [ 145.14 KiB | Viewed 27241 times ]


Attachment:
1-1-2.jpg
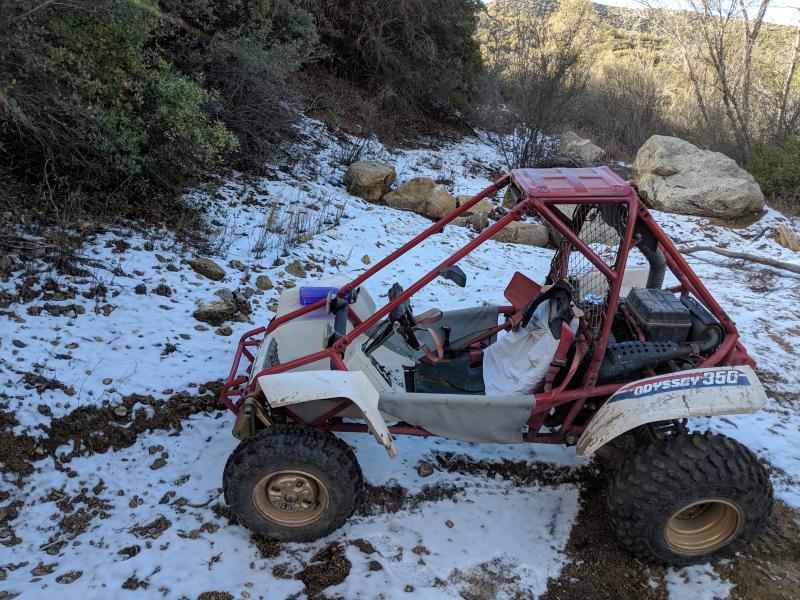
1-1-2.jpg [ 127.28 KiB | Viewed 27241 times ]


As you get deeper and further in on this trail, you will eventually come across 2 washes. The first your forced into, and have to crawl through for quite a ways (2-300 yards). The second isn't so bad. For this particular outing, they were both mildly active, pretty much like a slow creek.

I kept climbing, and ran into a group who were trying to assist a Suzuki Samurai that had rolled over trying to do one of the optional 'extreme challenges' along the route. I didn't have any tools or anything to offer any assistance, and they all turned down my offer of a extra pair of hands. So I pressed on.

The night before, it had rained at my house. This means it had snowed at the elevation I was now at. There was around 4-5 inches of snow on the ground. The Honda took it in stride, and kept on charging. I came up to a pair of Jeep Wranglers, one trying to pull the other up the hill with a tow strap. I can't get around them, and I'm starting to get cold. At this point, it's starting to get gloomy like it might start snowing again, so I decide to turn back. Yet again defeated in my quest for Crown King.

The way back, it does start snowing. I'm sure it's in my head but it feels like the Honda is getting 'tired'. It seems like it's tougher to get through the wash/creek on the way back, like the tires are slipping off rocks that they had gripped before, that sort of thing. We manage to lumber our way through, and get all the way back down the mountains to the staging area.

Throughout all this journey, the entire way, the old sweetheart never missed a beat. The Engine ran strong the whole time, and took me from mild to wild and back again without whine nor whimper. We covered probably 35-40 extreme miles that day. Here's a scenic view of Lake Pleasant, first a close up and then a zoom out.

Attachment:
lake_pleasant1.jpg
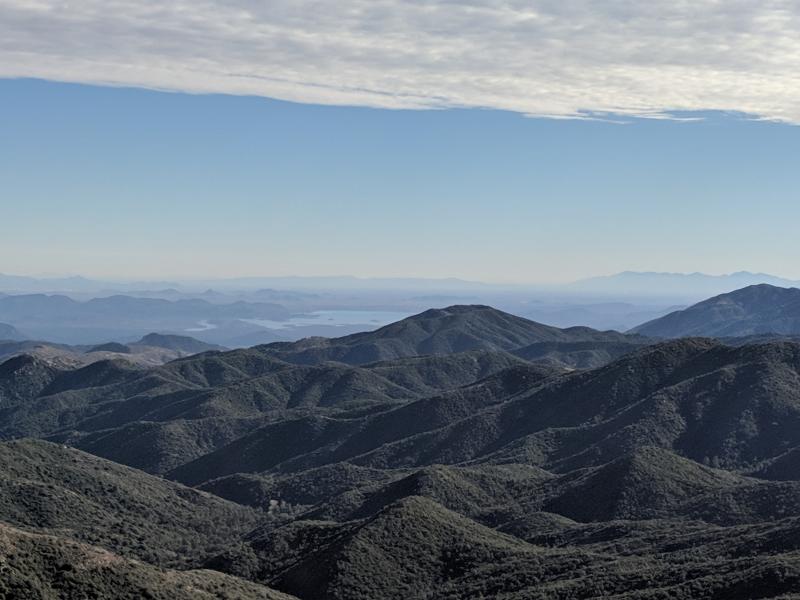
lake_pleasant1.jpg [ 55.45 KiB | Viewed 27241 times ]


Attachment:
lake_pleasant2.jpg
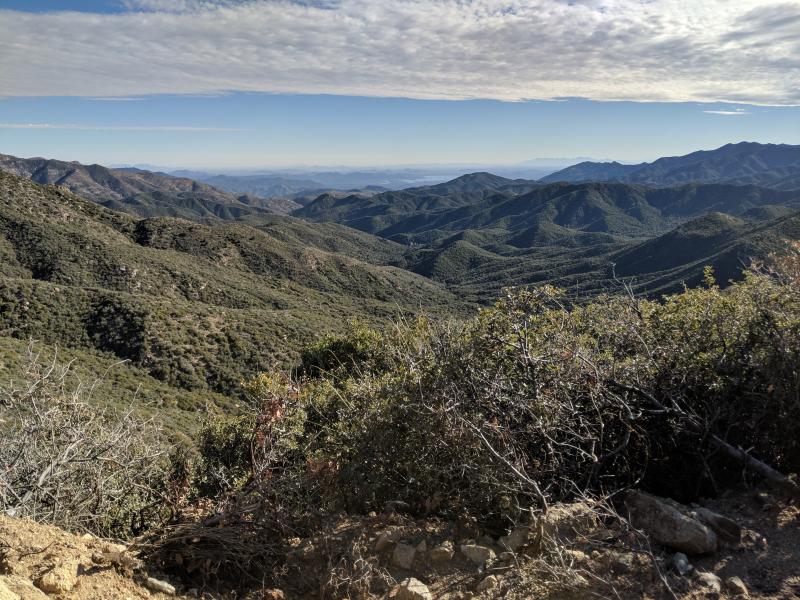
lake_pleasant2.jpg [ 114.16 KiB | Viewed 27241 times ]


After we got back to staging and I had loaded her onto the trailer, I restarted her and was letting her idle with the petcock off to get some of the gas burnt out of the lines/carb bowl since she always dribbled out of the overflow onto the trailer deck on the drive back.

It was during this idiling while sitting on the trailer as I was getting everything else stowed. Suddenly I hear a 'PING', and the Honda dies.

I go back to it, and hit the starter. It cranks, but it sounds funny, not at all like the normal 'thump thump thump' when being spun by the starter. It refuses to start. I stop, thinking maybe it inhaled a reed or something. I'm concerned, but not too concerned that it won't start. From there I finish up with getting ready to leave, and I start thinking about things, both what had happened and what could have happened, had it died like this on the trail.

So, that's how the old sweetheart earned her rebuild. Effectively stock, she muscled her way most of the way up the 'Back road to Crown King', 78mm piston and all, with an extra 25lbs of fuel and frame hanging off her tush. She did it end to end, and literally died on my trailer on the way home. She could have abandoned me in some pretty extreme climate, and forced me to take my truck up through the wash(s) to get her. But she didn't, she gave up the ghost after she was strapped down on her way home. That touched me, and made me wish to return the same kindness.

The cliff hanger at this point is, just what happened? What was the PING? Place your bets? :-)

So that, my newfound friends, leads us to Act 2, the rebuildening!


Top
 Profile E-mail  
 
PostPosted: Tue Nov 12, 2019 2:30 am 
Offline

Joined: Mon Nov 11, 2019 9:05 pm
Posts: 134
Location: Dirty Bird, AZ
Jan 4, 2019:

So what the thunder happened? What was the PING? I have no idea! I pulled the spark plug, and this is what I found:

Attachment:
gunk-plug.jpg
gunk-plug.jpg [ 41.87 KiB | Viewed 27238 times ]


I'm not in too big of a hurry, so I go ahead and scrub her down, getting ready for next steps:

Attachment:
dirty_girl.jpg
dirty_girl.jpg [ 96.77 KiB | Viewed 27238 times ]


Attachment:
scrubbed_for_surgery.jpg
scrubbed_for_surgery.jpg [ 93.07 KiB | Viewed 27238 times ]


It's at this point that Ryan finally comes over, and gives the pull start a tug. 'Dude, you got zero compression'. "Oh.... well crap."

So we pull the head, and find this:

Attachment:
head_bang.jpg
head_bang.jpg [ 61.67 KiB | Viewed 27238 times ]


At this point, many adult beverages were enjoyed, and much googling was done. We eventually guessed that it ate the rings and crawled to our respective beds.

From here, life takes over for a few months, however some progress is made. I'm able to get the Honda a bonded title, and get it registered and plated with a OHV sticker. All that took the span of about 8 weeks, in and of itself. At this point, I have not pulled the jug to confirm or deny our guess.

Ryan still felt bad about the broken plastics, so he offered to have my seat 'freshened up'. He also recommended giving him the seat belts, since they were long in the tooth as well. So I handed them over.

Attachment:
seat_be_gone.jpg
seat_be_gone.jpg [ 58.31 KiB | Viewed 27238 times ]


This is also when I start amassing replacement parts and tools.

Attachment:
reeds_gaskets.jpg
reeds_gaskets.jpg [ 78.5 KiB | Viewed 27238 times ]


Top
 Profile E-mail  
 
PostPosted: Tue Nov 12, 2019 2:43 pm 
Offline

Joined: Mon Nov 11, 2019 9:05 pm
Posts: 134
Location: Dirty Bird, AZ
January 5th to April-ish 2019:

So far till now, all I've known is the rings broke somehow, I've not gone further than pulling the head off. Life took over, and the Honda got put on a slow simmer on a back burner. I was still thinking about it, given the information I knew, and what I was learning online. I also continued accumulating parts and tools, in preparation for getting the old girl going again.

It was around this time I decided to go ahead and replace the rear tires as well, they were also 20+ years at that point per the date codes. It was also during this time frame that I had a very bad experience with bias ply tires and my trailer, and I became firmly rooted in the radial tire camp. So like chocolate and peanut butter, I combined the two!

Attachment:
front_radials.png
front_radials.png [ 207 KiB | Viewed 27198 times ]


Attachment:
rear_radials.png
rear_radials.png [ 212.22 KiB | Viewed 27198 times ]


As you can see, these rears are quite beefy, and have me concerned. Are they going to rub continuously, and how will I now fit this thing on my trailer?

Attachment:
rear_meats.jpg
rear_meats.jpg [ 45.89 KiB | Viewed 27198 times ]


Attachment:
she_toight.jpg
she_toight.jpg [ 38.59 KiB | Viewed 27198 times ]


Since they are so much wider, I'm hopeful they will be able to handle the wash better.

Attachment:
rear_meats2.jpg
rear_meats2.jpg [ 74.13 KiB | Viewed 27198 times ]


Top
 Profile E-mail  
 
PostPosted: Tue Nov 12, 2019 3:16 pm 
Offline

Joined: Mon Nov 11, 2019 9:05 pm
Posts: 134
Location: Dirty Bird, AZ
Still January 5th to April-ish 2019:

As I had mentioned before, I bought it completely stock, and it also had the 'post-recall' air cooled head. I knew I wasn't going to be able to get anything smaller than a 80mm Wiseco, so pulling the jug and a rebore was in order. So that takes care of the piston and jug, what do I do with this chowdered up head? So after much debate and deliberation with my wallet and bank accounts, I decided to go ahead and switch to water cooled. This was the head I settled on, purchased from a gentleman in Bakersfield via eBay. It was listed as a 'Rand's Head'. Unfortunately I can't locate any photos I had taken of the head before mounted, so here's the eBay listing shot.

Attachment:
unnamed.jpg
unnamed.jpg [ 27.37 KiB | Viewed 27197 times ]


If I'm not mistaken, this is the same head used by Methodical.

Anywhoodle, it was around this time I acquired the piston and had sent it off to be coated, ceramic on top and teflon on the skirt. It was also near time to pull the jug, since once the piston came back I'd be ready to bore.

Here's what I found. In this first shot, you can see the exhaust side of the piston is heavily scuffed, and missing a large chunk of aluminum between the two rings. Judging by the carbon buildup, it looks like this had cracked at some not too distant point, and finally blew out fairly recently, possibly even on that New Years Day ride. I don't think this was the 'PING' I heard though.

Attachment:
piston1.jpg
piston1.jpg [ 56.92 KiB | Viewed 27197 times ]


In this next shot, you can see the skirt has also cracked. It did so on both sides, intake and exhaust.

Attachment:
piston2.jpg
piston2.jpg [ 68.98 KiB | Viewed 27197 times ]


Here's the intake side of things, where I think my 'PING' came from, as well as all the impact damage to the dome of the head. You can see the upper ring did in fact snap, two pieces came off, one on either end. I was able to fish one out of the crank case, and shake the other out of the expansion chamber. So all the chromium chunks were accounted for, no signs of the missing aluminum though.

Attachment:
piston3.jpg
piston3.jpg [ 59.06 KiB | Viewed 27197 times ]


So what do you guys think went wrong? I still have these parts, if more photos are required for your evaluation :-)


Top
 Profile E-mail  
 
PostPosted: Tue Nov 12, 2019 4:20 pm 
Offline

Joined: Sun Jul 29, 2018 2:03 pm
Posts: 549
Location: Jerseydale, CA
What kind of oil mixture ratio and octane are you running? Have you checked for air leaks?

In my (uneducated) opinion it looks like the ring gap was too small and caused the ring to expand too much under high temps and blow.


Top
 Profile E-mail  
 
PostPosted: Tue Nov 12, 2019 8:36 pm 
Offline

Joined: Mon Nov 11, 2019 9:05 pm
Posts: 134
Location: Dirty Bird, AZ
Thanks everybody, for all the welcomes!

At this point, I was running 91 octane with 20:1 Pennzoil mix

Attachment:
pennzoil.jpg
pennzoil.jpg [ 22.36 KiB | Viewed 27180 times ]


Leading up to the 'PING', I had not checked for air leaks, it seemed to be running fine.


Top
 Profile E-mail  
 
PostPosted: Tue Nov 12, 2019 8:50 pm 
Offline

Joined: Mon Nov 11, 2019 9:05 pm
Posts: 134
Location: Dirty Bird, AZ
April 28, 2018:

While I had it apart and the various pieces out and about, I figured now would be the time to address everything else that needed attention. So I started with the brakes. The front brakes looked fine, I think a lack of regular adjustment (and use really) kept them from wearing much. I don't have any shots of the original pads, however they looked near new. I went ahead and replaced them anyway.

Attachment:
brakes3.jpg
brakes3.jpg [ 61.93 KiB | Viewed 27178 times ]


The rear pads didn't fare as well, they were almost toast.

Attachment:
brakes1.jpg
brakes1.jpg [ 82.43 KiB | Viewed 27178 times ]


Attachment:
brakes2.jpg
brakes2.jpg [ 77.38 KiB | Viewed 27178 times ]


It was around this time that the tank holder came back from the powder coaters! Yay!

Attachment:
tank_holder_black1.jpg
tank_holder_black1.jpg [ 89.41 KiB | Viewed 27178 times ]


Attachment:
tank_holder_black2.jpg
tank_holder_black2.jpg [ 68.53 KiB | Viewed 27178 times ]


Top
 Profile E-mail  
 
PostPosted: Tue Nov 12, 2019 8:53 pm 
Offline

Joined: Thu Aug 18, 2005 10:13 am
Posts: 3761
Location: PERTH WESTERN AUSTRALIA
I'm not familiar with that oil,but seems wrong for our application? Isn't it an outboard motor (( Internal Combustion Engine ? )) oil for boating?


Top
 Profile E-mail  
 
PostPosted: Tue Nov 12, 2019 9:11 pm 
Offline

Joined: Mon Nov 11, 2019 9:05 pm
Posts: 134
Location: Dirty Bird, AZ
May 3rd, 2019:

I had reached out to the gentleman in Bakersfield that had sold me the head, asking if he had any recommendations as far as radiator and water pump. He did indeed, and was happy to sell me a set. I couldn't readily identify the pump, and I wasn't a fan of the size/orientation of the radiator itself, it seemed way overkill. So I broke out the google-fu, and tracked down exactly the radiator I was after.

It turns out 'my' ideal radiator for this setup was from a 2007 Yamaha YFM450 Grizzly 4x4. It was readily available on ebay for less than $100, it came with a temp sensor bung, and had the inlet/outlet/cap all orientated exactly how I wanted.

Attachment:
radiator.jpg
radiator.jpg [ 26.82 KiB | Viewed 27177 times ]


Here's a shot of the Yamaha radiator, alongside the other radiator I got from Bakersfield. The Yamaha is a 'horizontal' style, the other is a 'vertical' style. In this image, the radiator on the right has the cap facing down.

Attachment:
radiators.jpg
radiators.jpg [ 49.5 KiB | Viewed 27177 times ]


I also grabbed all the Yamaha mounting hardware, as well as a fan, and a overflow bottle!

Attachment:
cooling_fan1.jpg
cooling_fan1.jpg [ 43.8 KiB | Viewed 27177 times ]


Attachment:
overflow1.jpg
overflow1.jpg [ 34.11 KiB | Viewed 27177 times ]


Attachment:
overflow2.jpg
overflow2.jpg [ 27.5 KiB | Viewed 27177 times ]


I also wanted a name brand water pump, that would be easy to replace. This time Amazon came through, and hooked me up with 'die pumpe'!

Attachment:
water_pump.jpg
water_pump.jpg [ 69.77 KiB | Viewed 27177 times ]


Top
 Profile E-mail  
 
PostPosted: Tue Nov 12, 2019 9:28 pm 
Offline

Joined: Mon Nov 11, 2019 9:05 pm
Posts: 134
Location: Dirty Bird, AZ
May 5th, 2019:

I didn't care for the looks of my driven clutch, so it got a turn too! Here you can see the slippers are all pretty well worn, and the spring looks crusty.

Attachment:
driven1.jpg
driven1.jpg [ 36.01 KiB | Viewed 27175 times ]


Attachment:
driven2.jpg
driven2.jpg [ 37.86 KiB | Viewed 27175 times ]


Attachment:
driven3.jpg
driven3.jpg [ 38.47 KiB | Viewed 27175 times ]


Here it is all apart, in it's gross glory...

Attachment:
driven4.jpg
driven4.jpg [ 80.84 KiB | Viewed 27175 times ]


And coming back together, first with some dry moly and new slippers:

Attachment:
driven5.jpg
driven5.jpg [ 71.52 KiB | Viewed 27175 times ]


And finally remounted with a repainted spring and looking much better!

Attachment:
driven6.jpg
driven6.jpg [ 60.41 KiB | Viewed 27175 times ]


Top
 Profile E-mail  
 
PostPosted: Tue Nov 12, 2019 9:35 pm 
Offline

Joined: Mon Sep 04, 2006 2:20 pm
Posts: 781
Location: Joliet, Illinois
GrojDad wrote:
Thanks everybody, for all the welcomes!

At this point, I was running 91 octane with 20:1 Pennzoil mix

Attachment:
pennzoil.jpg


Leading up to the 'PING', I had not checked for air leaks, it seemed to be running fine.


Not criticizing but I would not use that oil. I use Honda HP2, mixed at 32:1. Today's oils are much better and recommended usually at 32:1, or even 40 or more to 1. Others will chime in with their favorite oils, and they are all pretty good, I just personally prefer the Honda brand.

Project is looking pretty good, thanks for the pics and updates, looking forward to more.


Top
 Profile  
 
PostPosted: Tue Nov 12, 2019 9:44 pm 
Offline

Joined: Mon Nov 11, 2019 9:05 pm
Posts: 134
Location: Dirty Bird, AZ
Lonerider wrote:
GrojDad wrote:
Thanks everybody, for all the welcomes!

At this point, I was running 91 octane with 20:1 Pennzoil mix

Attachment:
pennzoil.jpg


Leading up to the 'PING', I had not checked for air leaks, it seemed to be running fine.


Not criticizing but I would not use that oil. I use Honda HP2, mixed at 32:1. Today's oils are much better and recommended usually at 32:1, or even 40 or more to 1. Others will chime in with their favorite oils, and they are all pretty good, I just personally prefer the Honda brand.

Project is looking pretty good, thanks for the pics and updates, looking forward to more.


No offence taken, I hope everyone does chime in with their favorite (oil or thread about oil). This is just me regurgitating my project, I've got a laundry list of questions I'll eventually get to :-)


Top
 Profile E-mail  
 
PostPosted: Tue Nov 12, 2019 9:56 pm 
Offline

Joined: Mon Nov 11, 2019 9:05 pm
Posts: 134
Location: Dirty Bird, AZ
May 12th, 2019:

I was not a fan of the fact the backup method for starting this girl was a 30+ year old piece of rope. At some point, it looks like something may have fallen on the pull cord handle, and had split the boot around the base. So I decided to replace both the handle and the cord. I went with Cobra Cord, since it's guaranteed for life, and made in 'murica! https://www.cobrapullcords.com/

Here's what I found when I went to replace the pull cord.

Attachment:
nasty_pullcover.jpg
nasty_pullcover.jpg [ 80.39 KiB | Viewed 27166 times ]


Attachment:
behind_flywheel.jpg
behind_flywheel.jpg [ 68.19 KiB | Viewed 27166 times ]


I was at a loss why everything was covered in oil and dirt. Then I started searching around, and came across the service bulletin. I also found all the mods everyone had done, and decided 'eh, when in Rome with the cover off...'

Attachment:
plug_screw.jpg
plug_screw.jpg [ 47.13 KiB | Viewed 27166 times ]


Attachment:
plug_screw2.jpg
plug_screw2.jpg [ 60.19 KiB | Viewed 27166 times ]


After all that, I got my fancy blue Cobra Cord wrapped up and preloaded, and bolted back on!

Attachment:
side_cover1.jpg
side_cover1.jpg [ 76.07 KiB | Viewed 27166 times ]


Attachment:
cobra_cord.jpg
cobra_cord.jpg [ 68.53 KiB | Viewed 27166 times ]


Top
 Profile E-mail  
 
PostPosted: Tue Nov 12, 2019 10:26 pm 
Offline

Joined: Mon Nov 11, 2019 9:05 pm
Posts: 134
Location: Dirty Bird, AZ
May 19th, 2019:

This is the weekend I decide to tackle the front trailing arm bushings. I had located an awesome kit of them on ebay, that were larger (more load bearing area) than factory, had a grease channel rifled in the bore, and had an o-ring to seal at the end. The much tighter tolerances were also a pleasant surprise, I couldn't believe how tight my front end became after I replaced them.

Attachment:
trailing_bushing1.jpg
trailing_bushing1.jpg [ 71.77 KiB | Viewed 27159 times ]


Attachment:
trailing_bushing2.jpg
trailing_bushing2.jpg [ 76.38 KiB | Viewed 27159 times ]


In the above shot where I had the drivers side trailing arms re-attached, you can see I had also started the process of replacing the brake hoses all around.

During this weekend, I also decided to get the water pump ready. I had searched high and low for a pigtail compatible with this particular pump. After firing the parts cannon at it twice, both times with a 'really really firm guess', I was let down. So I decided to stick with the pump, but it had to be modified.

The mod I came up with was to first trim back about 1/2" of the connector socket from the pump housing, and then solder the + and - leads directly to the exposed tabs. After that, I wrapped the leads in heatshrink, and crimped on a waterproof 2 pole socket. The icing on this cake was the epoxy potting to keep it all secure and dry.

Attachment:
potted_pump1.jpg
potted_pump1.jpg [ 75.79 KiB | Viewed 27159 times ]


Attachment:
potted_pump2.jpg
potted_pump2.jpg [ 48.82 KiB | Viewed 27159 times ]


Incidentally, when I was re-assembling the front end, I realized I had a first edition of the shop manual in my hands. My friend Ryan's Dad had given it to me as part of the sale.

Here's what caught my attention:

Attachment:
first_edition.jpg
first_edition.jpg [ 50.8 KiB | Viewed 27159 times ]


Attachment:
2nd edition.jpg
2nd edition.jpg [ 62.94 KiB | Viewed 27159 times ]


Top
 Profile E-mail  
 
Display posts from previous:  Sort by  
Post new topic Reply to topic  [ 89 posts ]  Go to page 1, 2, 3, 4  Next

All times are UTC - 5 hours [ DST ]


Who is online

Registered users: Bing [Bot], Google [Bot]


You cannot post new topics in this forum
You cannot reply to topics in this forum
You cannot edit your posts in this forum
You cannot delete your posts in this forum
You cannot post attachments in this forum

Jump to:  
cron
Powered by phpBB® Forum Software © phpBB Group