Board index

My Home Page

PilotOdyssey.com By hoser...


PilotOdyssey.com Chat Room

PilotOdyssey.com Photo Album

* Login   * Register * FAQ
http://www.pilotodyssey.com/PO/adm/images/imagemenu/smiley_cool.png PilotOdyssey.com Chat    http://www.pilotodyssey.com/PO/adm/images/imagemenu/find.png PilotOdyssey.com Google Search    http://www.pilotodyssey.com/PO/adm/images/imagemenu/emoticon_tongue.png FL400 Parts    http://www.pilotodyssey.com/PO/adm/images/imagemenu/emoticon_grin.png FL350 Parts    http://www.pilotodyssey.com/PO/adm/images/imagemenu/emoticon_evilgrin.png FL250 Parts    http://www.pilotodyssey.com/PO/adm/images/imagemenu/emoticon_unhappy.png Admin Email   
It is currently Sat Apr 27, 2024 9:21 am

All times are UTC - 5 hours [ DST ]


Post new topic Reply to topic  [ 31 posts ]  Go to page 1, 2  Next
Author Message
PostPosted: Sat Mar 28, 2020 12:17 pm 
Offline

Joined: Sun Nov 05, 2017 9:35 pm
Posts: 13
I started this build in 2017. What an awesome resource of information this forum is! The goal of this project is a cheap, fast, fun buggy for primarily riding sand on the Oregon coast. Time and money resources have fluctuated greatly since starting this project, so hopefully posting here will help me finish it. I grew up riding Banshees on the sand and that helped greatly sourcing parts and measurements.

Craigslist find. Few hundred bucks for a worn out 350 minus the Engine.

Image

Image

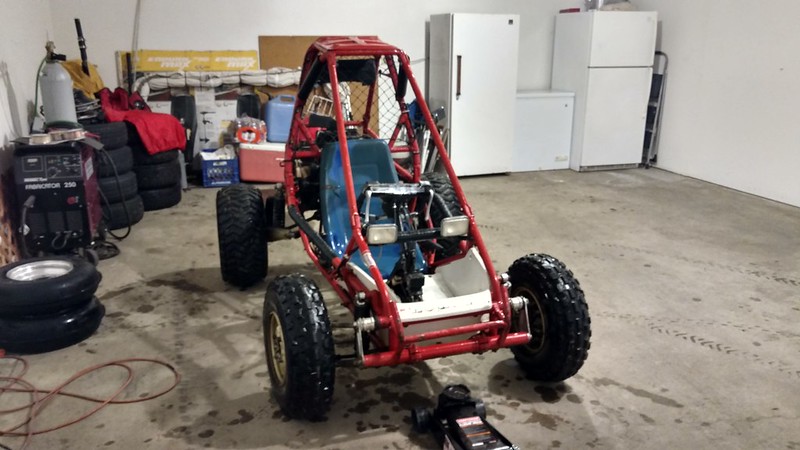
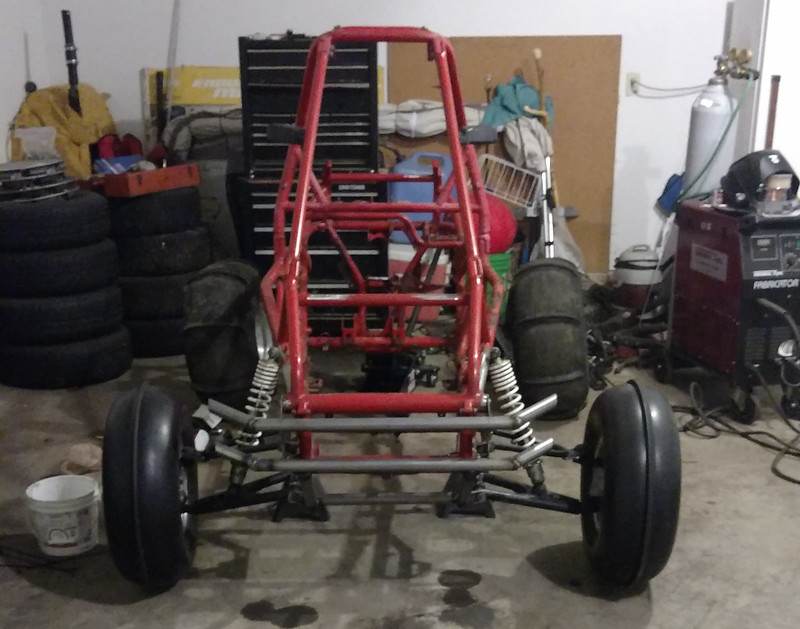
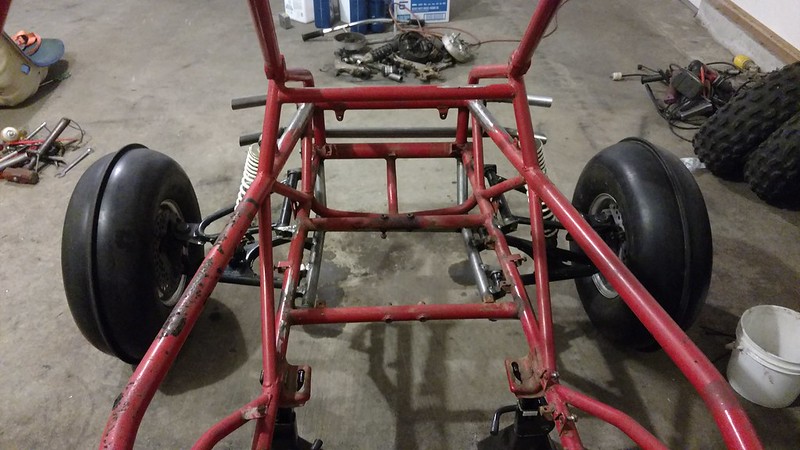
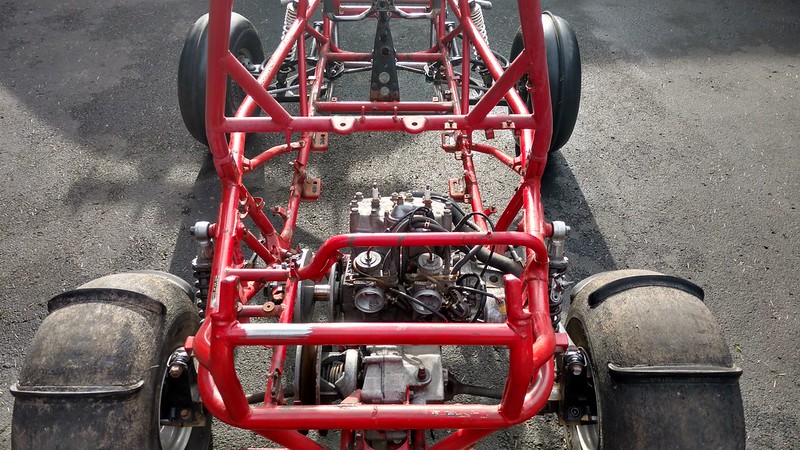
1.5" .125 tube and some used front banshee suspension with raptor 660 shocks and I ended up with this. 22 inch tires in the front, 24 inch tires in the rear. Hopefully help for lack of suspension but I have a few ideas for upgrades in that department too. Wheelbase is a few inches longer and the front is as equally as wide as the rear.

Image

Image

Image

Image

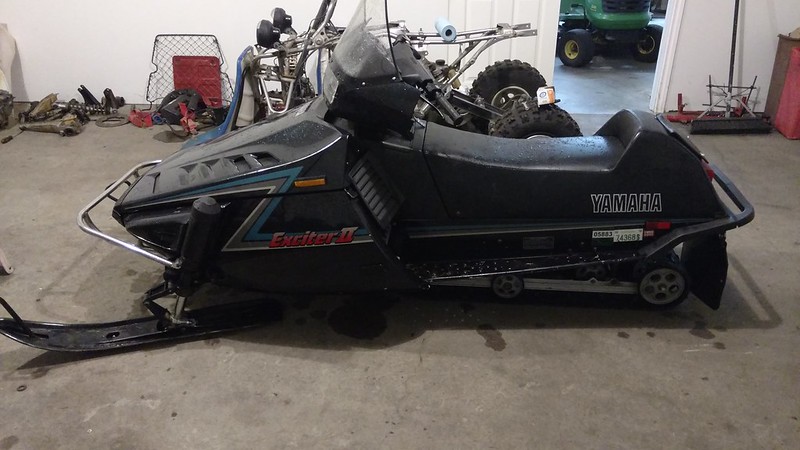
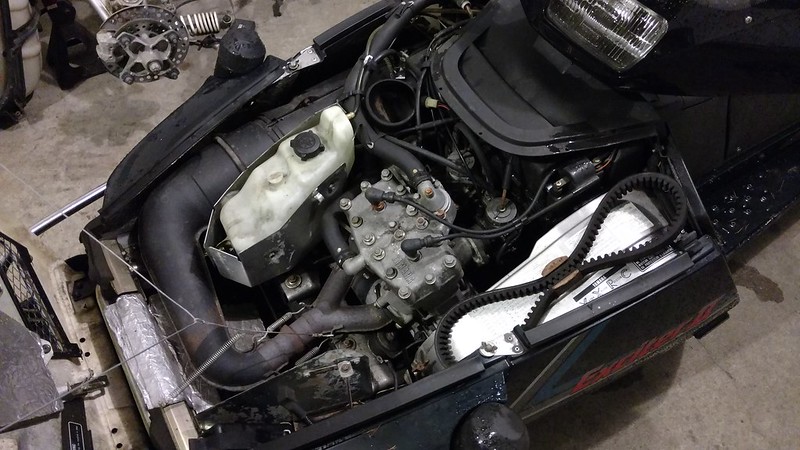
Craigslist strikes again! Donor vehicle. 1996 yamaha exciter II 570. It was the "wifes sled". Took it for a rip in the mountains and it ran awesome. Water cooled, electric start, twin carb and simple dash. So I tore it apart!

Image

Image

Fast forward a few months. I came to realize how much bigger the 570 is than the 350 and why people have stretched the frame on these. In my opinion that looks unproportional to me. So I made it fit. I will rebuild the frame comparable to what I cut out. To combat bump steer I made a cantilever type steering setup that ended up having no leverage so it all got cut off. What also puzzled me is, how in the world am I going to keep the front end from never touching the ground?!

Image

Image

Image

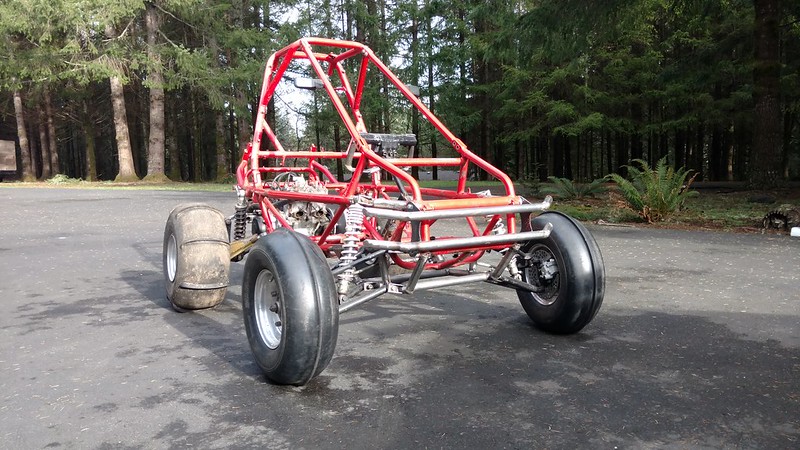
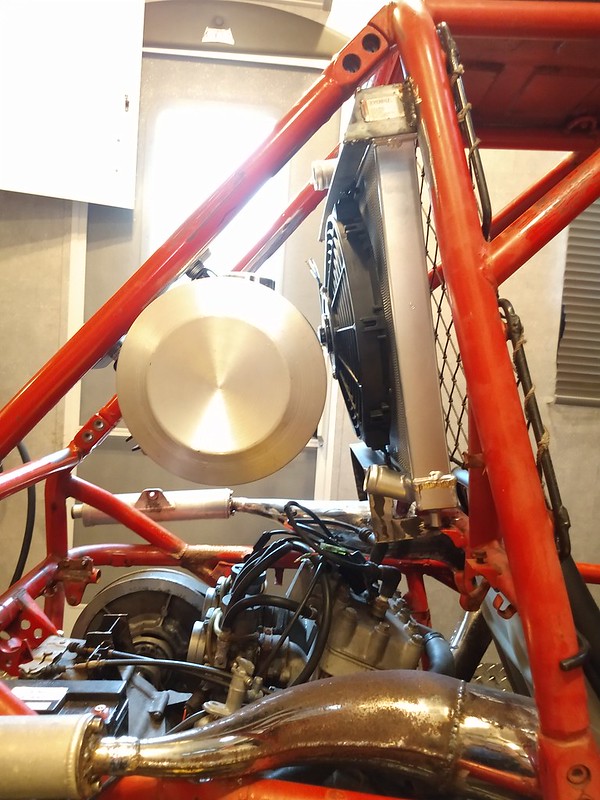
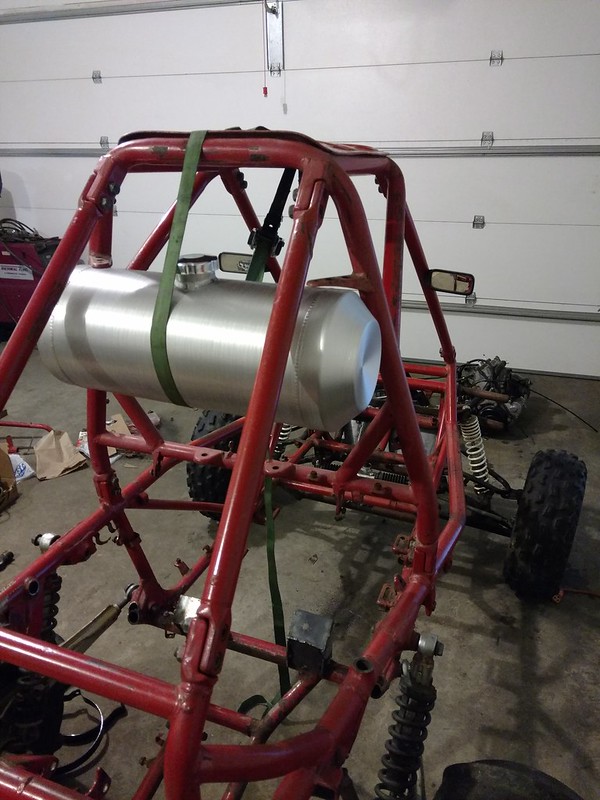
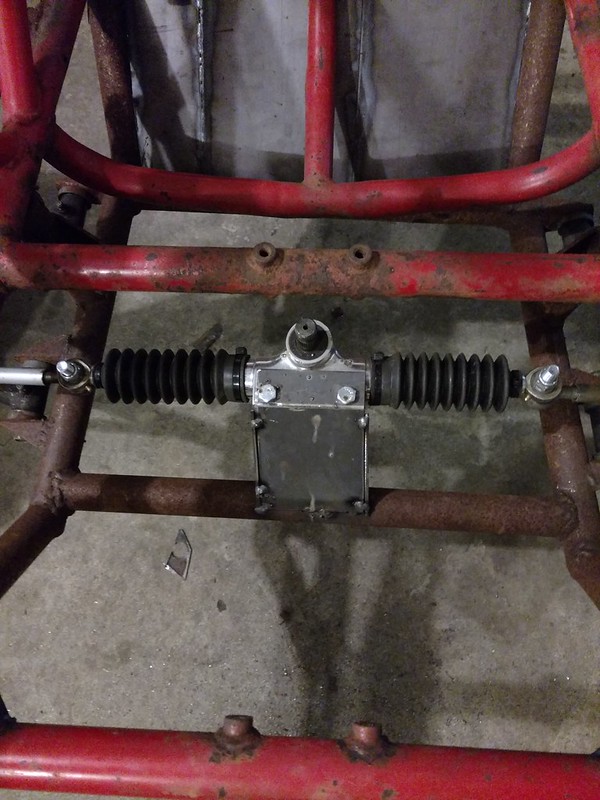
Alright months later I picked up a 4.5 gallon tank, and rebuilt the stock ody seat with some much needed extra padding. I wanted to upgrade to something nicer but would have no room for the exhaust if I did that. Cheap steering rack on amazon and some .125 plate and bump steer is almost all eliminated. After fighting with the clutch alignment .125 plate makes the front motor (( Internal Combustion Engine ? )) mounts.

Image

Image

Image

Image

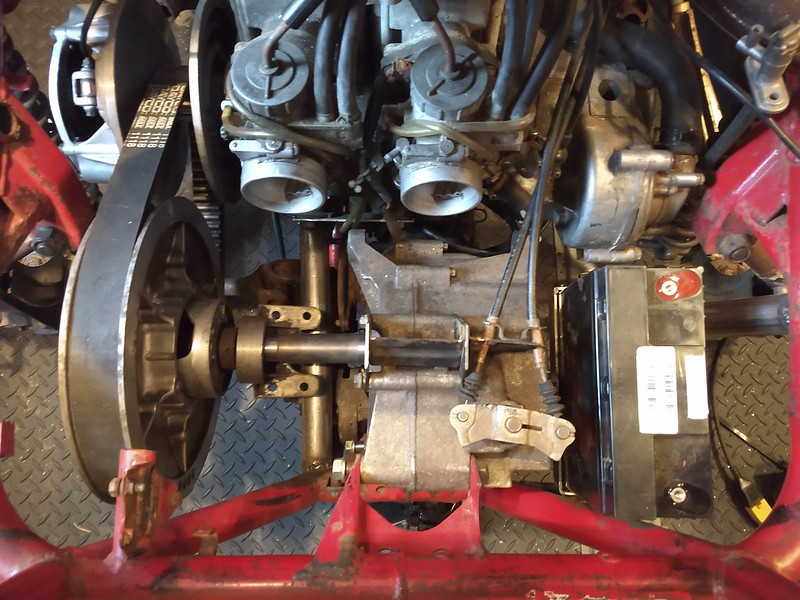
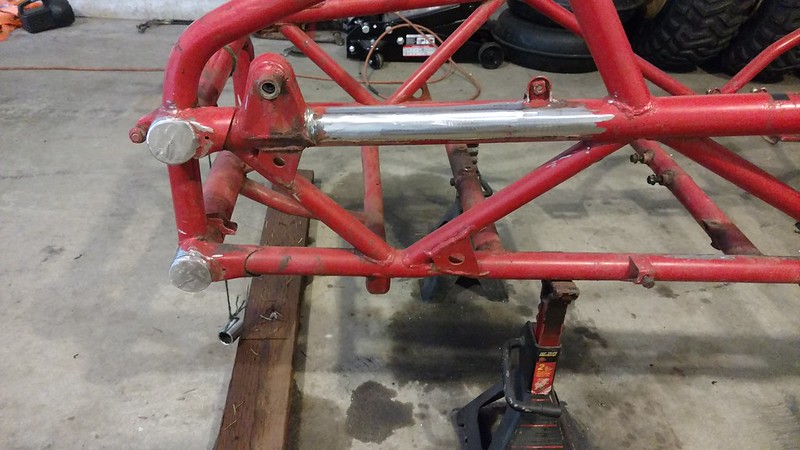
So next came the issue of clutches. First I had to fight with getting the factory secondary off the trans and ended up cutting it off. After some measuring I had a local machine shop rob my bank account for a piece of hardened steel. Output of 350 trans shaft on one end and factory yamaha secondary drive shaft on the other with plenty of surface to mount a support roller bearing I took from the sled. Fits perfect. This was sometime last spring.

Image

Image

Last year I buckled down and worked a lot, and it wasn't on this. Traveling the country for work hurts the timing on a project like this. So I fixed that.

Image

The garage may be small but its still a garage. My neighbors love me heh.

Image

I've made some good progress since that last picture and will share that soon. Brakes, steering, wiring, exhaust, Engine mounts, output shaft support bearing, rear suspension, and a steel foot tub are mostly figured out. That will put us up to date with the project.

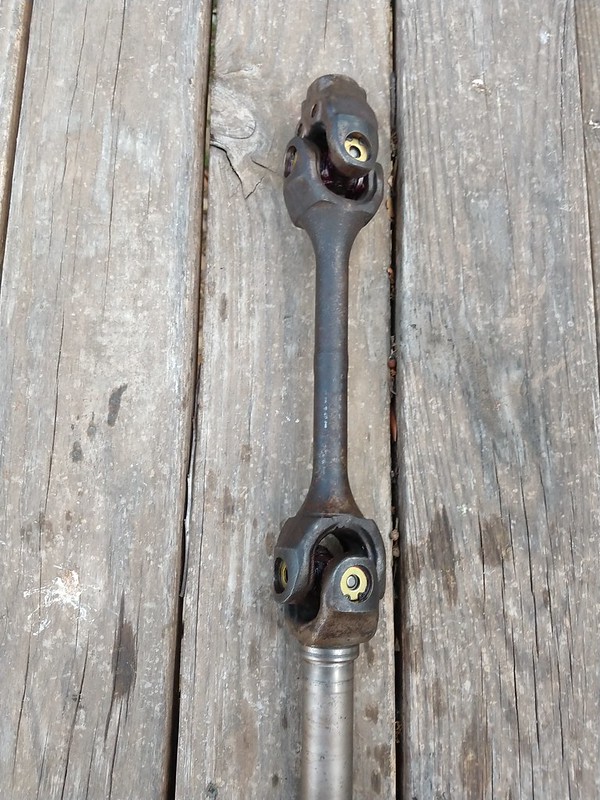
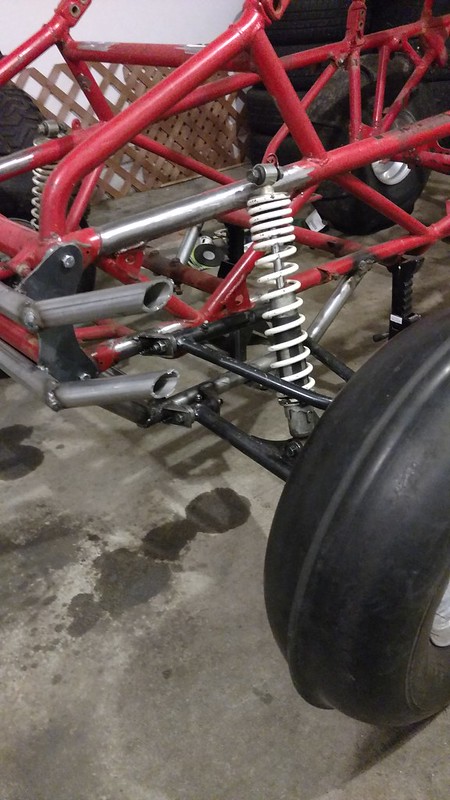
I need some rear suspension joints that are in decent shape or preferable brand new. Or should I grab some from Ruff Stuff and build my own? Try my best to find information that has already been asked/answered before asking here but I may run into a few things and that's why I brought this thread over from other forums.

Thanks for lookin.


Top
 Profile E-mail  
 
PostPosted: Sat Mar 28, 2020 12:54 pm 
Offline

Joined: Sun Jul 29, 2018 2:03 pm
Posts: 549
Location: Jerseydale, CA
Welcome.


Could you share the seat rebuild process? It looks rather comfy.


Top
 Profile E-mail  
 
PostPosted: Sat Mar 28, 2020 2:04 pm 
Offline

Joined: Sun Nov 05, 2017 9:35 pm
Posts: 13
Garemie wrote:
Could you share the seat rebuild process? It looks rather comfy.


I made .125 plate with some nuts welded on to replace the rusted out factory pieces and JB welded the plate to the bucket. Then the upholstery shop used 2 inch high density foam where you see the square sections and .5 inch foam over the top of that and everywhere else. That was glued to the marine vinyl and then the whole thing stapled into the seat bucket. I cant feel the plates underneath and its very secure and comfortable. $200 where I had it done.


Top
 Profile E-mail  
 
PostPosted: Sat Mar 28, 2020 2:13 pm 
Offline

Joined: Fri Jul 04, 2014 7:33 am
Posts: 1070
Where do you go and what was the cost of that input shaft?


Top
 Profile E-mail  
 
PostPosted: Sat Mar 28, 2020 2:55 pm 
Offline

Joined: Tue Jan 17, 2012 3:19 am
Posts: 7701
Location: Hope, B.C Canada
Well thanks for sharing this build here.
I second Garemie's comment ---- very very nice job on that seat so tell your upholstery shop "great work !". By the way please share upholstery shop name address so others can use it if they live near by.

I only have one negative comment. Ur ded if you use non stock rear shocks. You WILL break u-joints. You can NOT use a shock that has more than 15 1/4" eye to eye length or you will get u-joint bind. These length shocks are hard to find. Nobody makes that length unless you run those high dollar Works, Fox or similar.
You can run 15 1/2" shocks but you MUST modify the u-joints. I did do a thread on this but you will have to find it using the search box.
Keep posting here and keep us updated. Maybe we can help with stuff. You appear to be a competent fabricator. What do you do for a living ??
CO

Edit: Sorry one more bad attitude negative comment. In my opinion the top front shock mounts are going to need more support or you're gona rip them off. The stock oddy frame is paper thin. I cut one apart after a crash to do repairs. It's 1/16" wall. In my opinion I would run a tube from the top shock mount to the down tube directly above the shock.
CO


Top
 Profile E-mail  
 
PostPosted: Sat Mar 28, 2020 3:34 pm 
Offline

Joined: Sun Nov 05, 2017 9:35 pm
Posts: 13
canadian oddy wrote:
Well thanks for sharing this build here.
I second Garemie's comment ---- very very nice job on that seat so tell your upholstery shop "great work !". By the way please share upholstery shop name address so others can use it if they live near by.

I only have one negative comment. Ur ded if you use non stock rear shocks.


Perfect Stitch Upholstery in Longview WA did the seat. Was about $200.

I am using fox 2.0 part #. 980-02-013 found a gentleman on here that made a bushing/ hardware kit to use these shocks. Will get a final weight and have them tuned. For the front shocks im going to run whats there for now. I agree the shock mounts wont last long the way I ride, going to sandwich them with plate connecting up to the next tube. Also going to gusset more of the frame where I think there could be weak spots. Needs weight in the front anyways haha. Will do the "shock saver" chains/straps.

Thanks but i'm just some kid. I travel the country and commission new wind turbines for general electric.


ZeroClient wrote:
Where do you go and what was the cost of that input shaft?


Doug at Gear Tech inc. in Rainer OR. I believe it was $1500. Should have had him make a few with a blank output and sold em here.


Top
 Profile E-mail  
 
PostPosted: Sat Mar 28, 2020 4:32 pm 
Offline

Joined: Tue Jan 17, 2012 3:19 am
Posts: 7701
Location: Hope, B.C Canada
bansheebrigade wrote:


Thanks but i'm just some kid. I travel the country and commission new wind turbines for general electric.


That's what I thought.
CO


Top
 Profile E-mail  
 
PostPosted: Sun Apr 05, 2020 8:05 pm 
Offline

Joined: Sun Nov 05, 2017 9:35 pm
Posts: 13
Battery mount is mostly done. This is the battery i'm using.

Image

Rear Engine mount still needs some reinforcement but the clutches line up well. Waiting on a bearing to come in so I can fab a plate for the shaft support to bolt onto and help solidify the long input shaft I had machined. K&N filters with outerwears pre filters will mount directly to carbs as this will see mostly sand.

Image

Civic radiator with 12 inch fan mounted. The top mount is welded to the frame where I will also mount a puke bottle, lighting and flags. The bottom bolts on to aid in Engine removal. Fan is zip tied to the mounts and not directly to the radiator. Will have to see how well that works. Hoses on the sled Engine are 1 inch and the rad was built for 1.25 inch. The fuel tank is mounted. Will need to figure out if I can gravity feed the carbs or have to use a fuel pump. The "Firewall" net will be replaced with a two piece expanded steel shroud. Old toomey T-5's taken off of a banshee got chopped up for true dual exhaust. I will have to build an aluminum heat shroud and bolt it to the seat frame and also wrap the exhaust as it is very close to the seat frame and drivers arms.

Image

Image

Image

I apologize for the toyhauler lighting pictures. Once rear dirt tires come in ill roll it outside.
As we know Covid-19 is not helping with life right now. Hope everyone is keeping healthy.


Top
 Profile E-mail  
 
PostPosted: Sun Apr 05, 2020 8:22 pm 
Offline

Joined: Sun Jul 29, 2018 2:03 pm
Posts: 549
Location: Jerseydale, CA
bansheebrigade wrote:
Garemie wrote:
Could you share the seat rebuild process? It looks rather comfy.


I made .125 plate with some nuts welded on to replace the rusted out factory pieces and JB welded the plate to the bucket. Then the upholstery shop used 2 inch high density foam where you see the square sections and .5 inch foam over the top of that and everywhere else. That was glued to the marine vinyl and then the whole thing stapled into the seat bucket. I cant feel the plates underneath and its very secure and comfortable. $200 where I had it done.


Wow.... I would almost be willing to ship my seat up there to have that done. I always struggled with the price people charged for FL350 seat covers.


EDIT: Just noticed you have what looks like a free-ride, enduro, or park style bike. A Marzocchi fork with 160-180mm travel. What you got hiding back there? Looks like Crank Bro's wheels?


Top
 Profile E-mail  
 
PostPosted: Sun Apr 05, 2020 9:12 pm 
Offline

Joined: Sun Nov 05, 2017 9:35 pm
Posts: 13
Garemie wrote:
EDIT: Just noticed you have what looks like a free-ride, enduro, or park style bike. A Marzocchi fork with 160-180mm travel. What you got hiding back there? Looks like Crank Bro's wheels?


2009 rockymountain flatline frame with bomber 66 up front, fox dhx.x rear, crankbros wheels, zee brakes, sram drivetrain, raceface cranks, and a mix match of the rest. Fun "oldschool" send ittt bike that I haven't ridden for a few years.


Top
 Profile E-mail  
 
PostPosted: Sun Apr 05, 2020 9:45 pm 
Offline

Joined: Sun Jul 29, 2018 2:03 pm
Posts: 549
Location: Jerseydale, CA
Big fan of the older bikes.

All my bikes are from 2011 or earlier. Fun to watch the snobby brats when I absolutely destroy them on their own line when they're riding a $6,000 S-Works.


Top
 Profile E-mail  
 
PostPosted: Sun Apr 05, 2020 9:48 pm 
Offline

Joined: Tue Jan 17, 2012 3:19 am
Posts: 7701
Location: Hope, B.C Canada
It looks like you have done a good job there.
I do have one question though. That Engine will put out some power so do you think the drive clutch shaft will be ok and not bend at the bearing point ?? I say that because almost every other unit I have seen here has the bearing support on the outside of the clutch and not directly behind as you have there. Time will tell of coarse.
CO

Edit: Sorry another negative comment -- If you gravity feed those carbs you better make sure the valving is correct in the carbs. We have seen this before and it results in melted or holed pistons.

Edit 2: Please note that anytime I make negative comments I am NOT attacking. I'm trying to help a guy prevent future frustrations.
CO


Top
 Profile E-mail  
 
PostPosted: Mon Apr 06, 2020 1:26 am 
Offline

Joined: Thu Aug 18, 2005 10:13 am
Posts: 3761
Location: PERTH WESTERN AUSTRALIA
Please check your bottom cross member behind seat where it joins to the outer tubes.I and others have had them fatigue stress crack around there.It's a very fine crack the result of countless times of the Engine torque twisting via drive clutch engaging and disengaging rapidly.
Best to weld in some gussets there.
Especially now with this powerplant!
I have a FL800polarisPilot and AC550Pilot both stretched and more fun and more reliable than you can imagine.Never ever go back to stock Ody or Pilot
Good luck and can't wait for your vids.Baz


Top
 Profile E-mail  
 
PostPosted: Mon Apr 06, 2020 1:27 am 
Offline

Joined: Thu Aug 18, 2005 10:13 am
Posts: 3761
Location: PERTH WESTERN AUSTRALIA
Please check your bottom cross member behind seat where it joins to the outer tubes.I and others have had them fatigue stress crack around there.It's a very fine crack the result of countless times of the Engine torque twisting via drive clutch engaging and disengaging rapidly.
Best to weld in some gussets there.
Especially now with this powerplant!
I have a FL800polarisPilot and AC550Pilot both stretched and more fun and more reliable than you can imagine.Never ever go back to stock Ody or Pilot
Good luck and can't wait for your vids.Baz


Top
 Profile E-mail  
 
PostPosted: Mon Apr 06, 2020 9:02 am 
Offline

Joined: Sun Nov 05, 2017 9:35 pm
Posts: 13
Garemie wrote:
when I absolutely destroy them on their own line


Hell yeah.

canadian oddy wrote:
That Engine will put out some power so do you think the drive clutch shaft will be ok and not bend at the bearing point ??


I honestly do not know either. The sled had the same orientation of this setup being: gearbox-shaft-bearing-clutch. I hope a one inch diameter 1050 hardened shaft will take the abuse. As with the carbs and specific jetting etc. I was not very aware of so thanks for that. I will always gladly accept constructive criticism, its why I decided to make a thread as you guys are the experts at these things. I'm just building a cheap and fun ride but want to do it well.

EDIT: I am going to use the sled fuel pump, not gravity feed.

bugeye59 wrote:
Please check your bottom cross member behind seat where it joins to the outer tubes.


Good to know. I was planning on adding gussets in a few areas of the factory frame, but didn't know of this area specifically. I'll be sure to address it. Thanks.


Top
 Profile E-mail  
 
PostPosted: Wed Apr 08, 2020 2:03 pm 
Offline

Joined: Mon Jul 19, 2010 3:20 pm
Posts: 1718
Location: saskatoon, sk, canada
for the fuel, use the fuel pump from the sled, then you won't have to worry about it


Top
 Profile  
 
PostPosted: Thu Apr 09, 2020 9:07 pm 
Offline

Joined: Thu Apr 29, 2010 12:53 am
Posts: 1432
Location: Norco, CA
speaking of the fuel system, I have a 670 in my pilot with watercraft carbs, tank is about where your is, I find that fuel will make it's way past the reeds in the pump and flood the Engine, I have a ball valve that I have to remember to shut off and when I stop and open when I go, I just put on a normally closed 12vdc solenoid valve for when I'm out riding. worked well last weekend :)


Top
 Profile E-mail  
 
PostPosted: Tue Apr 28, 2020 8:25 pm 
Offline

Joined: Sun Nov 05, 2017 9:35 pm
Posts: 13
Been busy at work! It has been killing any motivation left. Making a post to help build some back up.

Parts have been arriving though so things should change. Making progress on the wiring now that I have the original key switch. The original sled fuel pump also showed up but probably needs tested as it has been sitting a few years since i took everything apart. I found that the sled coolant overflow tank will also work well. Rad hoses and adapters are on their way. Fox shocks were ordered them from poly performance, and they had many in stock. Install kit I found from this site made installing them super easy. I misplaced the original sled bearing to support the secondary clutch shaft so ill have to source another. Used upper rear links from ebay are on their way. Will take the shafts to a driveline shop to get the new u-joints swapped. Once the rear end is together I will figure out limit strap options. Kenda Scorpion 25x12 ,9's are getting mounted for the rear. Exhaust got cut and welded (many times) until I was happy with their shape and symmetry, and are getting sprayed with high temp paint and wrapped with titanium tape. Should sound rowdy. I had to modify the air filter snouts at a little tighter angle (I bought 20 degree flanges) weren't enough to clear the trans. Also had to modify the shifter cable mount. Been playing in the arts and crafts department chopping up cardboard for body panels and a custom foot tub. Making a two piece "Grill" to protect the front side of the radiator out of round bar same thickness as the factory "net hoop".

Anyone have a cracked transmission? Id like to replace my secondary clutch seal and am struggling to find one. (found one thanks CO)

Enough rambling. Will have a roller soon. Until then progress photos are coming as motivation grows.
Threw on a shock. *Everything in this picture was threw on for mock up only*
Image


Top
 Profile E-mail  
 
PostPosted: Tue Apr 28, 2020 9:16 pm 
Offline

Joined: Tue Jan 17, 2012 3:19 am
Posts: 7701
Location: Hope, B.C Canada
bansheebrigade wrote:
Anyone have a cracked transmission? Id like to replace my secondary clutch seal and am struggling to find one.


I find that hard to believe because Motion shows several of these ranging from $7 to $15 canadian.
Are we talking about the same seal here ?? Item #13 --- 91222-VM0-004 SEAL, OIL, 30X45X8

https://www.motioncanada.ca/taxonomy/Se ... 000%7C8+mm

CO


Top
 Profile E-mail  
 
PostPosted: Tue Apr 28, 2020 9:33 pm 
Offline

Joined: Sun Nov 05, 2017 9:35 pm
Posts: 13
canadian oddy wrote:


I find that hard to believe because Motion shows several

CO


Duh, search by size. Thank you very much, found it on US site.


Top
 Profile E-mail  
 
PostPosted: Tue Apr 28, 2020 9:45 pm 
Offline

Joined: Tue Jan 17, 2012 3:19 am
Posts: 7701
Location: Hope, B.C Canada
When ever you need funky seals try these guys:
https://www.colonialseal.com/search.php ... rch&page=1
Apparently run by a former USA military vet (can't prove that just rumor).
CO


Top
 Profile E-mail  
 
PostPosted: Tue Apr 28, 2020 9:48 pm 
Offline

Joined: Tue Jan 17, 2012 3:19 am
Posts: 7701
Location: Hope, B.C Canada
Never mind ---- rumor confirmed:
https://www.colonialseal.com/about_us.html
I'm sure they would appreciate the business.
CO


Top
 Profile E-mail  
 
PostPosted: Fri May 08, 2020 9:36 pm 
Offline

Joined: Sun Nov 05, 2017 9:35 pm
Posts: 13
Roughly threw the wiring together. Got it to turn over. Cleaned the disgusting carbs. Had to adjust the angle of the air filters to clear the transmission.
Goal is to have it running this weekend.
Looking forward to hearing the exhaust note. I might upload a quick vid.
I had Pro Machine in San Angelo TX install new Ujoints in the axles this week. I used the solid joints (with no zerk) from ebay. Installed very nice and seem like a quality product. Guess this power plant will test that.

Image

Image


Top
 Profile E-mail  
 
PostPosted: Sun Jun 14, 2020 2:07 am 
Offline

Joined: Sun Nov 05, 2017 9:35 pm
Posts: 13
Got a few weeks off. This thing rips. Going to the dunes in a few days for the first shakedown run.

320 main jet and fuel needle in second from top position.
Pump gas and golden spectro mix 40:1 at sea level. Running 10-40w in the 350 trans. Cooling system holds about a gallon and haven't used the cooling fan yet. Clutching seems about right so far.


Top
 Profile E-mail  
 
PostPosted: Sun Jun 14, 2020 10:59 am 
Offline

Joined: Sun Jan 10, 2010 9:14 pm
Posts: 1779
Location: Ma
Can’t wait to see a video, with the increase in power/torque, odyssey gear reduction and that awesome larger secondary clutch... that bug should launch hard.
Nice work.


Top
 Profile  
 
Display posts from previous:  Sort by  
Post new topic Reply to topic  [ 31 posts ]  Go to page 1, 2  Next

All times are UTC - 5 hours [ DST ]


Who is online

Registered users: Bing [Bot], Duneit, Google [Bot], Q, wyeeoddy


You cannot post new topics in this forum
You cannot reply to topics in this forum
You cannot edit your posts in this forum
You cannot delete your posts in this forum
You cannot post attachments in this forum

Jump to:  
cron
Powered by phpBB® Forum Software © phpBB Group