Hey everyone, I decided that even though I had to re download every photo, it's important to me for this build record to be here since so much of the help I needed during the build came from here. I've written this from my own perspective with the intended audience being people who may not be Pilot purists.
This project began in July 2010. The project involved taking a 1989 Honda Pilot FL400r frame and installing a snowmobile Engine. The reason for me doing this is three fold. First is, I love Honda Pilots. I’ve always wanted to build a “super pilot” and this was my chance. Simply stated, it was the challenge of it. The second reason is pretty obvious, MORE POWER. A stock pilot comes with a single cylinder 400cc two stroke Engine. In stock form it puts out approx. 36HP. The
Engine I chose for the swap is a Yamaha 500cc twin cylinder 2 stroke Engine which puts out approx 85HP. Not a bad increase. There are plenty of guys out there who go big with 800cc twin conversions but I didn’t feel I needed to go crazy and risk transmission failure. The final reason I did it was for reliability. The Honda Engine is good but it’s a one off in many ways. Many of the Engine components are no longer available so trying to fix it is often very difficult. The Yamaha Engine I used came from a 1996 VMax 500XT which is very common
motor ((
Internal Combustion Engine ? )) with easily accessible parts.
THE BUILD DAY ONE
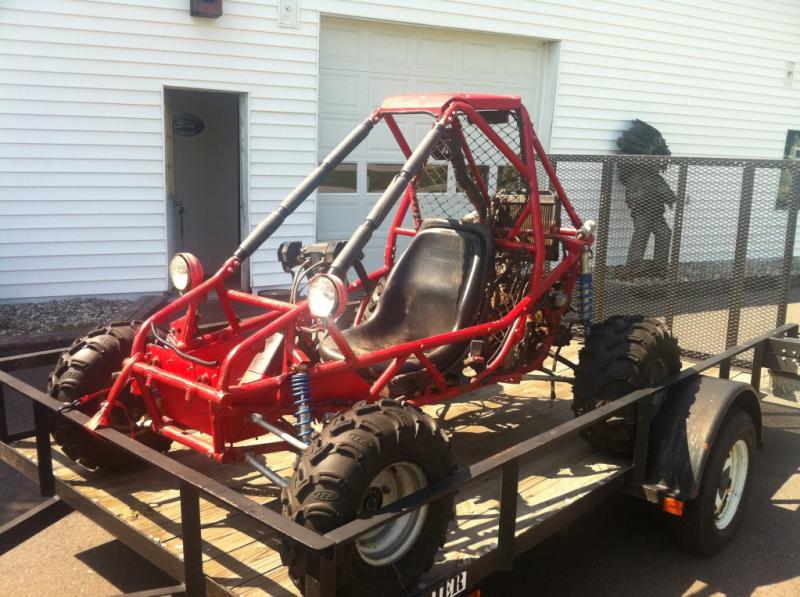
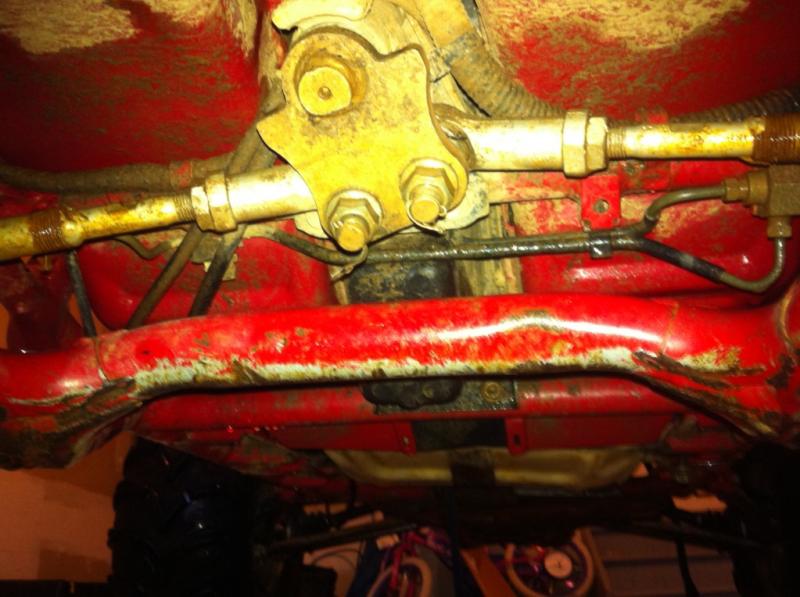
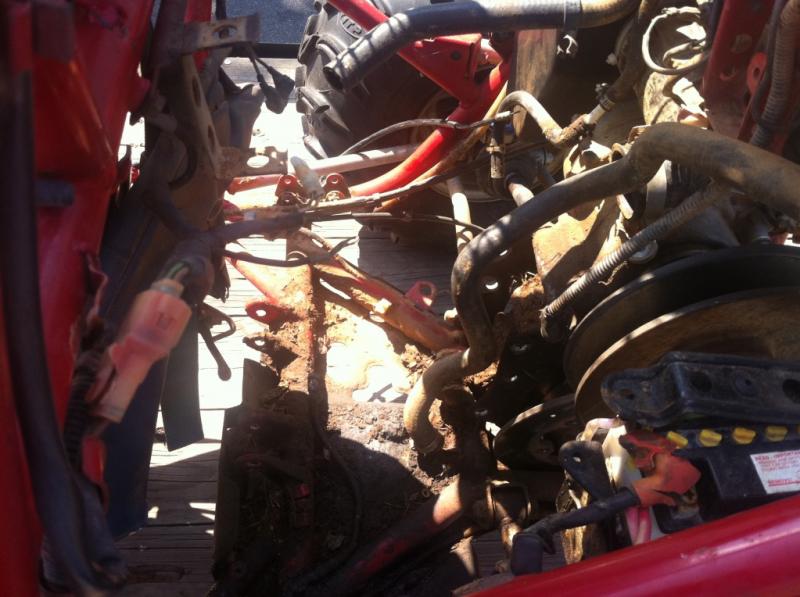
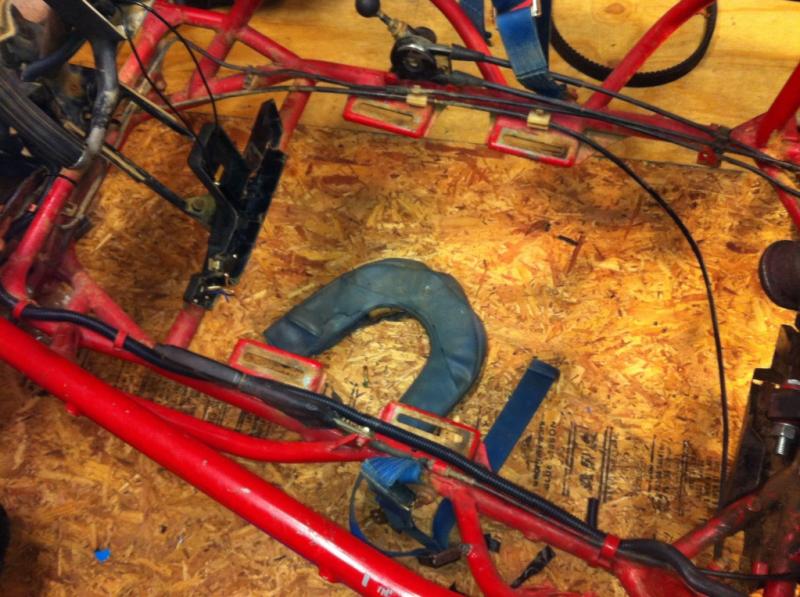
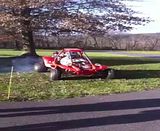
Here is the basis of what I had to start with. I drove up to Conneticut to buy this beauty. It was in good shape besides obviously missing some key components like the Engine AND BODY. The underbody was pretty clean, not dented to death like a lot of Pilots from the northeast. The frame was straight, all in all I was pleased. Engine bay was a bit dirty but very good condition, no rust or dents that were serious
Attachment:
 IMG_1288.jpg [ 85.5 KiB | Viewed 4097 times ]
Attachment:
 IMG_1300.jpg [ 65.11 KiB | Viewed 4096 times ]
Attachment:
 IMG_1290.jpg [ 67.71 KiB | Viewed 4096 times ]
THE DONOR
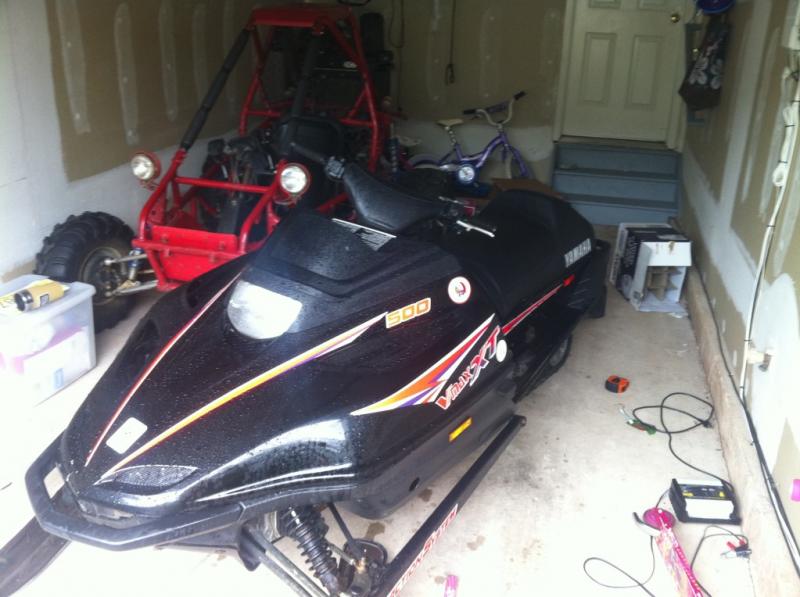
As I mentioned, I chose to go with a 1996 Yamaha VMax 500XT for the sled donor. They are easy to find parts for and are well regarded as reliable engines. They are particularly good with low end torque compared with some of their 500cc competitors so I felt it would be a good donor. Another reason I chose it was that if I ever got tired with the 500cc’s I’ve read that the 600XT (a 600cc Twin) bolts right in to the 500cc chassis. This means that I could go find a cheap donor 600XT and drop in the motor (( Internal Combustion Engine ? )) and electronics with no more fab work, just some bolts and plug ins. Could be easily done in a weekend. The sled had a total of 2100 miles on it when I bought and according the owner it had a top end rebuild less than 100 miles earlier. I was very pleased when I bought it. It started right up with a cold Engine, idled nicely and overall looked like it was taken care of. The owner was shocked when told him I would be removing the Engine and trashing the rest of the sled. He reminded me that it was a perfectly nice sled, no reason to destroy it. It drove nicely up on to the trailer under its own power.
Attachment:
 IMG_1317.jpg [ 61.14 KiB | Viewed 4096 times ]
Attachment:
 IMG_1328.jpg [ 70.2 KiB | Viewed 4096 times ]
THE TEAR DOWN
We were very carful on the tear down not to damage anything as well as maintain all the sled parts possible. There are a few philosophies when it comes to a sled Engine transplant in a pilot. Many of those who came before me did a lot to meld the two entities together. They may have used a combination of sled CVT and Pilot. They also may have used a combination of sled wiring and the stock pilot wiring. I planned a different route. I wanted to go all sled the greatest extent I could. To that end, we were very careful in the tear down so as to keep every part in good working order so it could re used. We also checked everything as we removed it and replaced anything that was worn or broken.
Attachment:
 IMG_1318.jpg [ 35.21 KiB | Viewed 4096 times ]
Attachment:
 IMG_1320.jpg [ 31.26 KiB | Viewed 4096 times ]
Attachment:
 IMG_1319.jpg [ 40.73 KiB | Viewed 4096 times ]
Attachment:
 IMG_1331.jpg [ 60.67 KiB | Viewed 4096 times ]
Attachment:
 IMG_1329.jpg [ 42.28 KiB | Viewed 4096 times ]
Attachment:
 IMG_1330.jpg [ 67.12 KiB | Viewed 4096 times ]
Attachment:
 IMG_1332.jpg [ 36.82 KiB | Viewed 4096 times ]
Attachment:
 IMG_1333.jpg [ 31.89 KiB | Viewed 4096 times ]
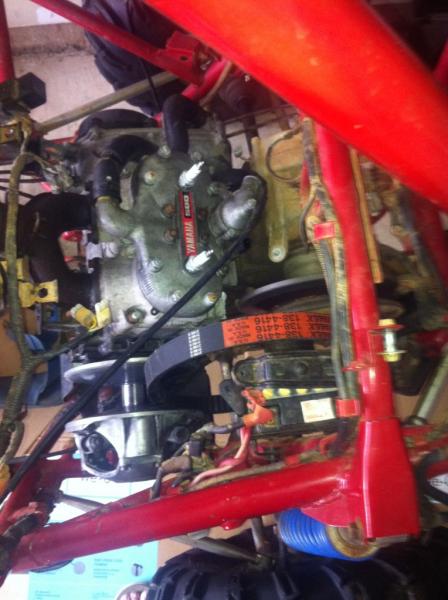
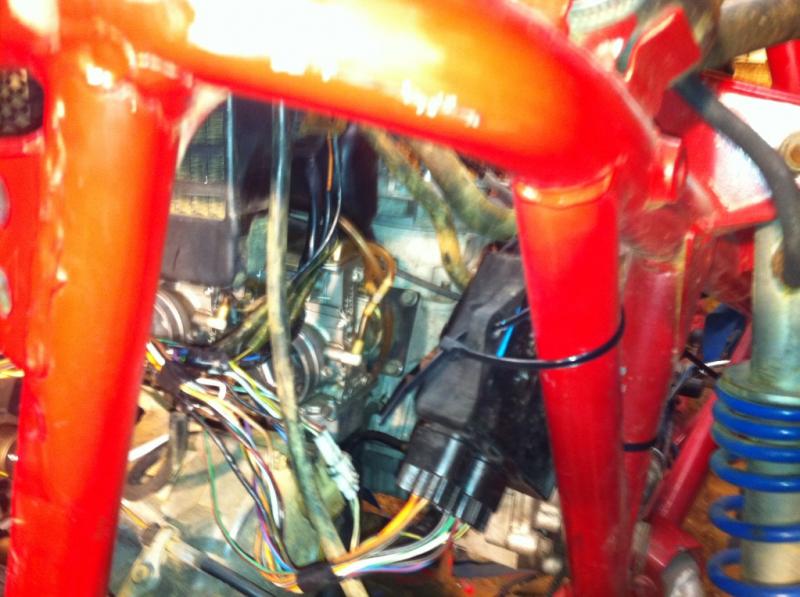
Once it was all torn down and everything was labeled and bagged I test fitted the Engine the pilot. It was a REALLY tight fit. This wouldn’t be simple. I was worried it would sit up too high. Some of these swaps require that in order to fit. I was hoping to avoid this if possible.
Attachment:
 IMG_1335.jpg [ 42.79 KiB | Viewed 4095 times ]
It’s important to address an additional philosophy on this build. I really wanted it done right with all the best people on it. Many guys who do these build take the attitude, if you want it done right, do it yourself. That is fantastic for them, I’m sure they are more than capable and I’m sure the work was great for that reason. I’ve got one problem with that, in my case, I KNOW I couldn’t do the best job. Almost everything that was done on this build was done by a individuals with expertise in that area. My problem is, I’m great at the planning and management, no so much on the technical stuff. :)
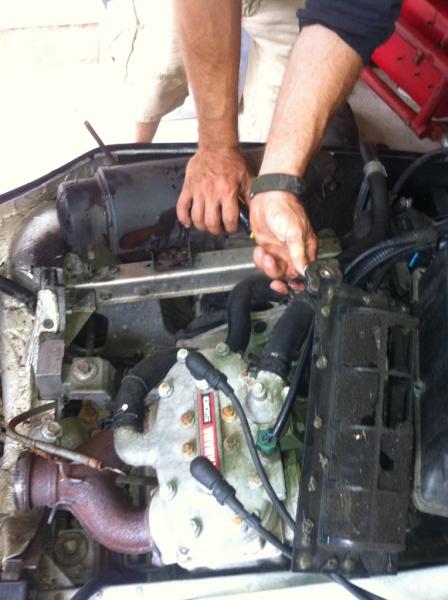
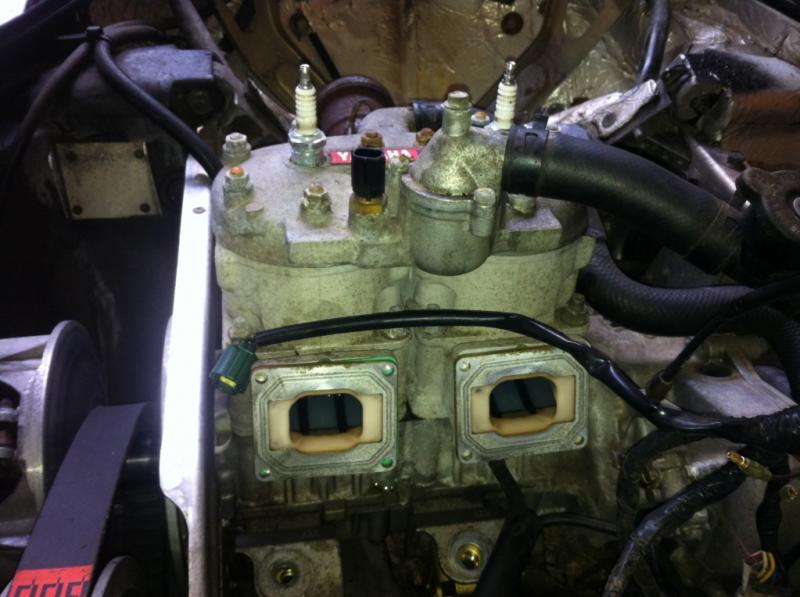
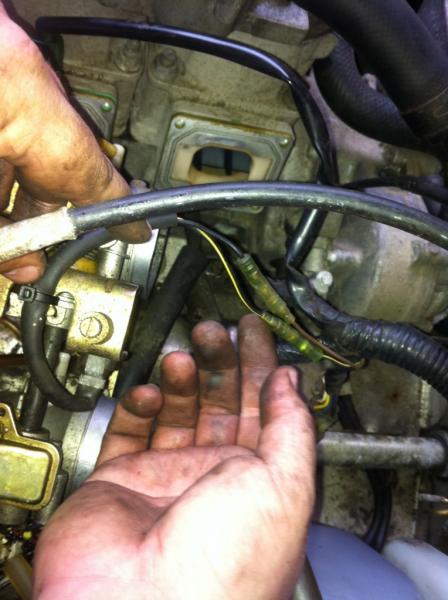
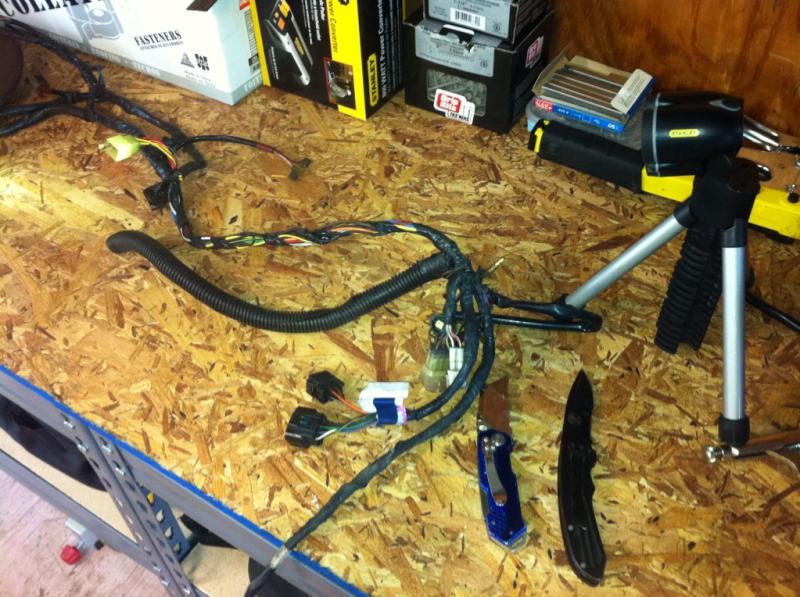
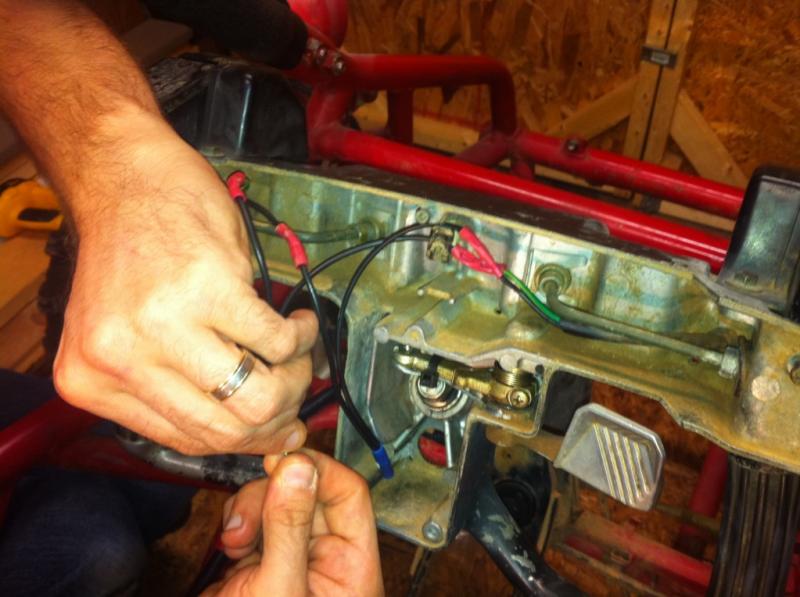
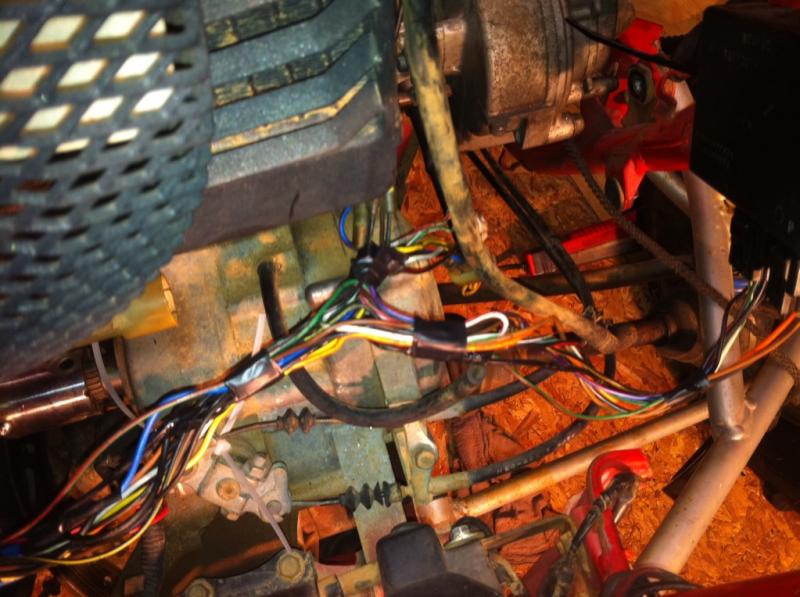
Back on track, one big hurdle was the wiring and electronics. For this part I hauled my pilot 2 hours out to Reading PA where a good friend of mine, Kenny agreed to help me wire it. Kenny is an ex-military mechanic who has more knowledge about wiring in his thumbs than I do in my entire head. The process took over 12 solid hours of work but we got all the main wiring done to make it run. Amazingly on the first pull, we got spark. I nearly knocked over Kenny (and a few empty beer bottles) with my dance of celebration. Kenny would have joined me in the dance but he informed me that Military men don’t dance in glee (nor do most other men, he added).
Attachment:
 IMG_2013.jpg [ 97.79 KiB | Viewed 4095 times ]
Attachment:
 IMG_2014.jpg [ 85.16 KiB | Viewed 4095 times ]
Attachment:
 IMG_2016.jpg [ 62.98 KiB | Viewed 4095 times ]
Attachment:
 IMG_2021.jpg [ 87.18 KiB | Viewed 4095 times ]
Attachment:
 IMG_2019.jpg [ 77.36 KiB | Viewed 4095 times ]
Attachment:
 IMG_2020.jpg [ 68.36 KiB | Viewed 4095 times ]
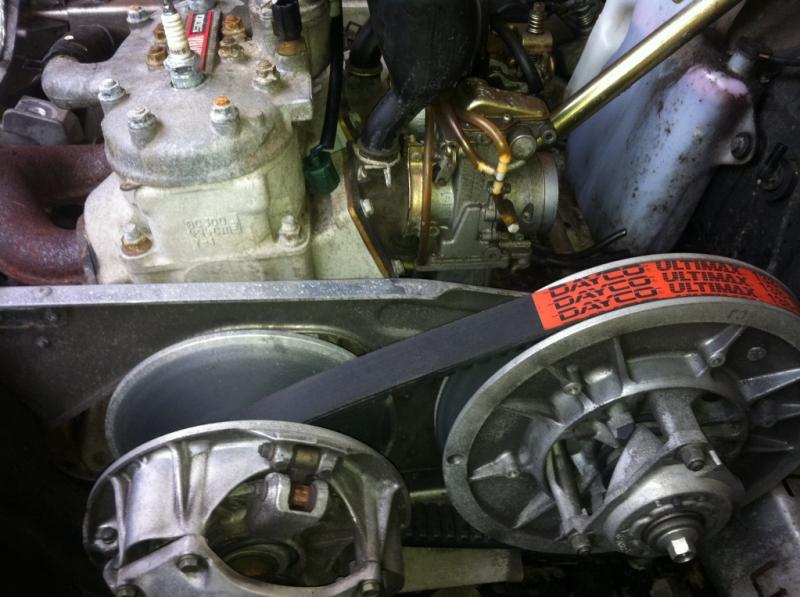
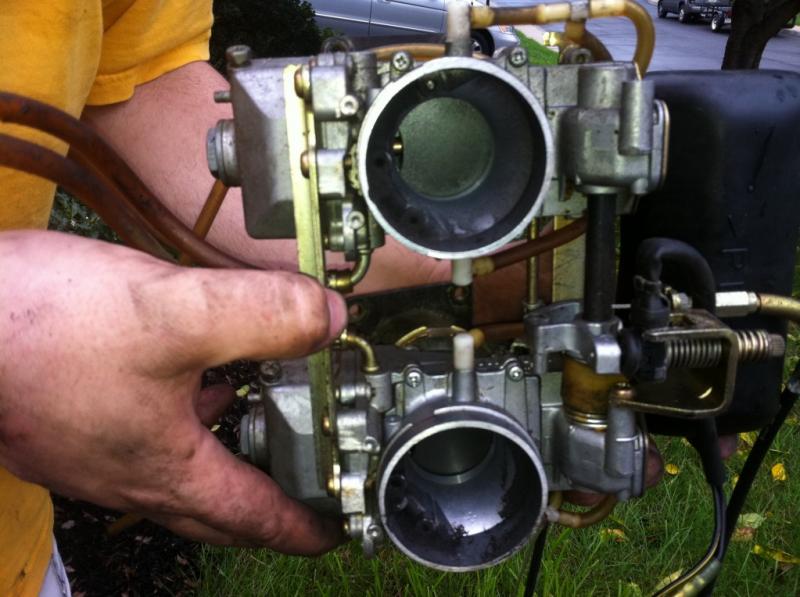
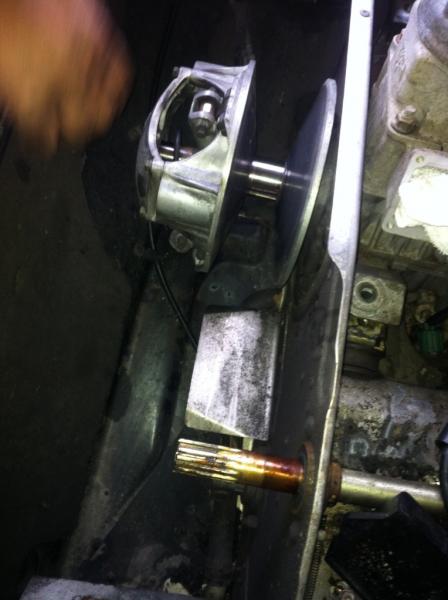
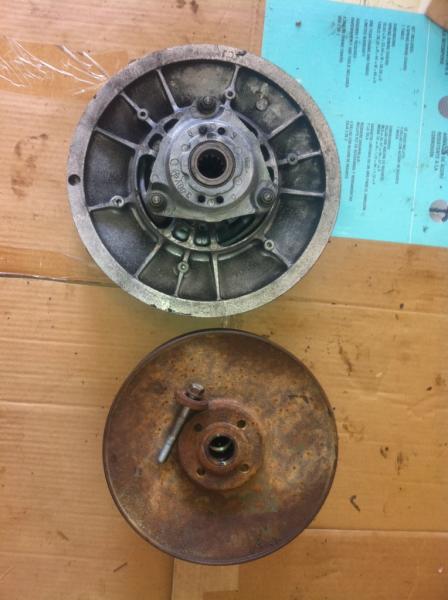
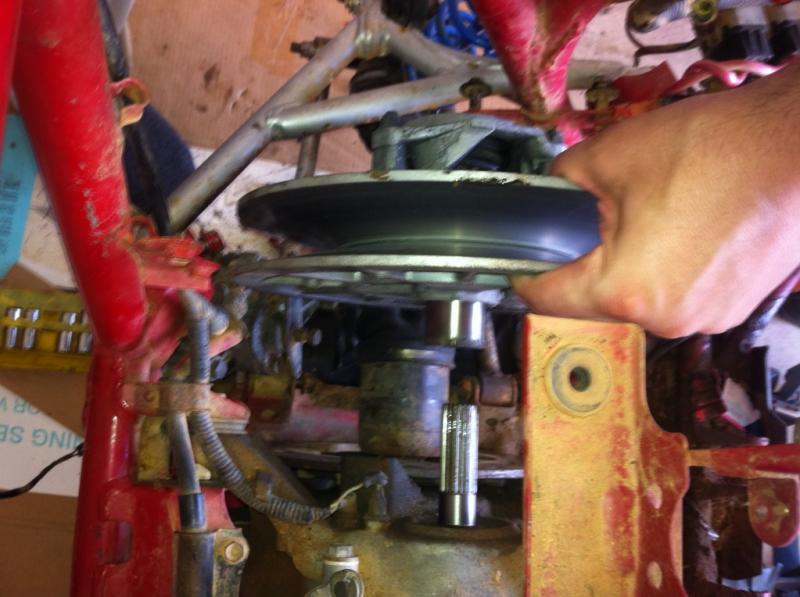
As mentioned above, I wanted to keep as much of the sled as possible. This extended to the CVT. The easy thing to do is use the sled primary and Pilot stock secondary. Other guys have done this effectively and it’s worked but I just didn’t feel like it would ever be tuned right unless the primary and secondary were matched. Other than the size difference (as seen below – The sled secondary is on the left) I was up against two major things. First is the shaft. Not surprisingly the stock Honda transmission shaft does not fit the sled secondary pulley. This would prove to be one of the largest issues with the build. The second issue was clearance. For Engine to fit and sit low in the frame it had to be pushed far to the left of the frame.
Attachment:
 IMG_1339.jpg [ 36.73 KiB | Viewed 4095 times ]
Attachment:
 IMG_1338.jpg [ 62.6 KiB | Viewed 4095 times ]
Attachment:
 P91400132.jpg [ 41.08 KiB | Viewed 4095 times ]
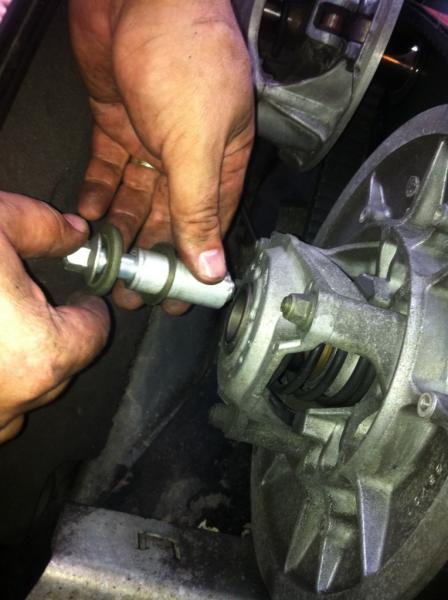
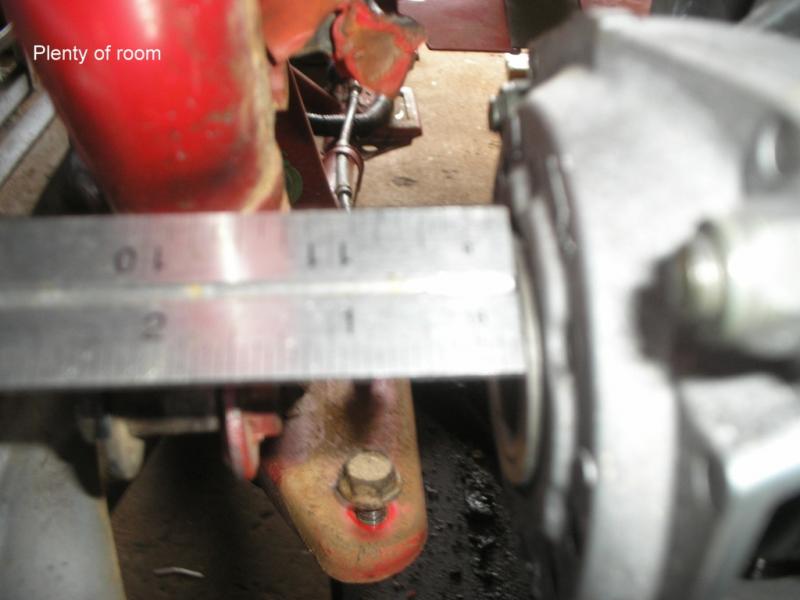
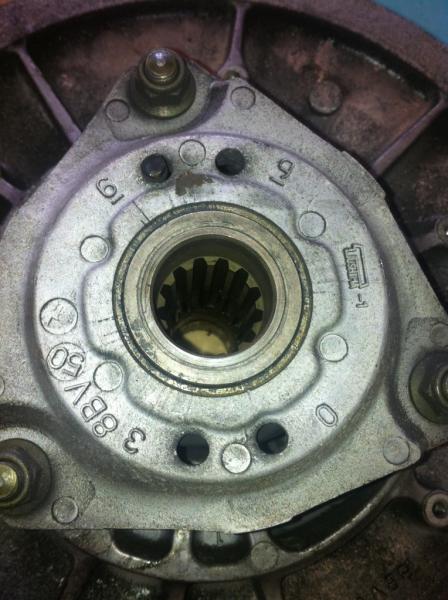
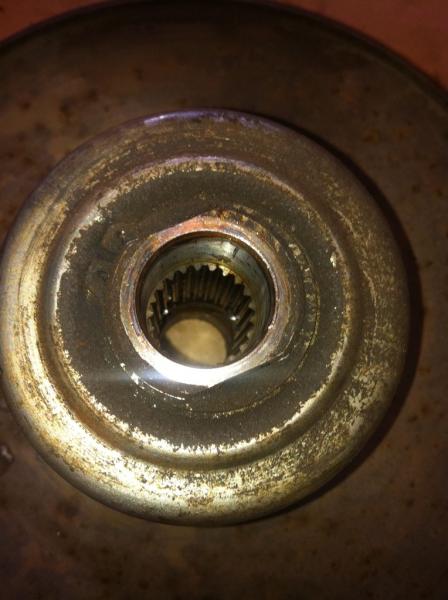
If the belt had to fit in alignment as the stock secondary it would have been WAY high and maybe not fit at all. My solution was to kill two birds with one stone. I decided to design a custom coupling which would fit over the stock pilot transmission shaft on one end and on the other go into the sled secondary. Simple sounding, complicated to work out. This part was way over my head so I decided I’d have it done professionally. I reached out to Wayne Hoez the owner of W.C.H. Welding in Philadelphia. He agreed to take on the job personally which I was great. He had done welding work on a Pilot a few years a back and was the welder on a motorcycle Engine swap on a Odyssey a year earlier. We decided we’d use the stock sled shaft and the stock pilot secondary pulley as donors for the coupling. The process took more hours than anyone could have expected. The work was redone and redone to get it true. Finally we took it to a the owner of a specially axle shop in Philadelphia who suggested that the only way to get it true was NOT to weld it but press it in and key it.
Attachment:
 IMG_1340.jpg [ 47.23 KiB | Viewed 4092 times ]
Attachment:
 IMG_1341.jpg [ 35.49 KiB | Viewed 4092 times ]
Attachment:
 P91300012.jpg [ 46.96 KiB | Viewed 4092 times ]
Attachment:
 P91300022.jpg [ 73.35 KiB | Viewed 4092 times ]
Attachment:
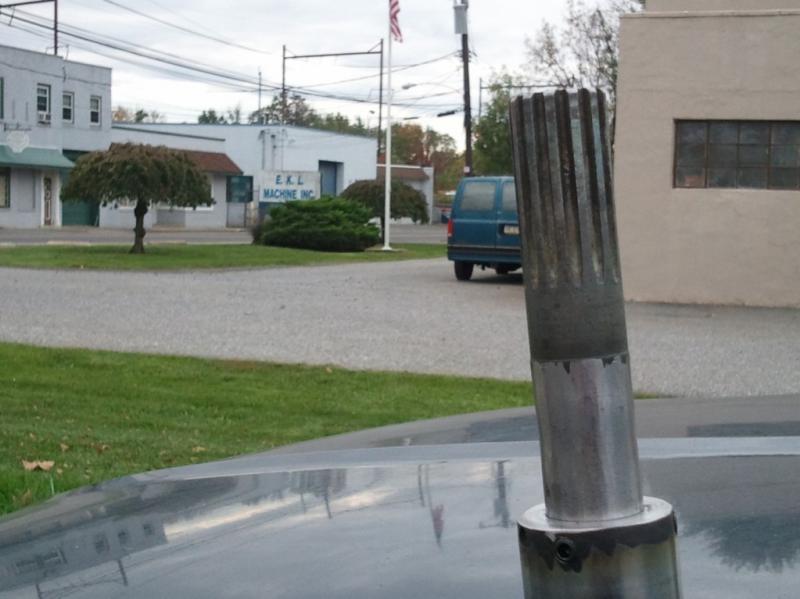 image14.jpg [ 52.14 KiB | Viewed 4092 times ]
Attachment:
 IMG_1365.jpg [ 76.6 KiB | Viewed 4092 times ]
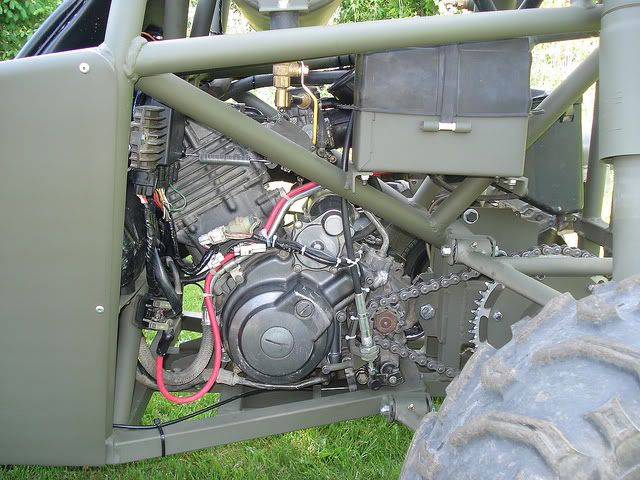
Now that the shaft was completed we could turn our focus to Engine mounts. The stock pilot Engine bolts directly to the pilot transmission. These two then create a solid package. The trans mounts to the rear frame with rubber mounts and the front of the Engine attaches to the frame with rubber mounts. Another priority of this project was to make it as “bolt in” as possible so that everything could be undone if need be. I also wanted an Engine which was easy to take in and out if necessary. Wayne built custom mounting brackets using the stock mounts from the sled Engine and the stock pilot transmission. He also built custom mounts using the engines mounts to attach to the stock mounting brackets on the Pilot frame. This plan allows it to bolt in on all sides, the Engine can be swapped with the same 500cc or its 600cc big brother, or the Engine can be removed completely and stock pilot Engine can be put back in. It worked out well. He used heavy 5/8th thick steel plate to make the mounts. They are super tough. I can’t image what could break them off. The Engine front mounts had to be made rubberized as well so as not to shake the pilot to pieces. Wayne got creative on this part. He went down to the local Auto store and found a sway bar bushing for a Monte Carlo sway bar which was the perfect size. He then bought a nut that size found on the Brooklyn Bridge (okay, maybe not quite that large) for the bushing to fit inside of. He finished it off with the perfect size bolt and BAMM, stock looking mounts.
Attachment:
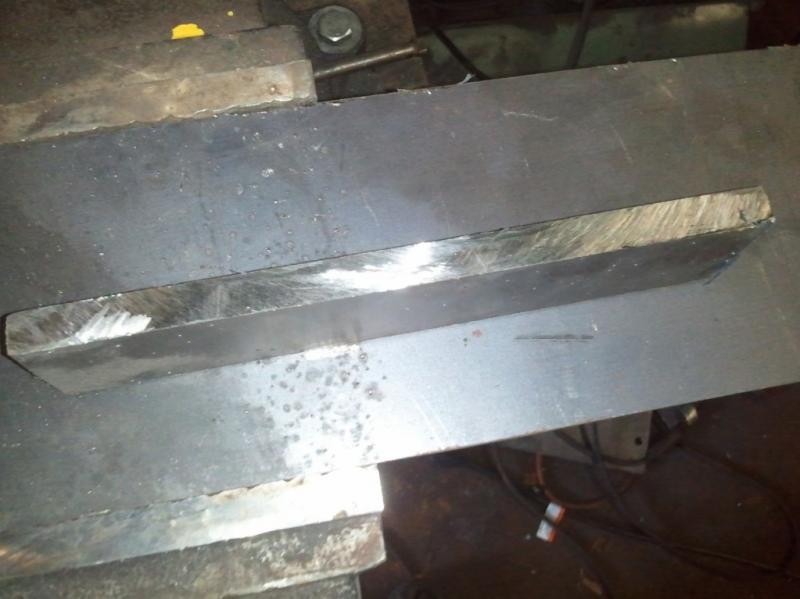 image18.jpg [ 46.92 KiB | Viewed 4092 times ]
Attachment:
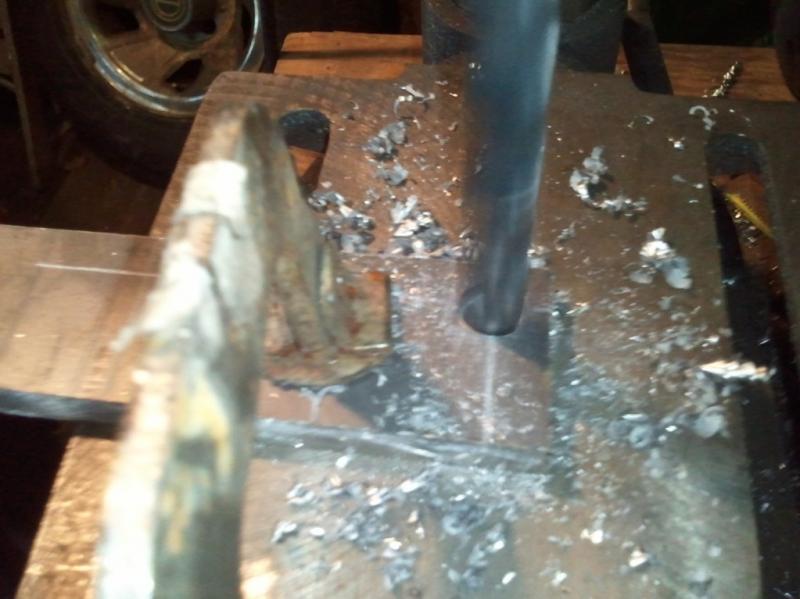 image19.jpg [ 53.66 KiB | Viewed 4092 times ]
Attachment:
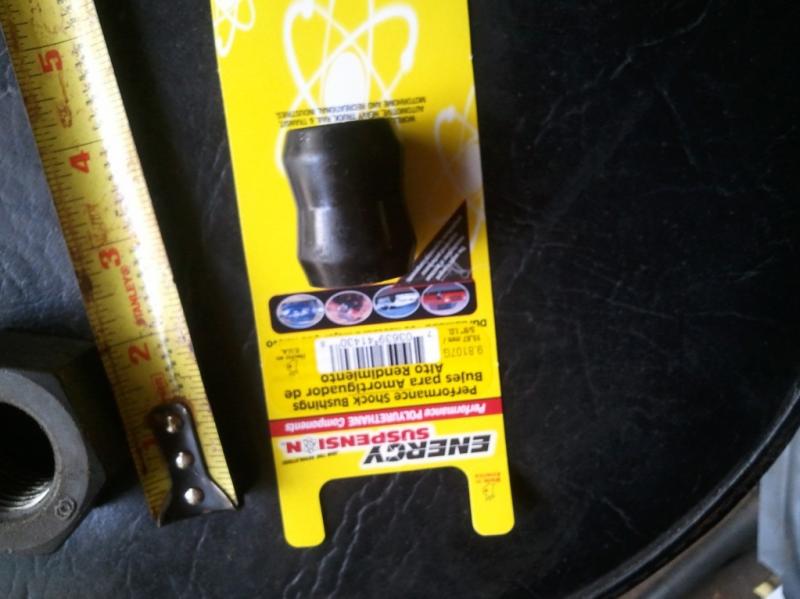 image15.jpg [ 50.22 KiB | Viewed 4092 times ]
Attachment:
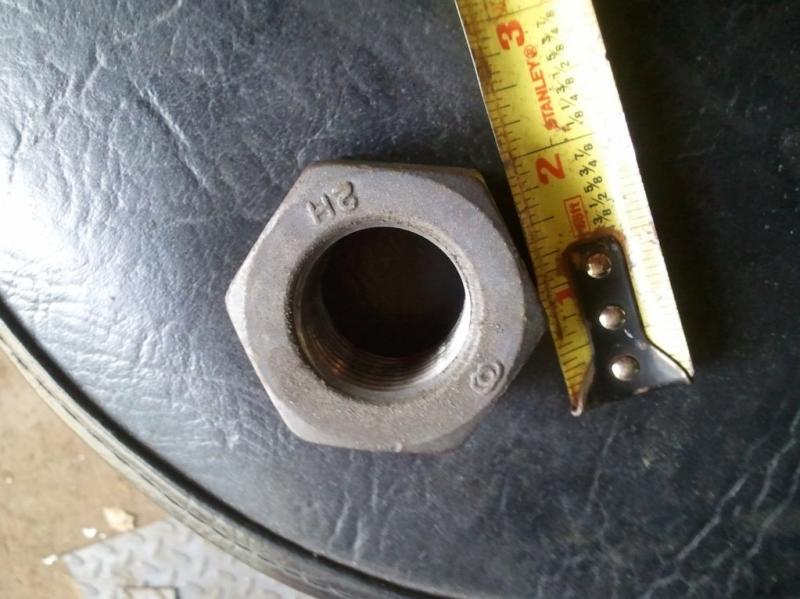 image14-1.jpg [ 61.82 KiB | Viewed 4092 times ]
Attachment:
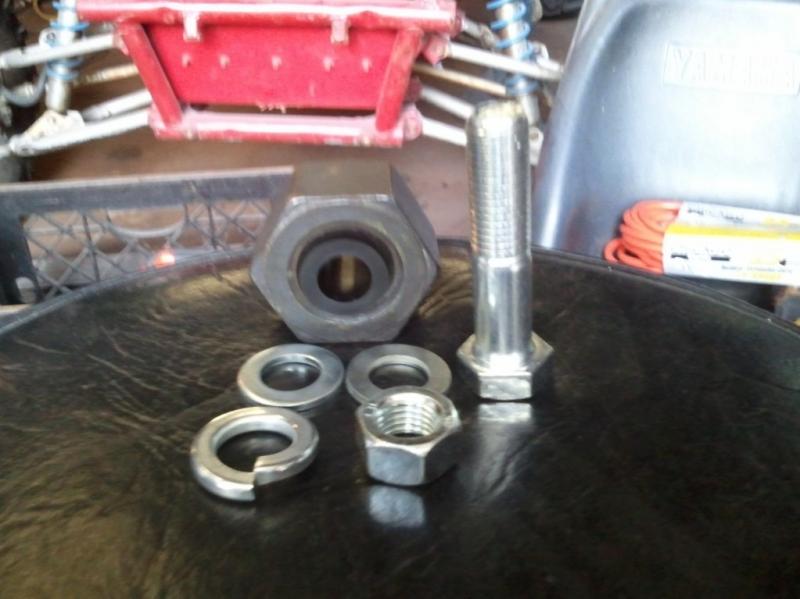 image16.jpg [ 50.92 KiB | Viewed 4092 times ]
Attachment:
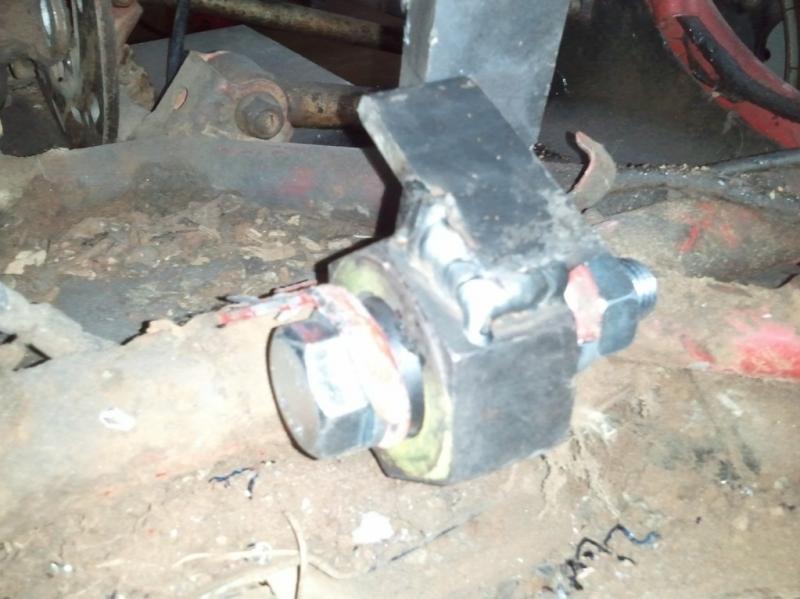 image17.jpg [ 56.11 KiB | Viewed 4092 times ]
Attachment:
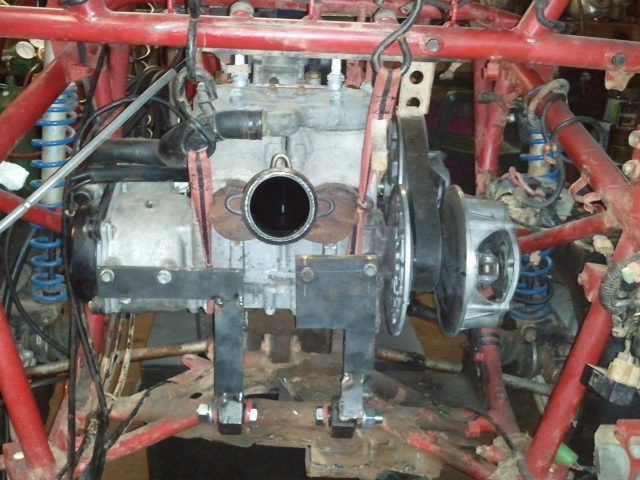 image20.jpg [ 146.17 KiB | Viewed 4092 times ]
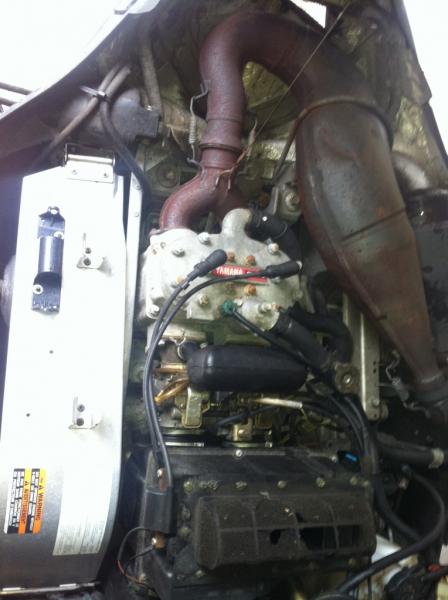
The next major undertaking was the exhaust. This was no small task given that there was bearly clearance behind the seat to begin with as seen here.
Attachment:
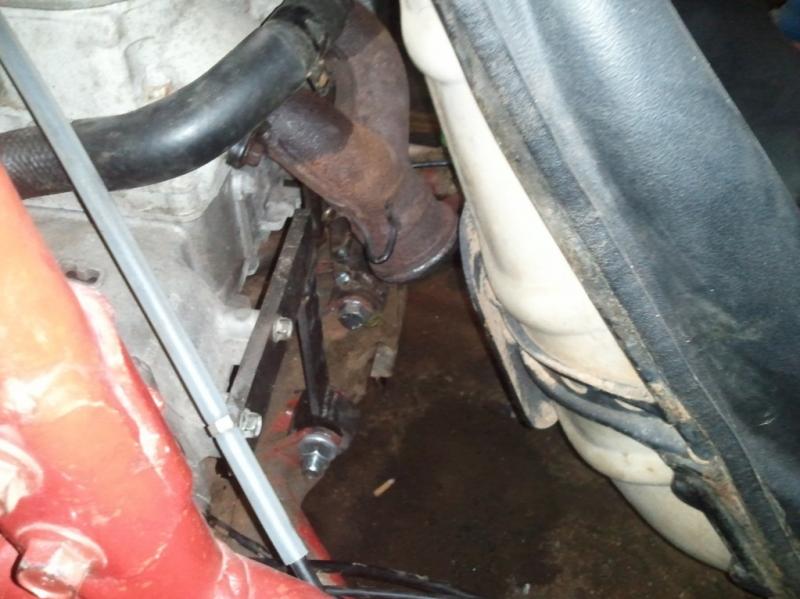 image21.jpg [ 59.41 KiB | Viewed 4091 times ]
Attachment:
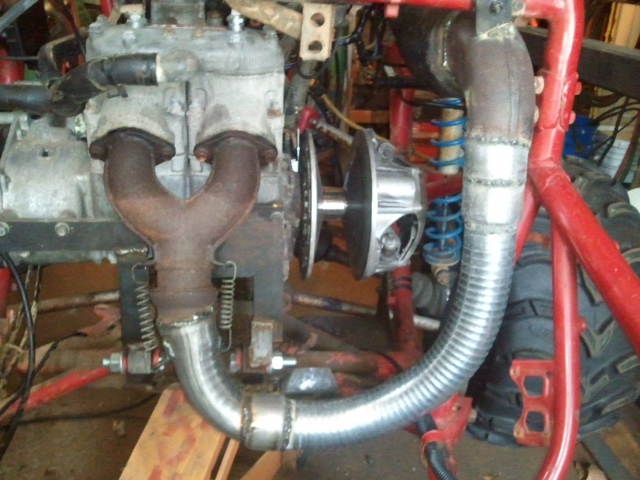 image26.jpg [ 127.75 KiB | Viewed 4091 times ]
The issues didn’t exactly end with the tight space in the front. The bend which was required to go over the shock support bar didn’t match the bend of the exhaust quite right. In a perfect world a full custom exhaust would be built to go nicely over the bar. We opted for a high mount and a turn down on the exhaust into the stock silencer. The bend looks a little odd and may reduce power output bit but it was okay for our purposes.
Attachment:
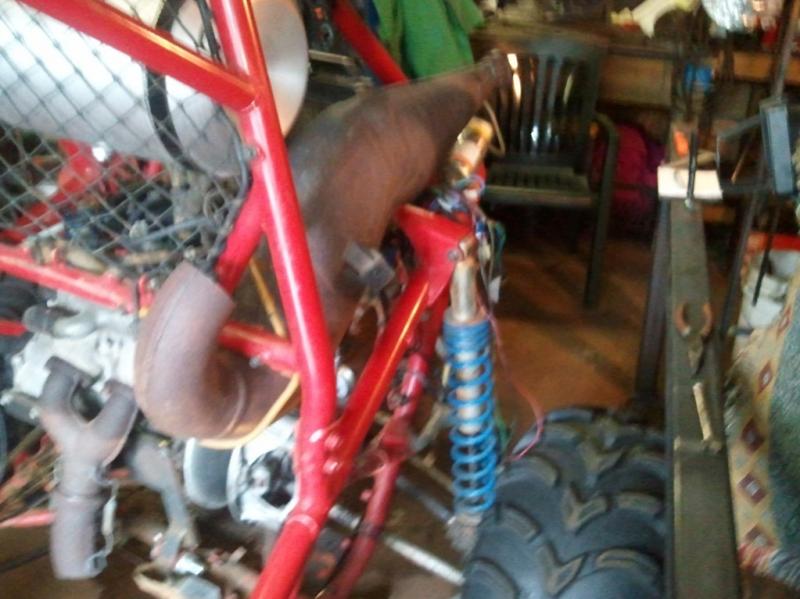 image25.jpg [ 63.77 KiB | Viewed 4091 times ]
Attachment:
 image5.jpg [ 60.3 KiB | Viewed 4091 times ]
Attachment:
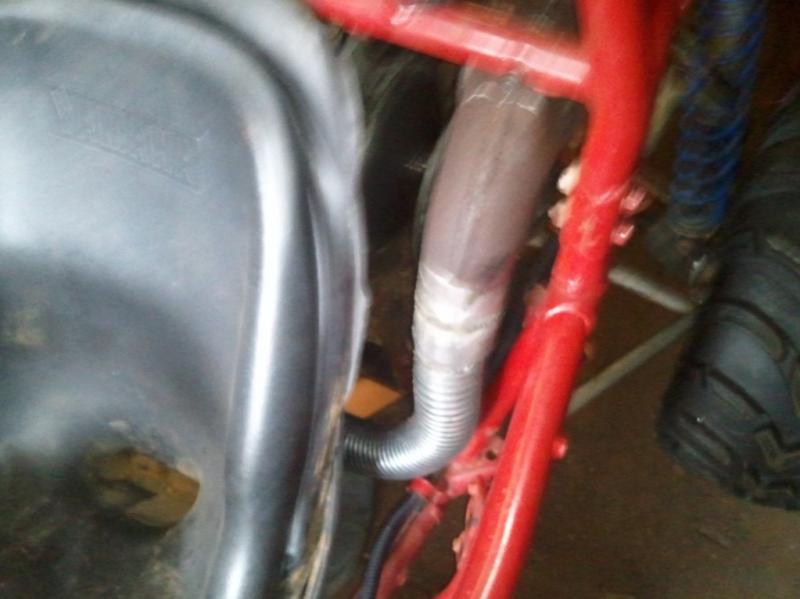 image6.jpg [ 44.34 KiB | Viewed 4091 times ]
Attachment:
 image26.jpg [ 127.75 KiB | Viewed 4091 times ]
Attachment:
 image5.jpg [ 60.3 KiB | Viewed 4091 times ]
Attachment:
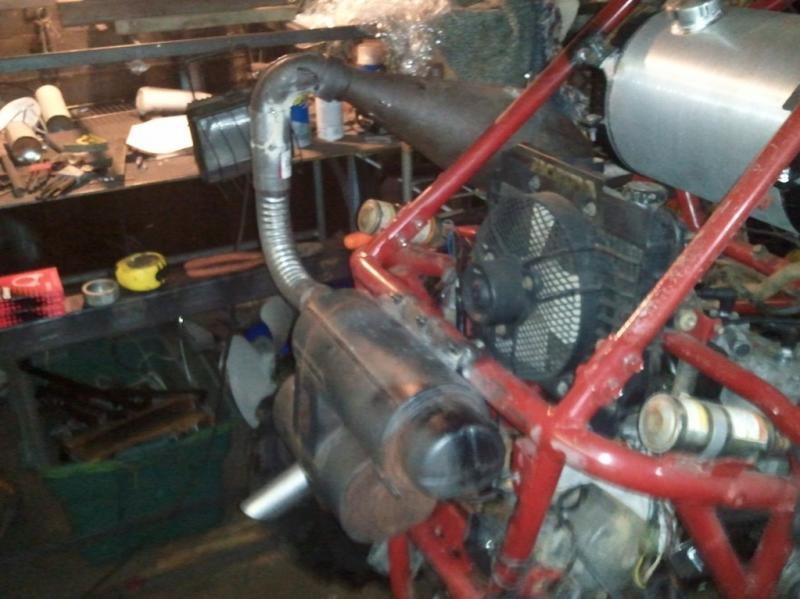 image3-1.jpg [ 61.2 KiB | Viewed 4091 times ]
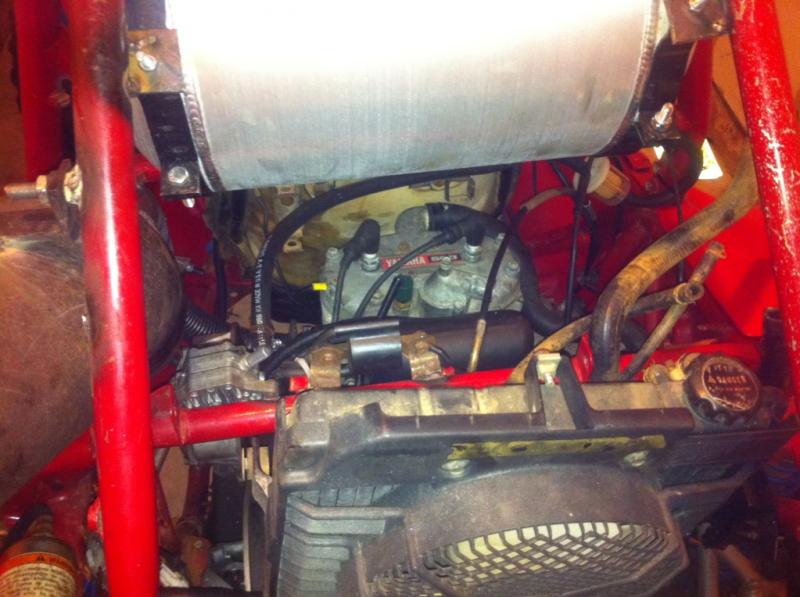
Whit the exhaust run we had some odds and ends to clean up, the fuel tank was one of them. I went with a 4 gallon spun aluminum. On my previous pilot I had a similarly mounted 7 gallon tank. I found that when it was full it made the pilot a bit more top heavy. When it was empty is sloshed around a lot. For these reasons I wanted to go much smaller. Total ride time on one tank should still be in 4-5 hours so I figure I’ll be okay. The radiator was a point of much consideration for a few reasons. The first was the question of if a radiator designed to handle the heat from a 400cc single could handle a 500cc twin. We’ll be watching the temp gauge closely on that but it appears to be more than enough at this point. I had a override switch wired and a mounted on the dash so I could control when the fan will go on and off.
Attachment:
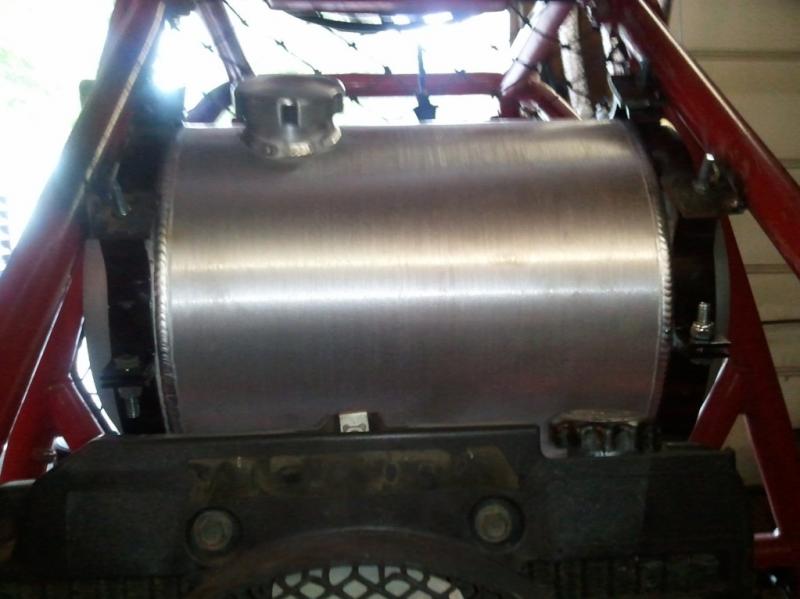 image7.jpg [ 44.57 KiB | Viewed 4091 times ]
Attachment:
 IMG_3011.jpg [ 65.91 KiB | Viewed 4091 times ]
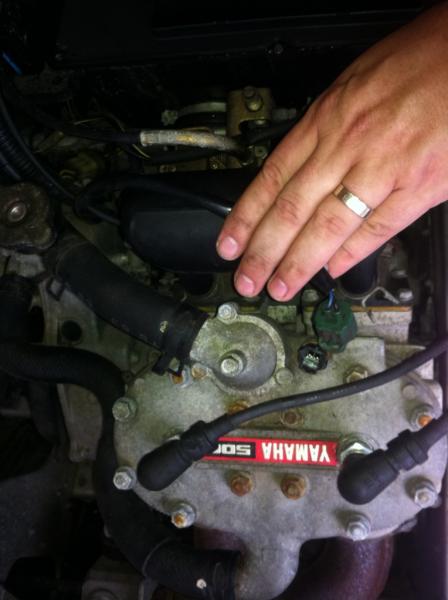
The odds and ends continue. I wanted to make sure that all the sled pieces had a welded bracket so they looked okay and were held in place as designed (no zip ties here). Some of these brackets included the coil,
CDI (Capacitor Discharge Ignition), coolant/oil resivour, etc. I also had a nice loop welded in for the pull cord. It is located at the same place as the stock Pilot. These engines had an option of electric start which could be bought aftermarket or used. I’ve not done that yet but it would be nice addition since it currently is only pull start.
Attachment:
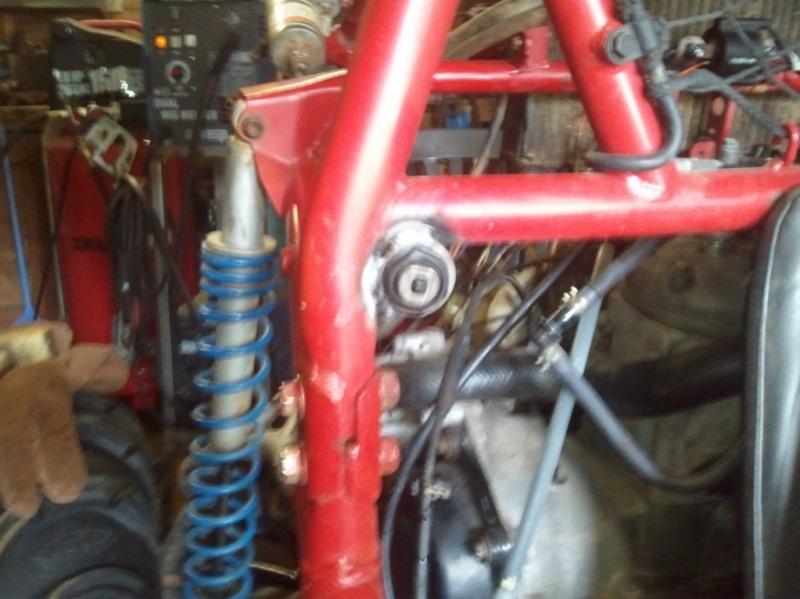 image9.jpg [ 58.56 KiB | Viewed 4091 times ]
Attachment:
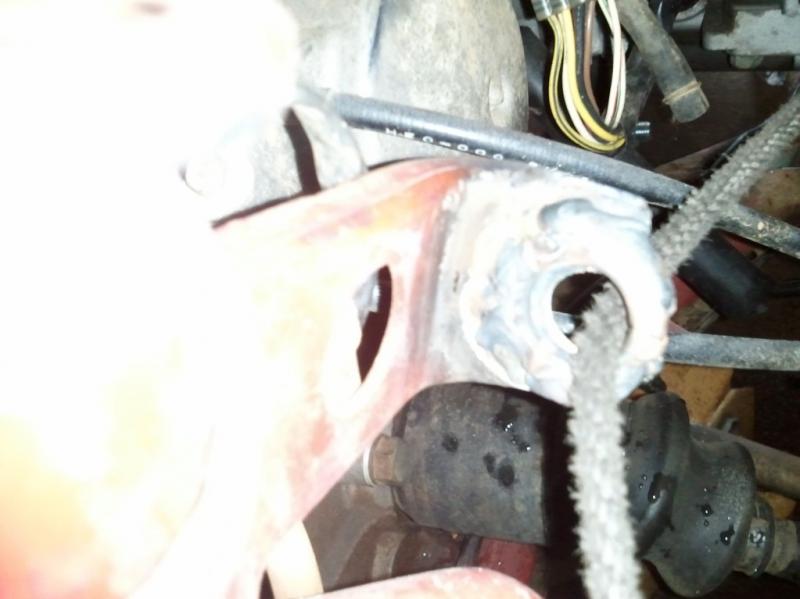 image10.jpg [ 42.17 KiB | Viewed 4091 times ]
Attachment:
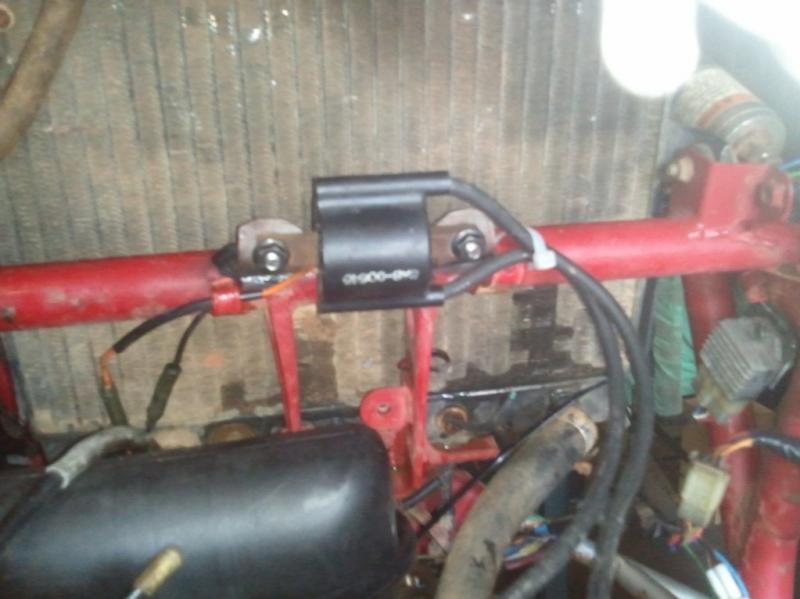 image12.jpg [ 48.37 KiB | Viewed 4091 times ]
Attachment:
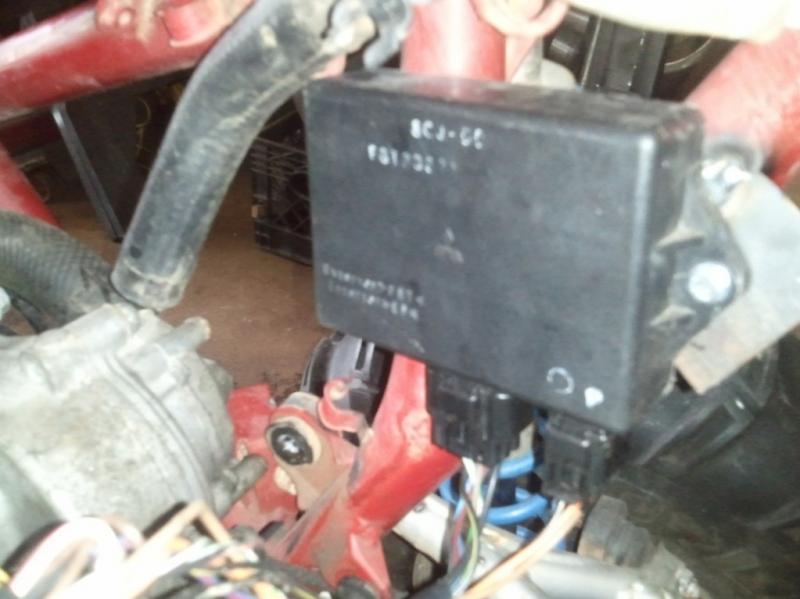 image22.jpg [ 49.28 KiB | Viewed 4091 times ]
Attachment:
 image23.jpg [ 132.27 KiB | Viewed 4091 times ]
Attachment:
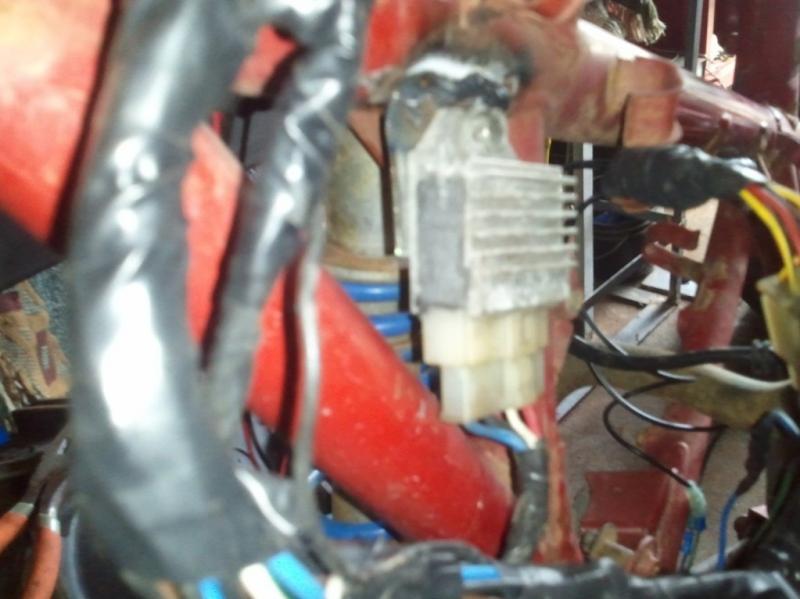 image24.jpg [ 52.74 KiB | Viewed 4091 times ]
At this point I had pretty much everything mounted and ready to go so it was time to send it to its new expert, Mark, for a once over. Mark is a former motorcycle/atv dealership mechanic who now does mechanics as a side gig. He’s talented and knowledgeable. I sent it to him for a combination of things. First were the brakes. The fronts didn’t work at all and the rear caliber wasn’t even installed. Mark installed fresh pads in the front and found that he master cylinder was shot so we replaced that. They also needed a good cleaning and reconditioning. The rear was a big challenge. He invested 10 hours just in getting the rear brake back to good working condition. I didn’t want any compromises on the brakes given that the pilot would have more power. I needed to feel confident I’d be able to stop well. Mark made sure this would be the case. Mark also fabricated the throttle set up which was no small task. The sled requires two cables to be pulled (Oil injector and throttle). I wanted a reliable way for this to operate. Mark came up with a way to fab a 2 into 1 cable so we could use the stock thumb throttle from the pilot. I also had Mark give her a good once over and tasked him with getting the pilot started for the first time since the transplant began. Everything was done well by the professionals; Wayne and Kenny. The one part I did was run the lines (Fuel, oil, etc.). No big shocker here, he found a mistake. I switched two lines on the fuel pump so it wouldn’t run. Once Mark found this, it took him no time to fix it. Then the moment of truth… The pull start…. BAMM! Started right up, no issues. Mark sent me a video of it running I wanted to do a dance of excitement but pictured Kenny’s disapproving look at men dancing so I resisted the urge.
I brought it back home to install the plastics that a fellow member here, Hyde was so kind to sell me. Great guy, he gave me a more than fair deal and took care of the shippping. The plastics were really nice with two exceptions the first was the right rear fender had a chunk missing out of it (Hyde told me about this) the second was that foot tub that was originally on it had the front missing. Looks pretty bad but I'm not in the looks phase just yet. It will have to be dealt with at some point.
Attachment:
 photo3.jpg [ 28.69 KiB | Viewed 4089 times ]
Attachment:
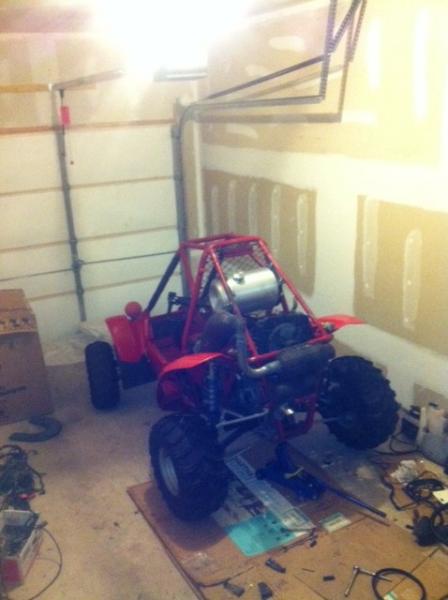 photo2.jpg [ 29.49 KiB | Viewed 4089 times ]
Attachment:
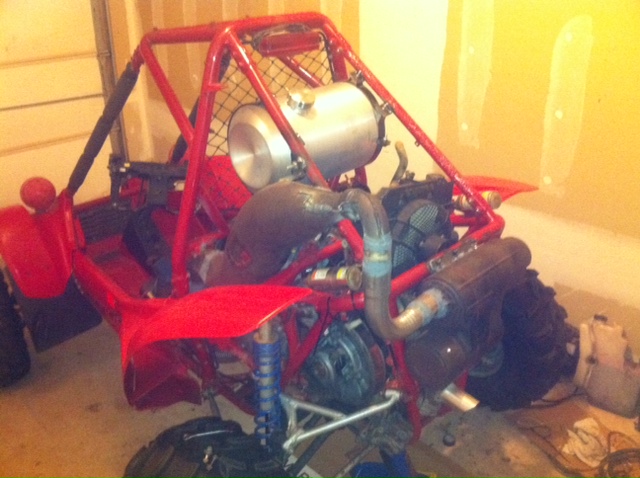 photo1.jpg [ 120.61 KiB | Viewed 4089 times ]
Attachment:
 photo.jpg [ 128.87 KiB | Viewed 4089 times ]
Next step was to get my intake set up. I went with a twin air intake set up using K&N filters. I combined these with intake tubes that ran directly to carbs. Currently the set is only hose clamp installed. When the pilot goes back to the welder I'll have him install brackets for them most likely.
Attachment:
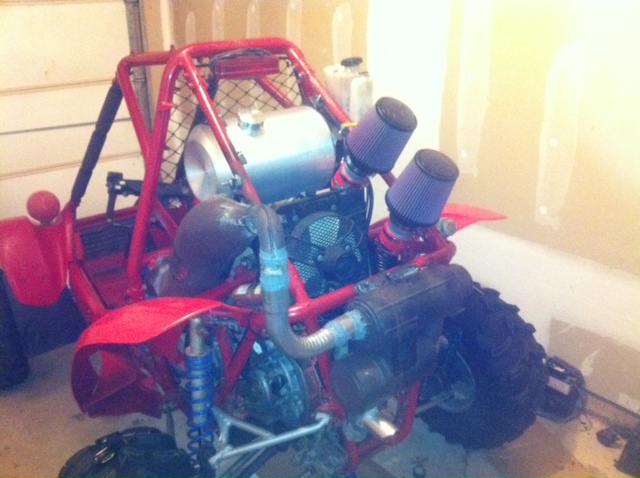 photo4.jpg [ 115.46 KiB | Viewed 4089 times ]
With everything welded on, brakes all redone and the Pilot running it was time to tune. We took it to a property for its first shake down run. It started right up but barely ran (I’m not sure why I expected anything else). The jetting and clutching were all wrong. We also suspected the oil injection weren’t tuned right. It smoked like crazy and couldn’t get up to speed at all. It would take off okay but couldn’t get over half throttle.
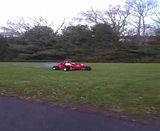
Videos of it running, ignore talking. I was driving and not able to manage quality control.
Obviously not running well,
Once again, I decided that I couldn’t afford to not do this right so I reached out to an old friend, Josh Kurtz. Josh owns a shop which specializes in race tuning snowmobiles. He agreed that it was likely a combination of clutching and jetting. He was familiar with the Engine and knew exactly how to tune it. Today it's at Josh's shop and he's working on it. Once he's done, it's back to the welder to get my braket support welded on. Will update soon.


 PilotOdyssey.com Chat
 PilotOdyssey.com Google Search
 FL400 Parts
 FL350 Parts
 FL250 Parts
 Admin Email


